Warning: even longer and more rambling post. This is a companion thread to the First Maintenance post. Here is how and why I modified my new to me Goldwing.
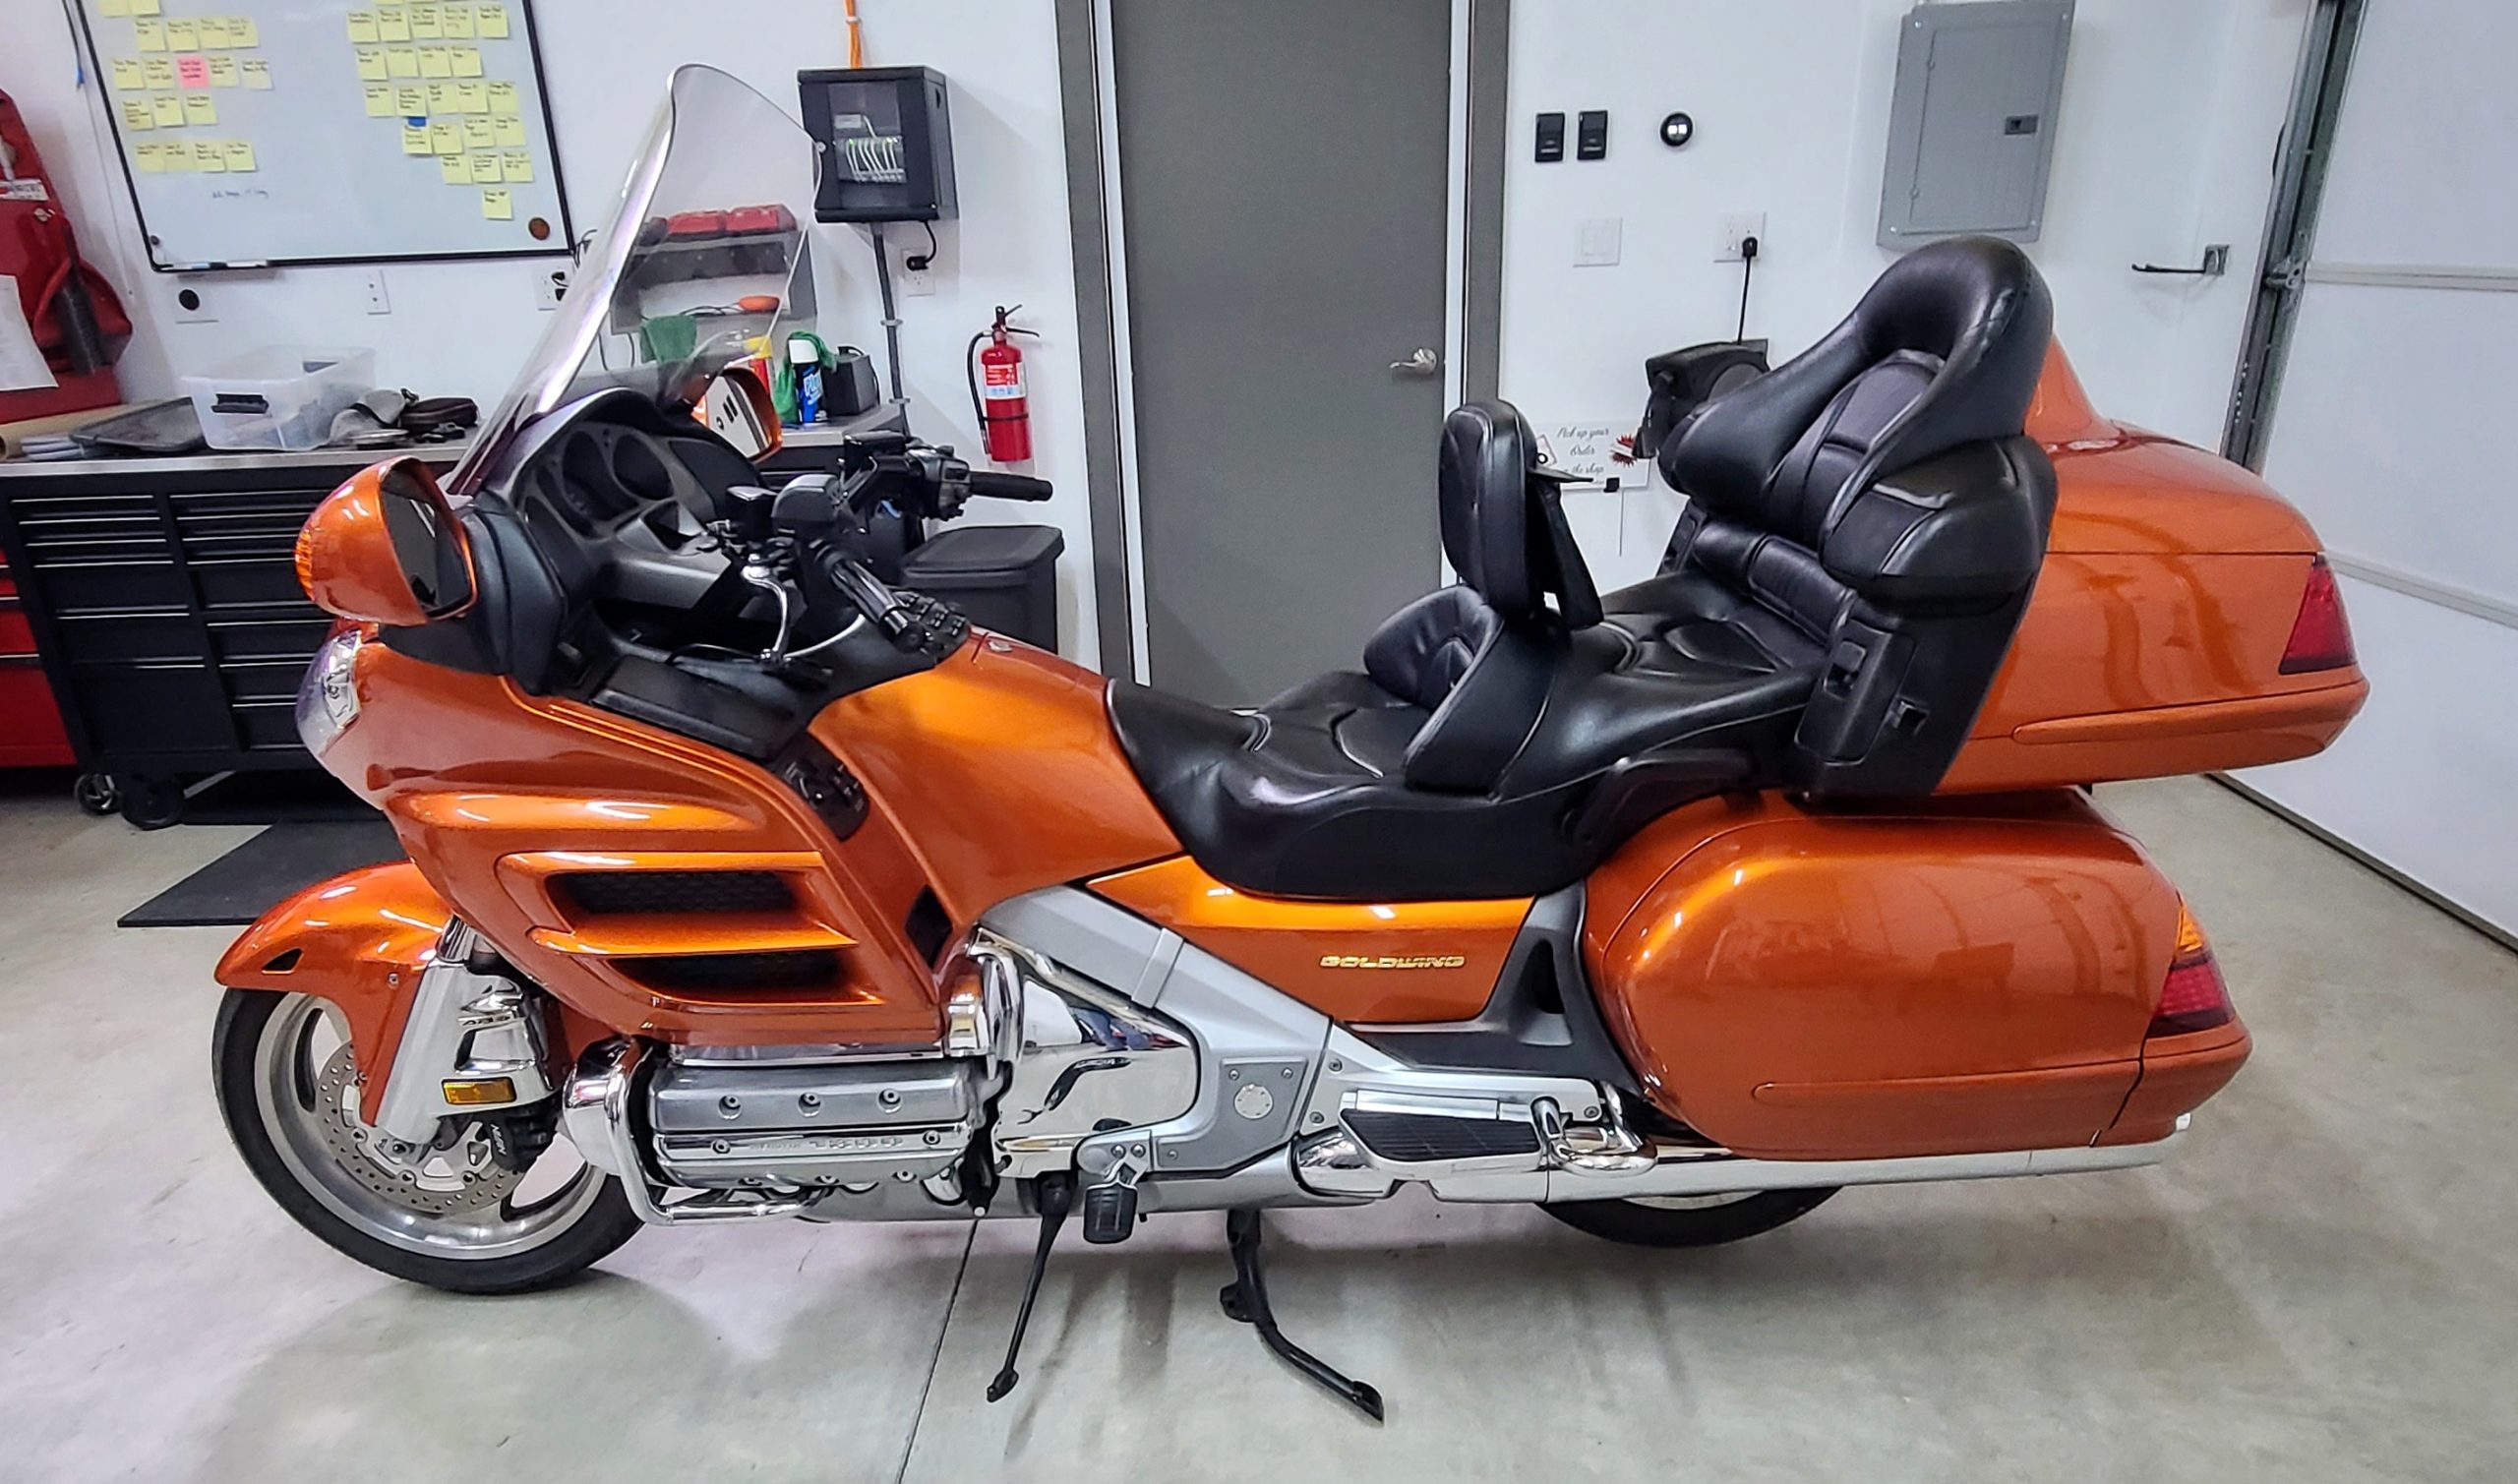
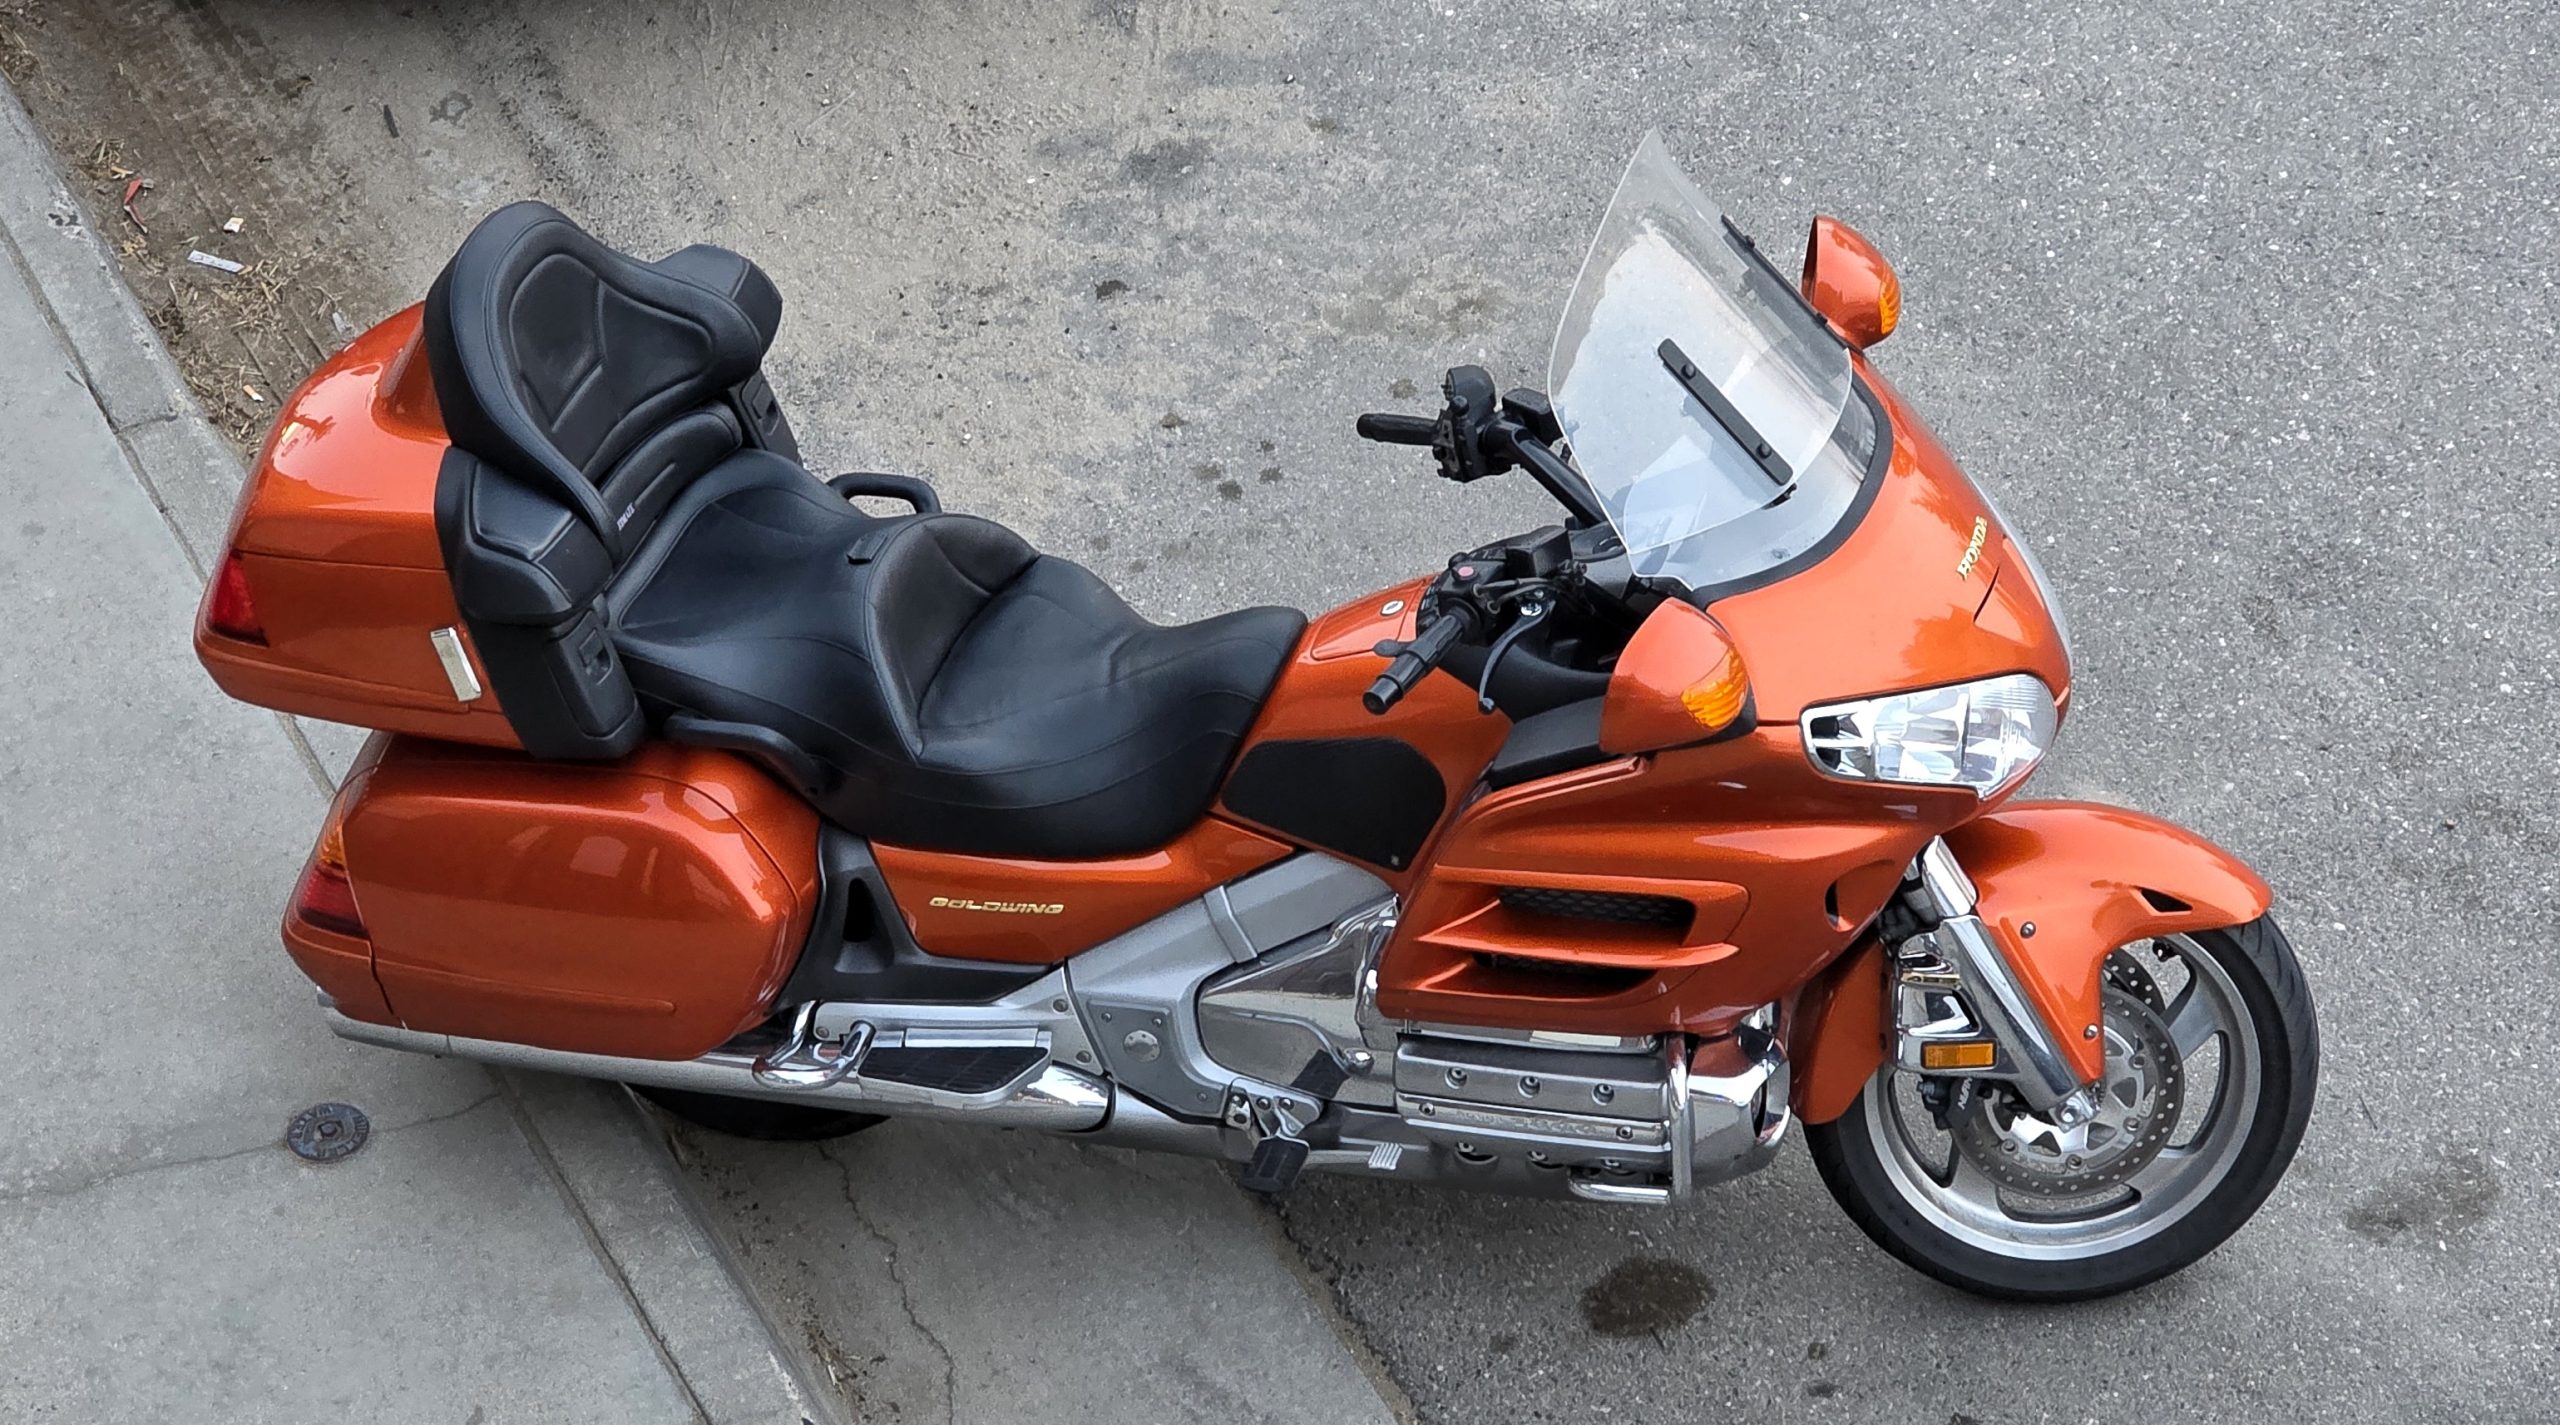
Earlier this year I was fortunately enough to find a well cared for 2002 GL1800A with only 8,000 miles. More fortunate for me was that it was very nearly stock. The only modifications the previous owners had done were to add a backrest to the stock seat and replace the lower cowl with a chromed one.
 I had a 2005 GL1800A as my daily driver for about ten years when I lived in Southern California, so when we decided to replace our BWM K1600GLT with a Goldwing, I had a good idea of what I wanted to do with the new bike.
Let’s start with the big two: windshield and seat. Almost all mods and farkles are a matter of personal preference, but few mods generate such strong and divergent opinions as do these.
On my previous Goldwing, I tried several different brands and sizes of windshields. I like to look over the windshield, especially when riding on mountainous, curvy roads. But It’s also nice to have a large, quiet air pocket for the rider and passenger when making miles on a highway. The best compromise I found was the Firecreek Windbender, so that’s what I put on the new bike.
We put it to the test on a recent trip to Yellowstone. I had good visibility while riding in the mountains and we had excellent wind protection on the numerous 75 and 80 MPH secondary roads. It even worked well on the one day of heavy rain.
I wish Firecreek still had the tinted lower shield, but I understand their reluctance to do another production run for a bike that’s over 20 years old. I may end up painting or tinting it myself as the darker lower does look better.
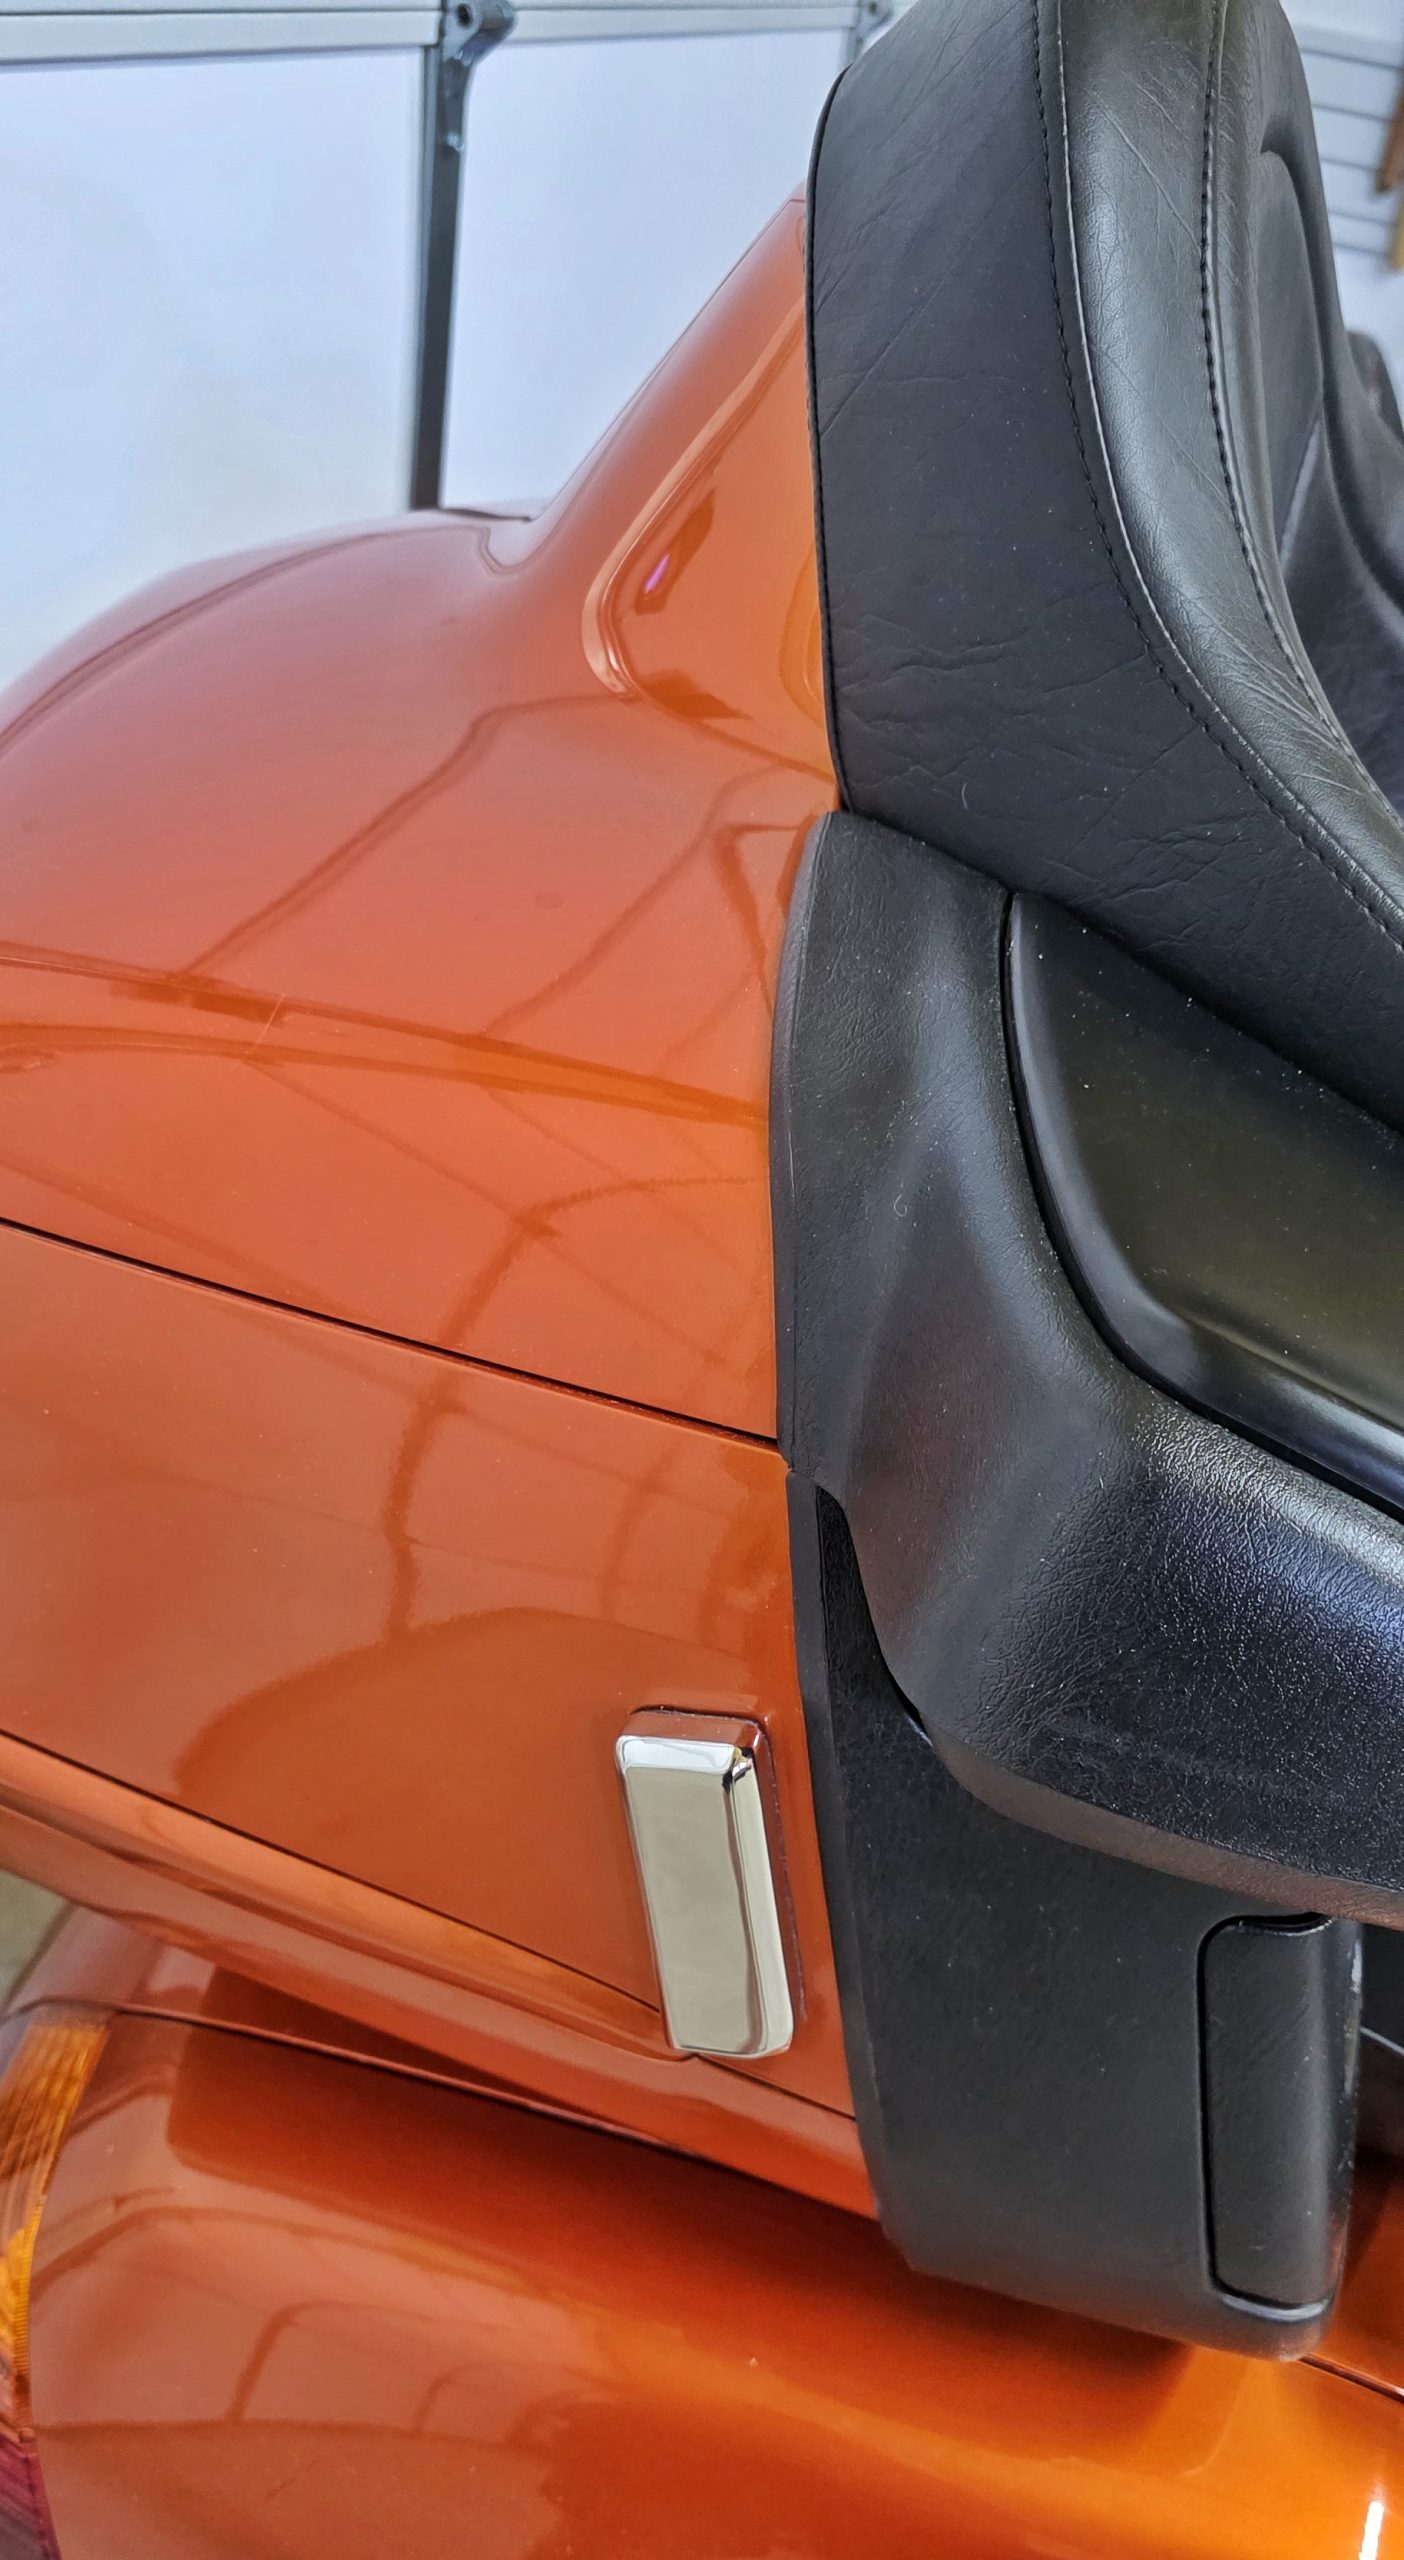
 When it came time to pick a seat, Chris and I had different requirements. My wife wanted a heated seat and one that was at least as comfortable as the stock. I like a relatively firm seat for long distance riding and prefer a more forward leaning riding position. I also like to be able to slide off the side of the saddle when riding in tight curvy roads when the Goldwing runs out of lean angle, something that’s difficult with the stock saddle wrap-around sides. I’ve had an adjustable backrest but found I didn’t use it much as I prefer to lean forward. A backrest also makes it more difficult for my wife to get on and off the bike.
We went with the Ultimate King seat. It worked well on our recent trip and the heater was wonderful on those mornings in the low 40’s. The passenger backrest is a little more reclined, which my wife liked, and the rider seat let’s me sit back about another 1 1/2″ inches which is more comfortable for my back and knees. The shape of the saddle also doesn’t press into my thighs like the stock and I can easily slide over to lean off when desired.
All in all, we’re happy with the choice. The only thing we don’t like is the seat heater switches. Since our bike didn’t come with OEM heaters, the low-profile push button switches are on each side of the seat. They are difficult to feel with gloves and have two settings: off and roast. I may replace the switches with ones easier to operate and with an intermediate setting.
Comms, Entertainment, and Navigation
These gen 1 GL1800’s came with, what was for the time, a pretty fancy electronics package. Radio and 4 speakers, wired intercom, AUX input, and options for a CB radio or CD player. But time moves on and there are better options.
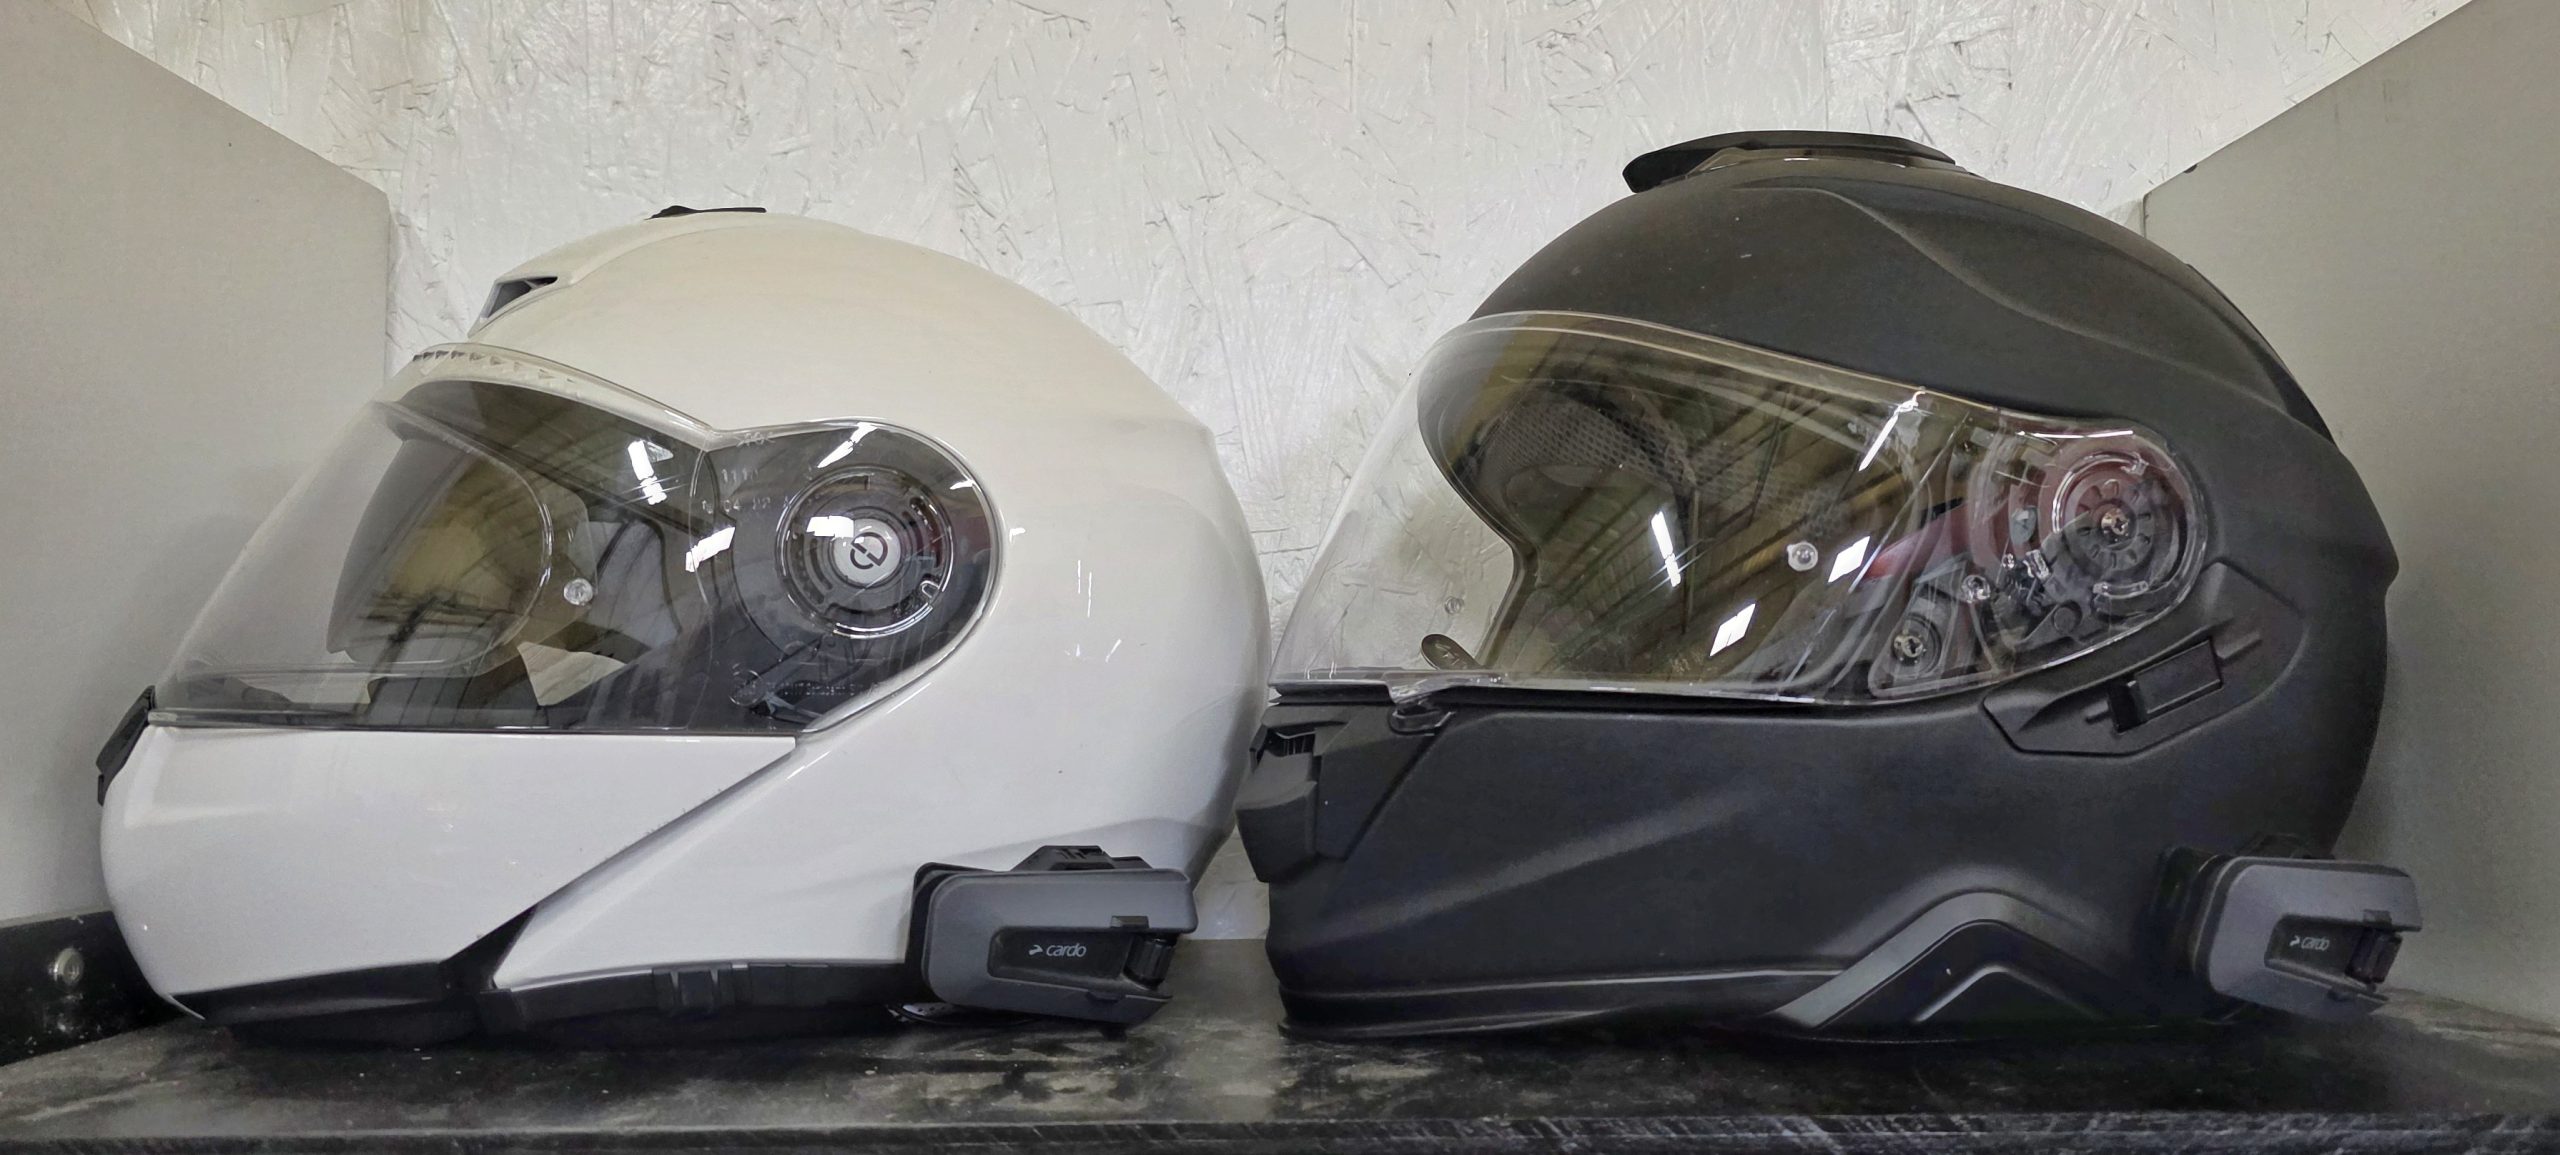
My wife and I have Cardo Packtalk Edge devices, our fourth generation of wireless comms. They worked wonderfully on our recent trip–we could talk privately, join in on the group conversation with the other couple, take phone calls, or listen to our own music or audio book. The JBL speakers sound great and are loud enough that we can wear ear plugs to block the wind noise and still hear the comms clearly. Expensive, but highly recommended.
Since we’re not using the bike radio, I have it unplugged and removed the whip antenna. (Does anyone need one?) The stainless cover for the antenna hole is sold as a passenger arm rest mount. I’m giving some serious thought to replacing the physical radio and tank button pod with a 3D-printed mount for a small tank bag.
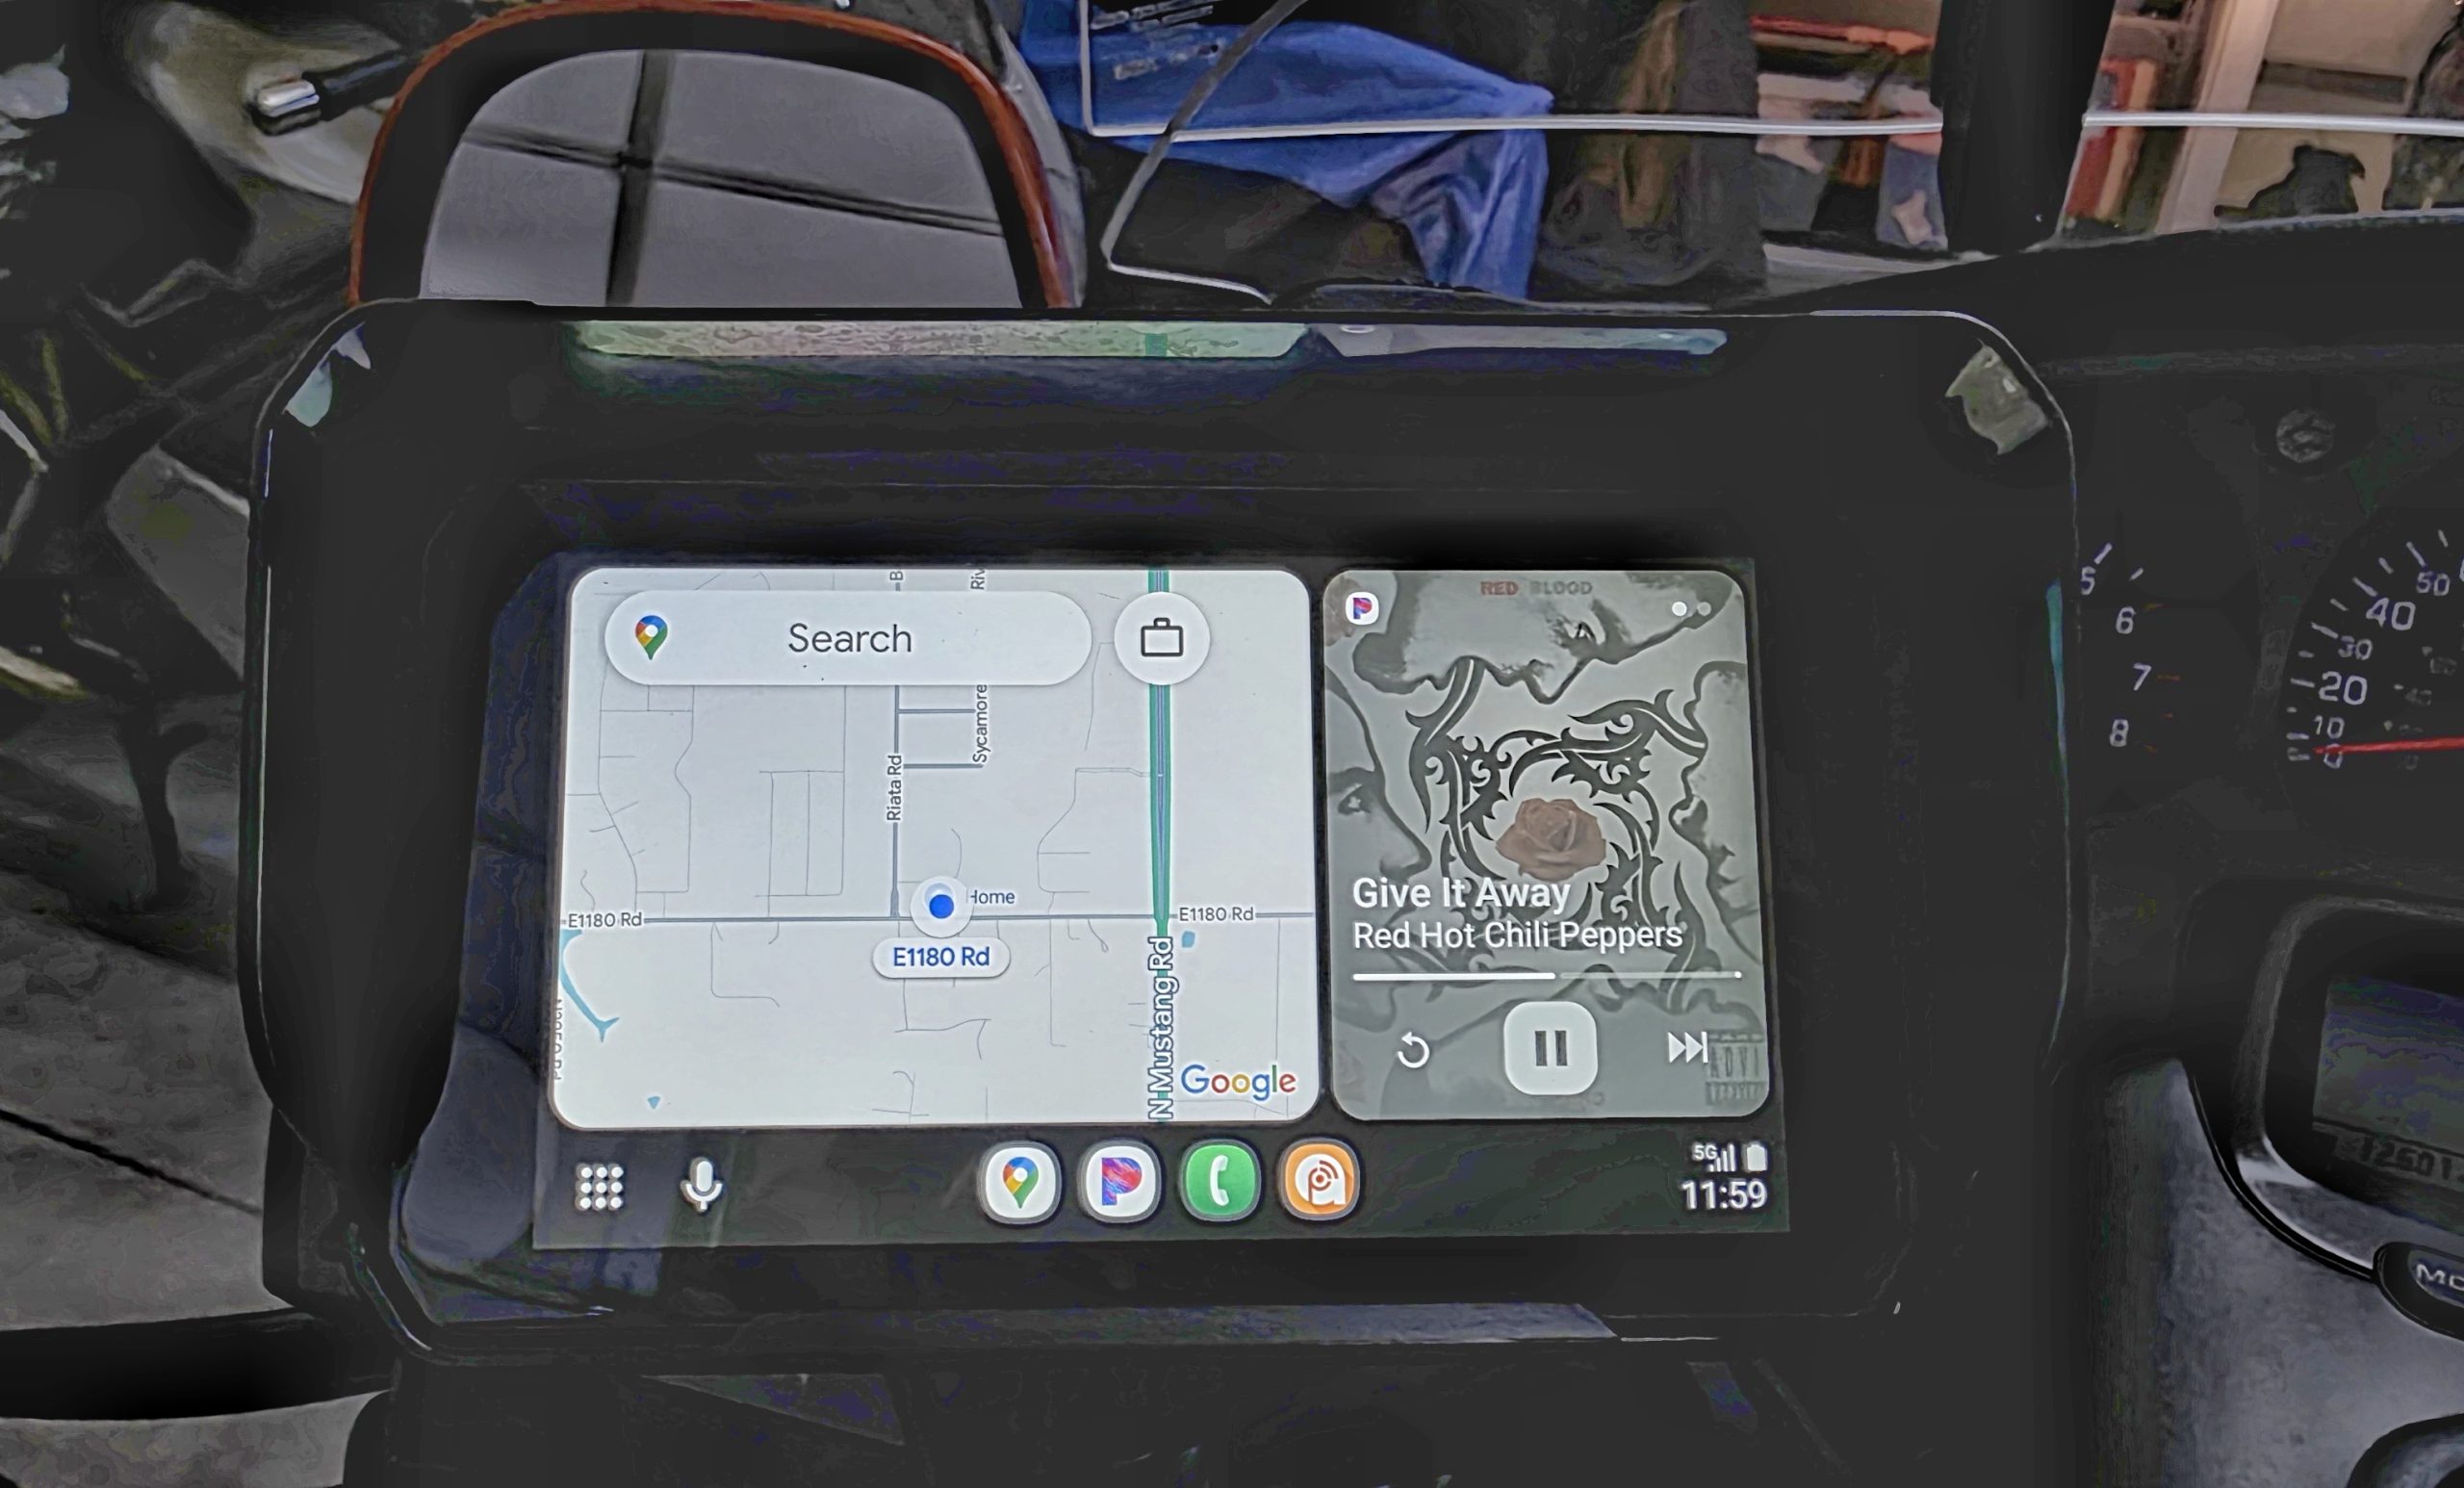
I’ve had at least four Garmin GPS devices over the years and have had a very love/hate relationship with them. For this bike I went with the ChiGee AIO-5 Apple Carplay/Android Auto display. They also make a 6″ display. The device has worked great. It’s very well made and never lost a connection with my phone during a 10 day trip. The screen is bright and easy to see in daylight. Like all such devices, you need a glove with a finger that works with a capacitive screen or you need to get good at using voice commands.
I got the tire pressure/temp sensors, but didn’t get the available dash and rear cameras. The TPS sensors are easy to install on the valve stems and you can set pressure and temp alarms.
My only minor issues are 1) you can use the sun shade hood or the screen protector, but not both–the sun shade lifts the screen protector; 2) there is a row of buttons on the top of the device for switching screens and such. They are low profile and difficult to feel with gloves, especially with the sun shade installed. Fortunately, the only reason to switch away from Android Auto is to check the current tire pressures.
In any case, I’m very happy with the solution and wouldn’t hesitate to recommend it. For now I’ve mounted it on the left handlebar with a typical RAM ball setup. In the future I may try to mount it on a RAM ball just below the ignition switch.

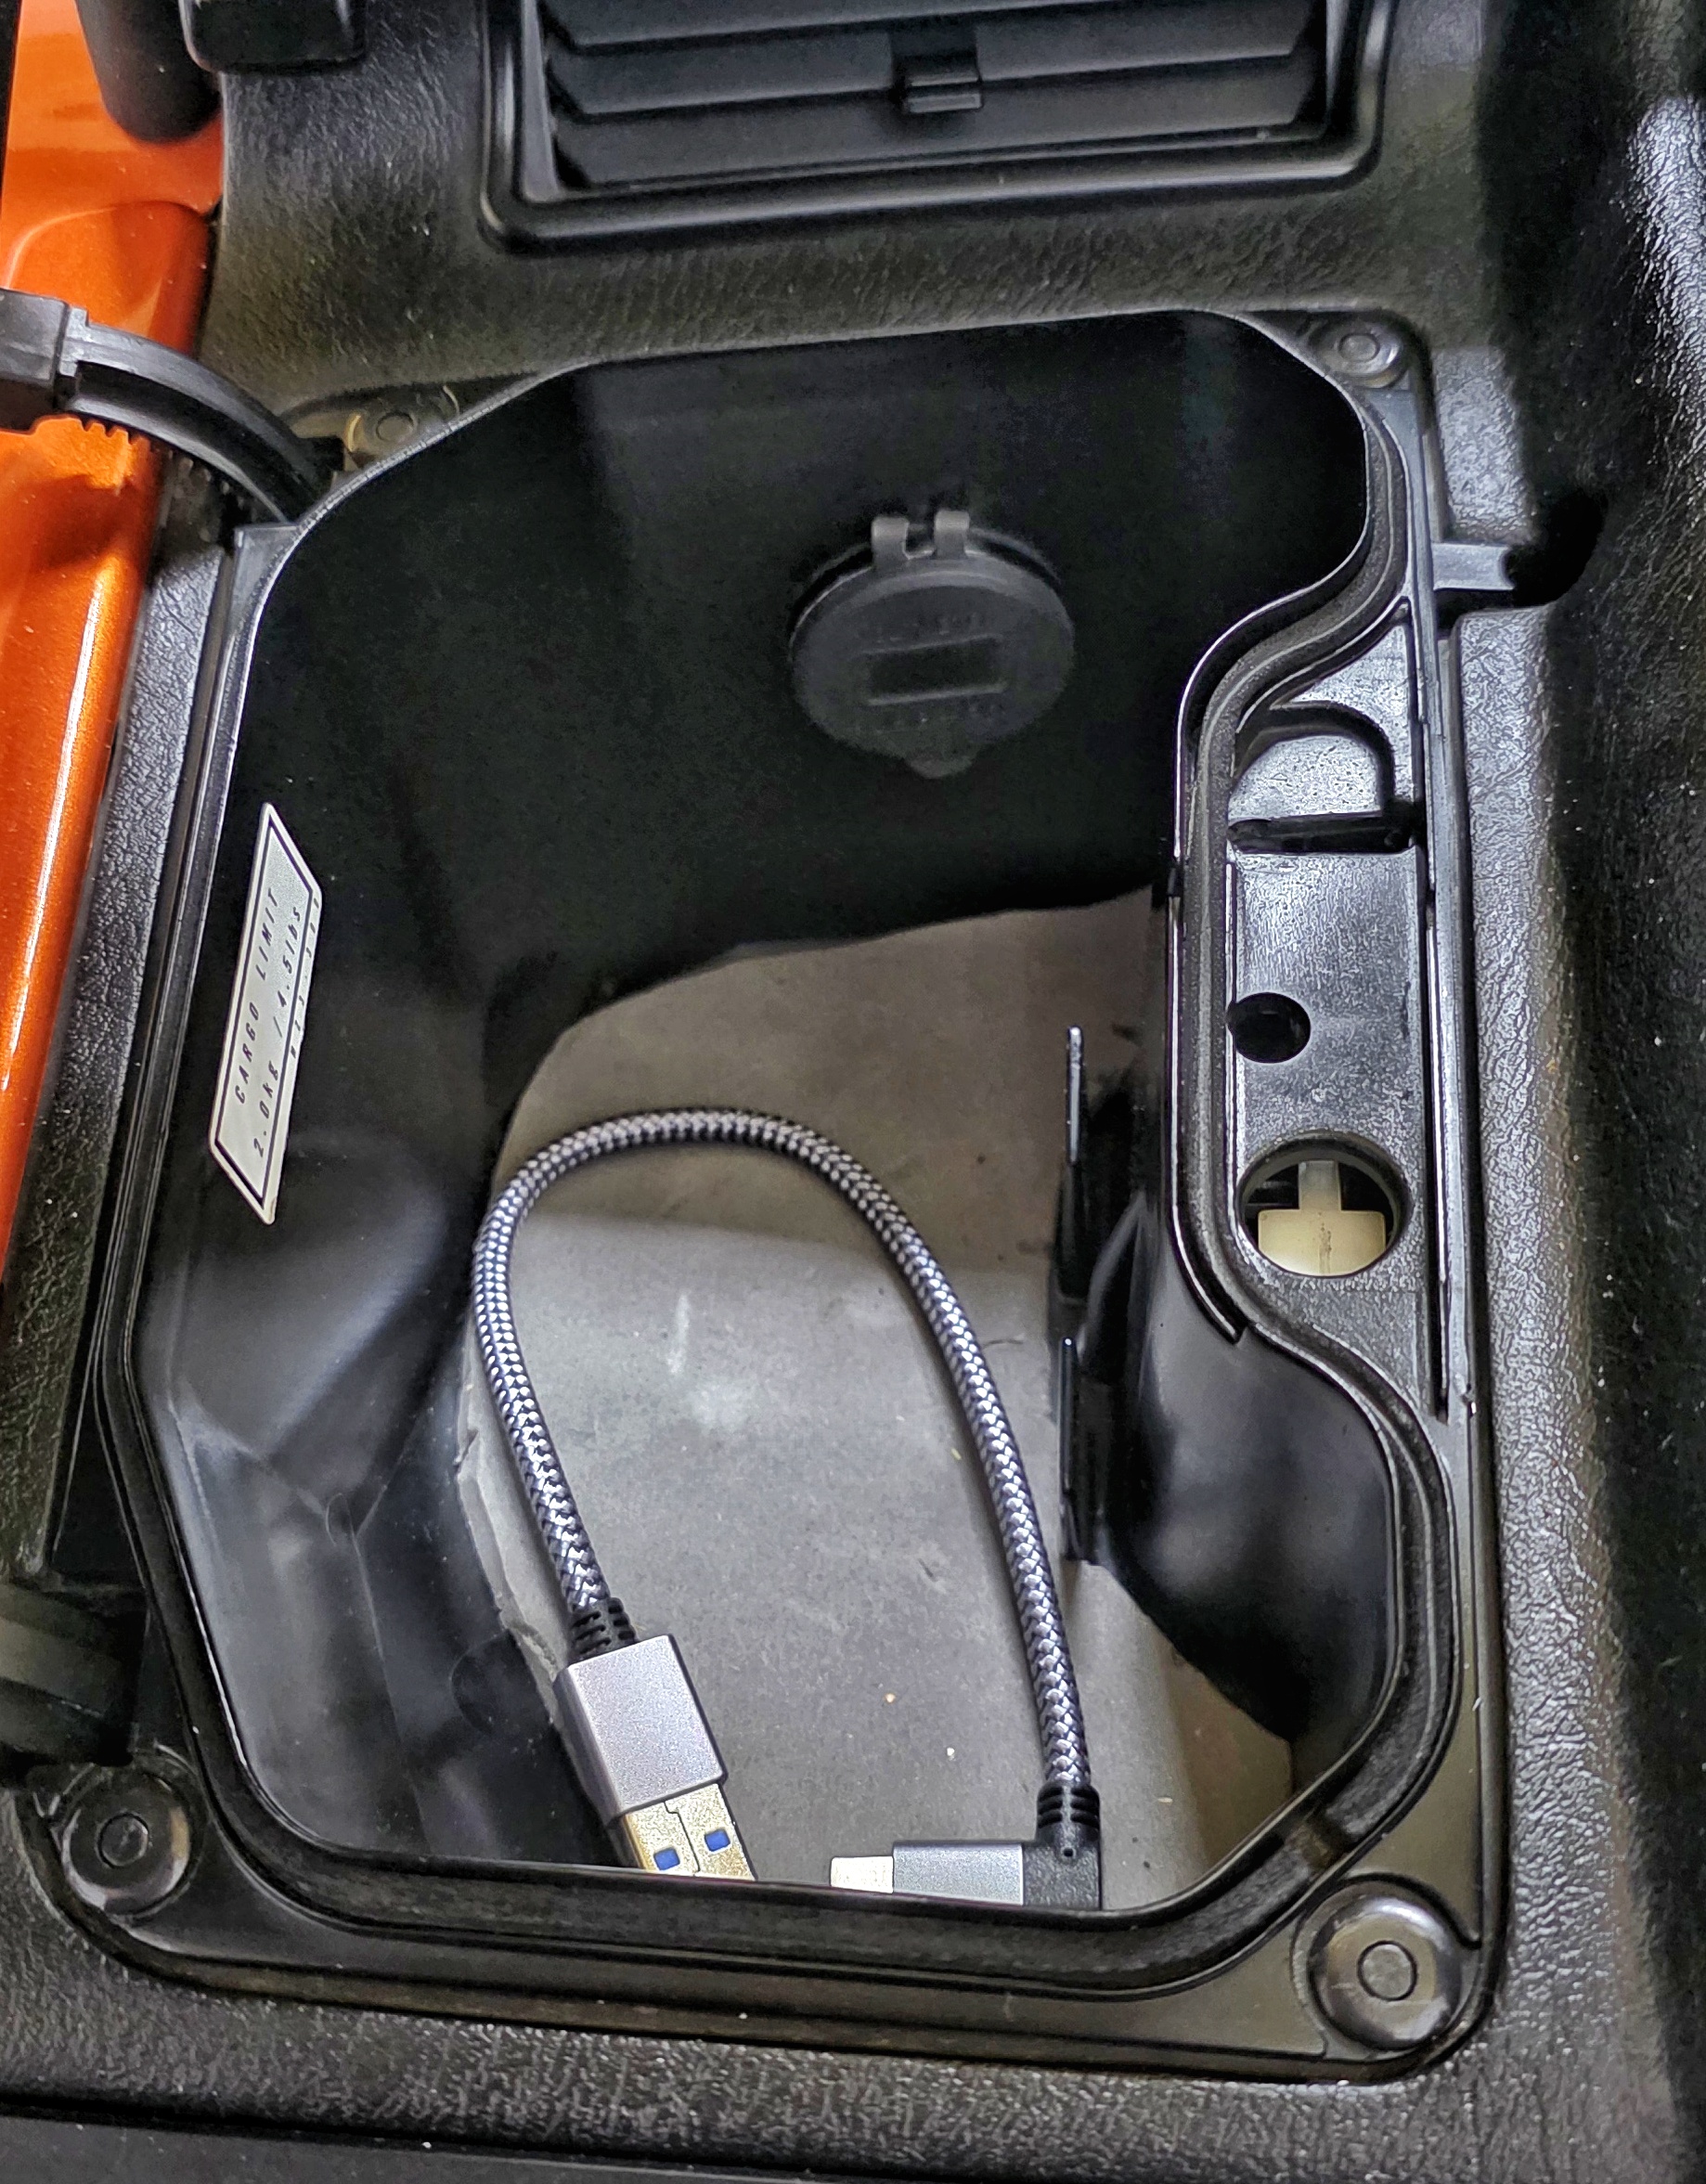
Finally, since we can be on the bike most of the day while running Android Auto/Google maps/music, I needed a way to keep my phone charged. I installed a marine PD/QC 3.0 USB charger in the left glove box, connected to the switched power source that would have been used with the OEM cigarette lighter charge port.
Lights and Wiring Hacks
None of these modifications are life-changing, but the little things do add up to a nicer riding experience.
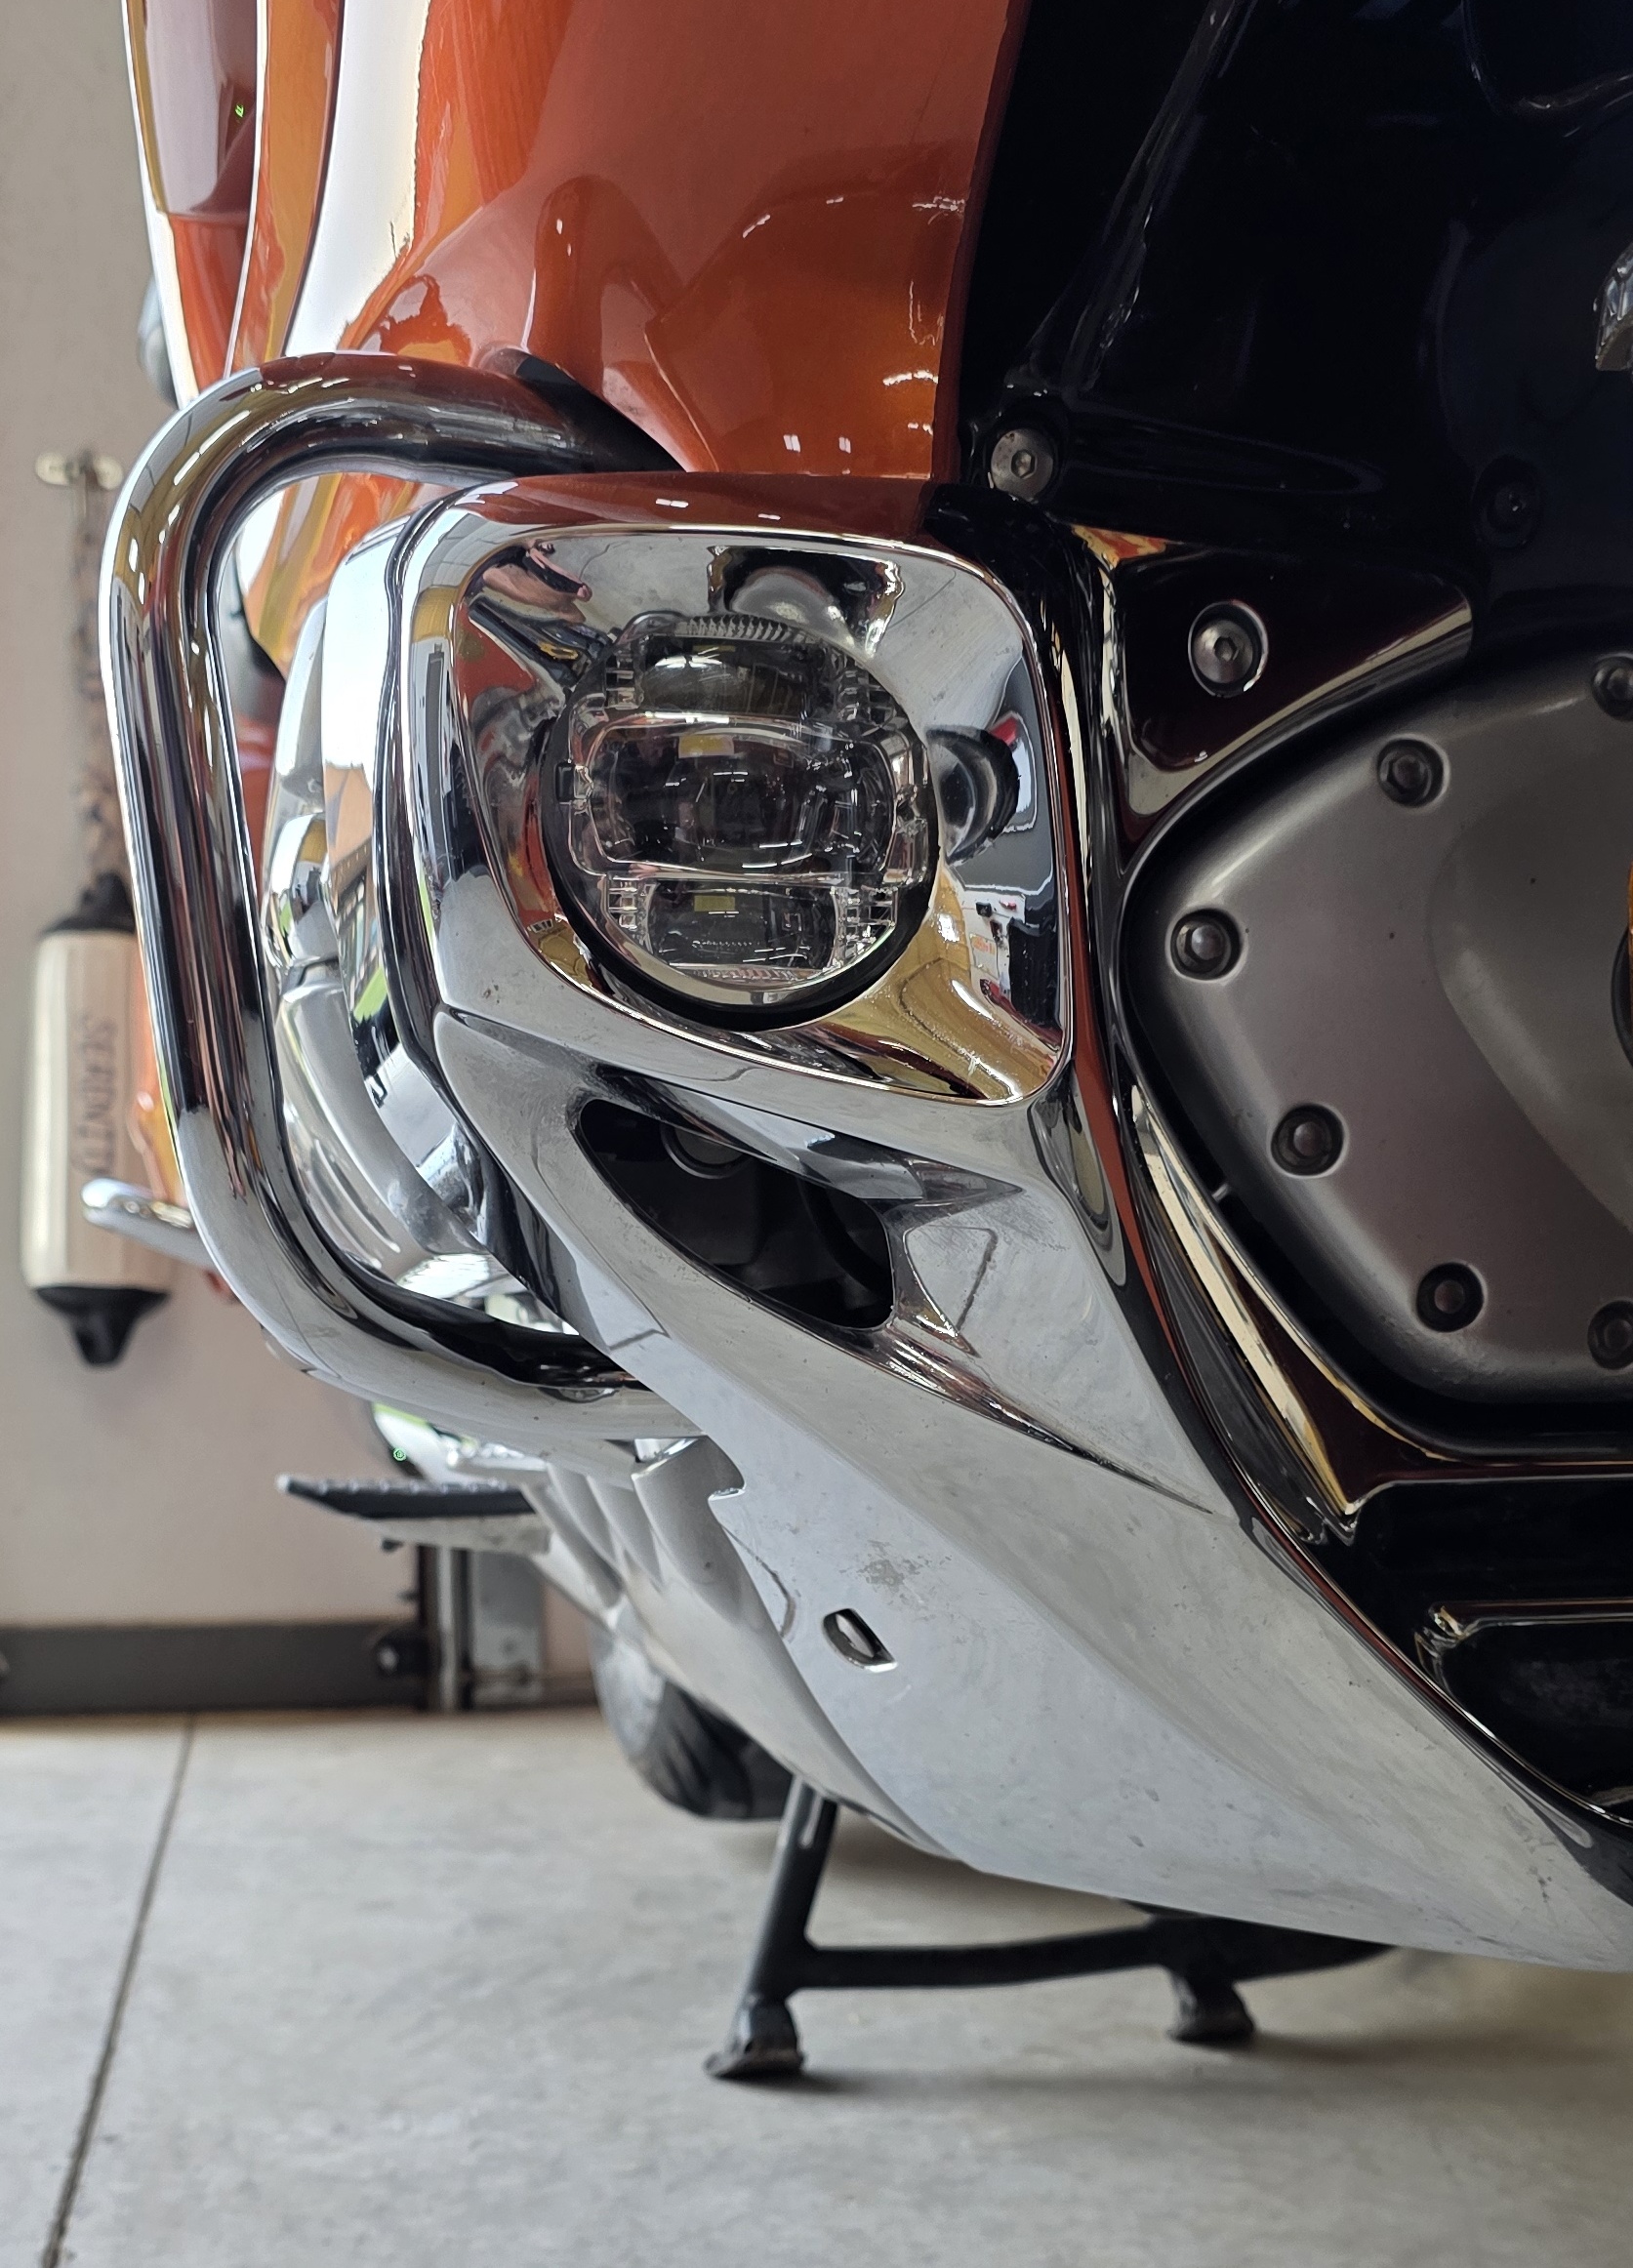
When I had a 2005 Goldwing, I always regretted not getting the fog lamps. Not only does it help when riding at night, I think it makes a big difference in how well car drivers see you coming during the day. I picked up a set from Wingstuff on sale.
While I was there, I also picked up a volt meter with back panel. Digital is nice, but all I’m looking for is a confirmation that alternator is working and the resting and load voltages of the battery while starting. Only a few minutes to install, if you have the faring apart already. Plugs into an existing connector.
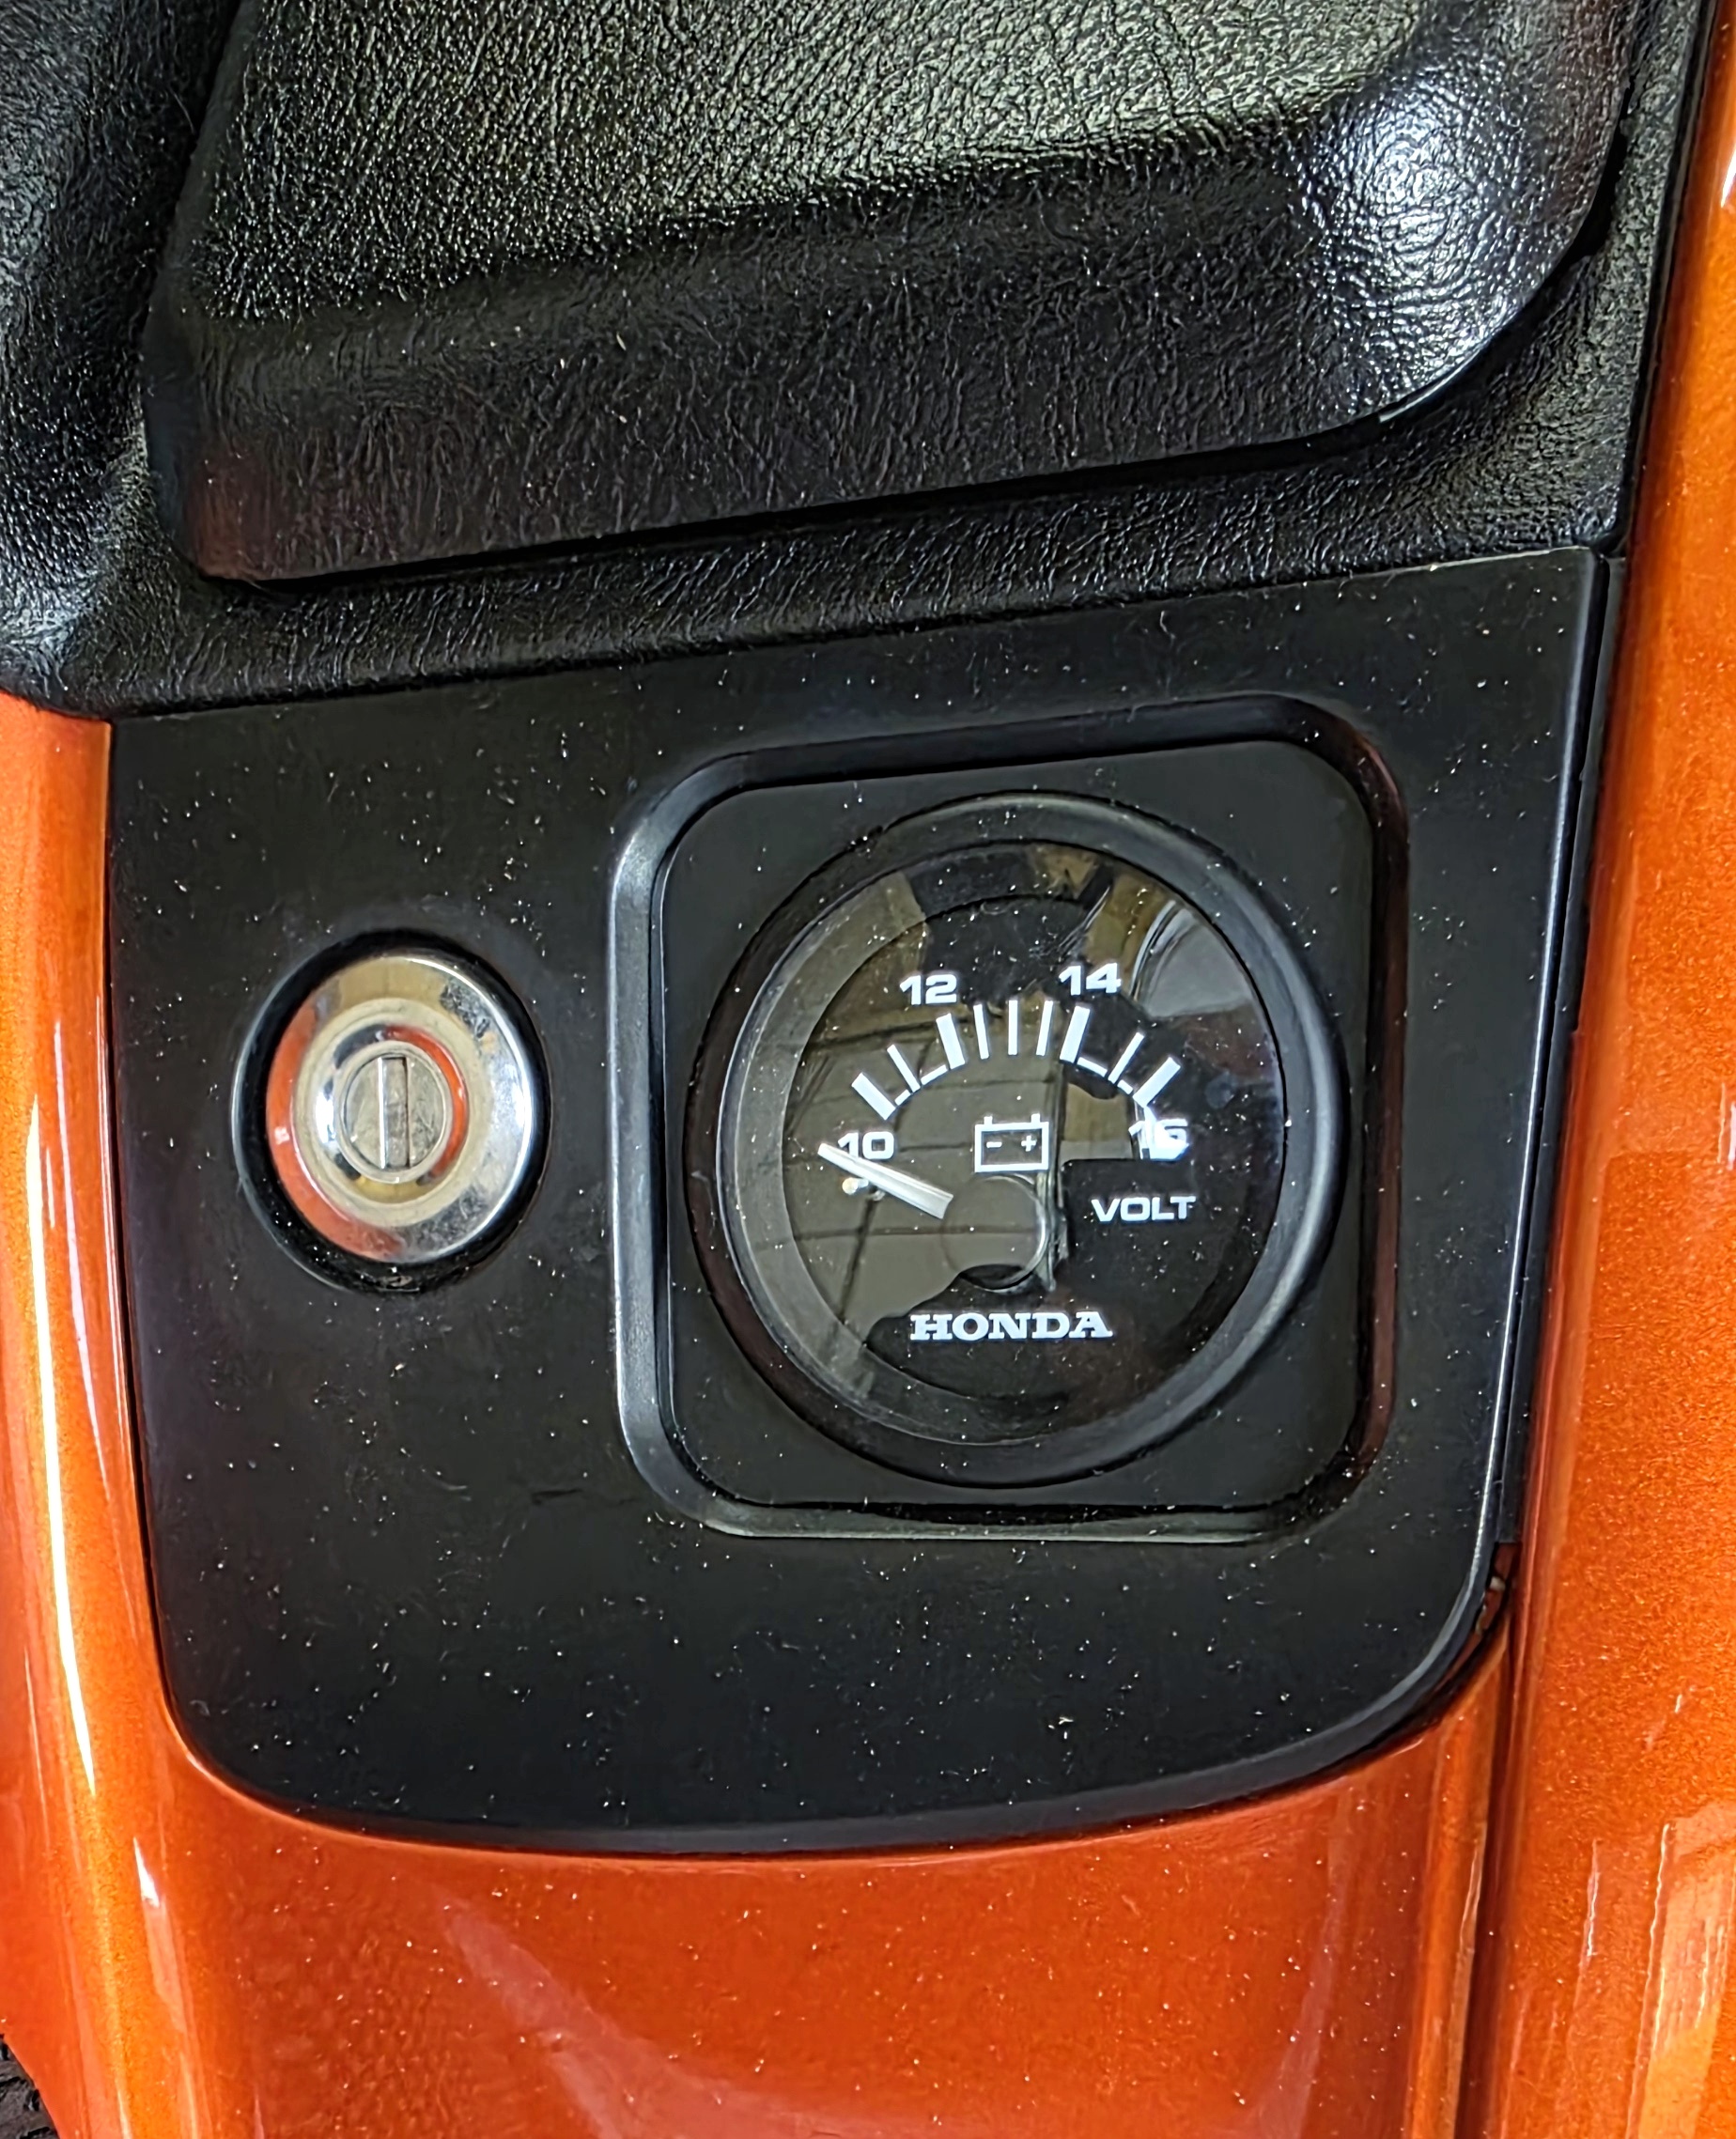
Speaking of battery voltages, I’ve never really had an issue with the battery going dead on the Goldwing, but every once in a while it’s nice to be able to put it on a tender. I added an SAE pigtail behind the side panel that covers the battery for those rare occasions.

The previous owner put a new AGM battery in the bike right before I bought it. When it dies, I’ll replace it with a lithium iron version. I’ve used these in all my bikes (except for the Triumph, that just felt wrong) for about 20 years and been very happy with the performance.
The following hacks are ones that I also did to my 2005.
I like to be able to toggle the display to see the temperature without having to take a hand off the handle bars. It’s pretty easy to connect the turn signal cancel circuit to the display panel toggle circuit. I ran a wire from the display wire harness right below the ignition switch to the turn signal cancel wire located behind the right locking storage box. (See pics for details.) The pictures don’t show it, but I did clean up the wire routing and tie-wrapped it in place. Since I already had the faring apart, the mod only took five minutes.
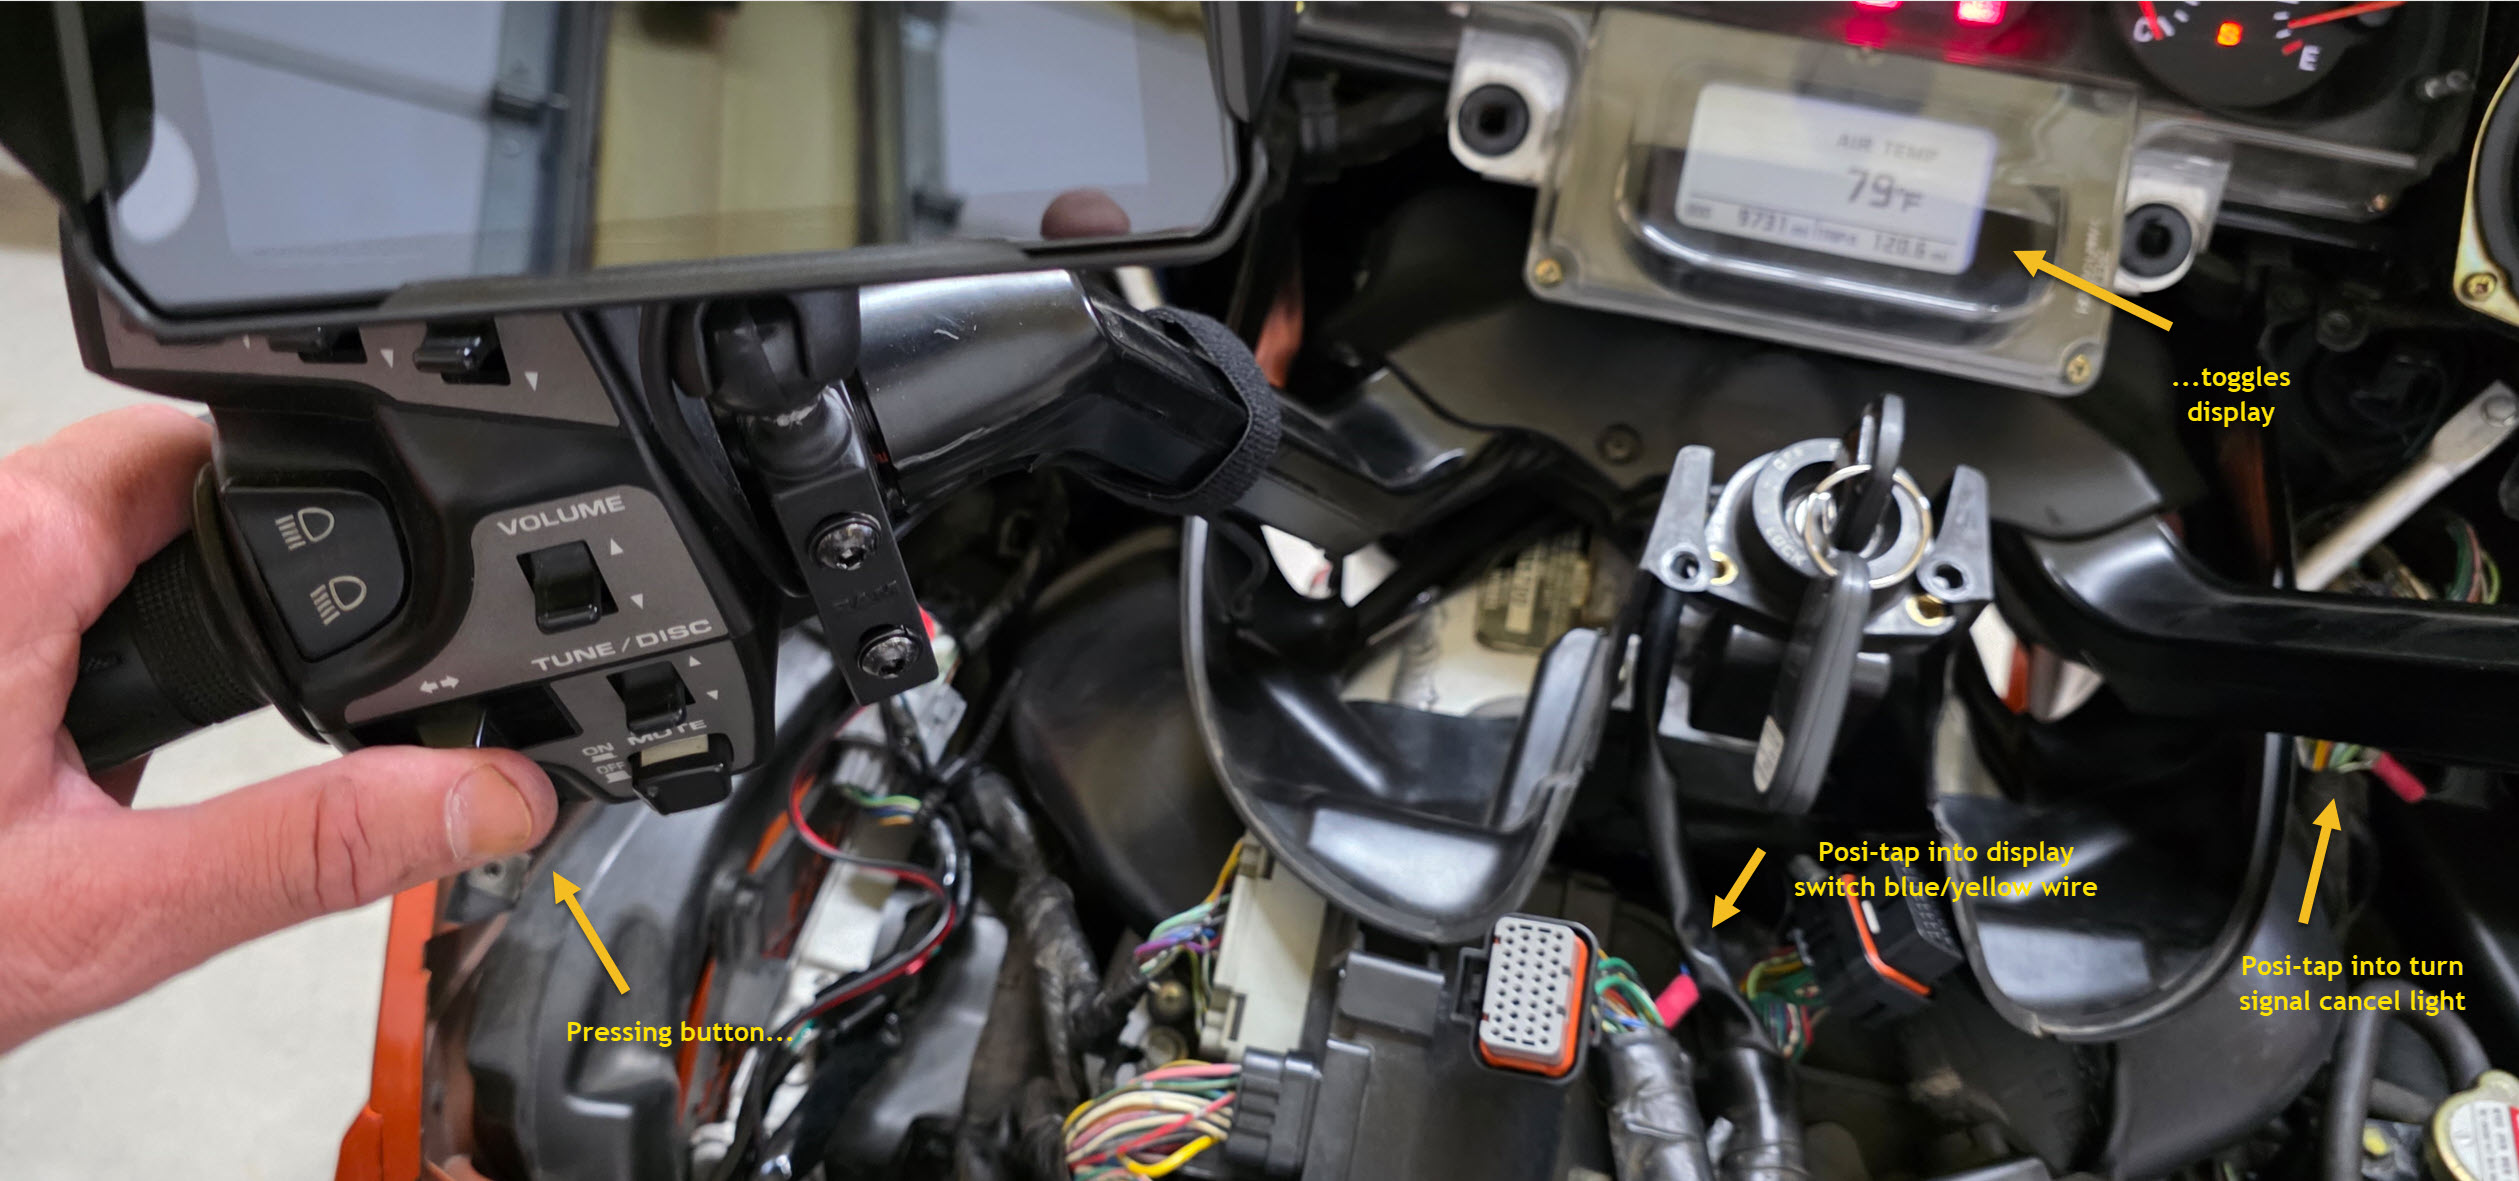
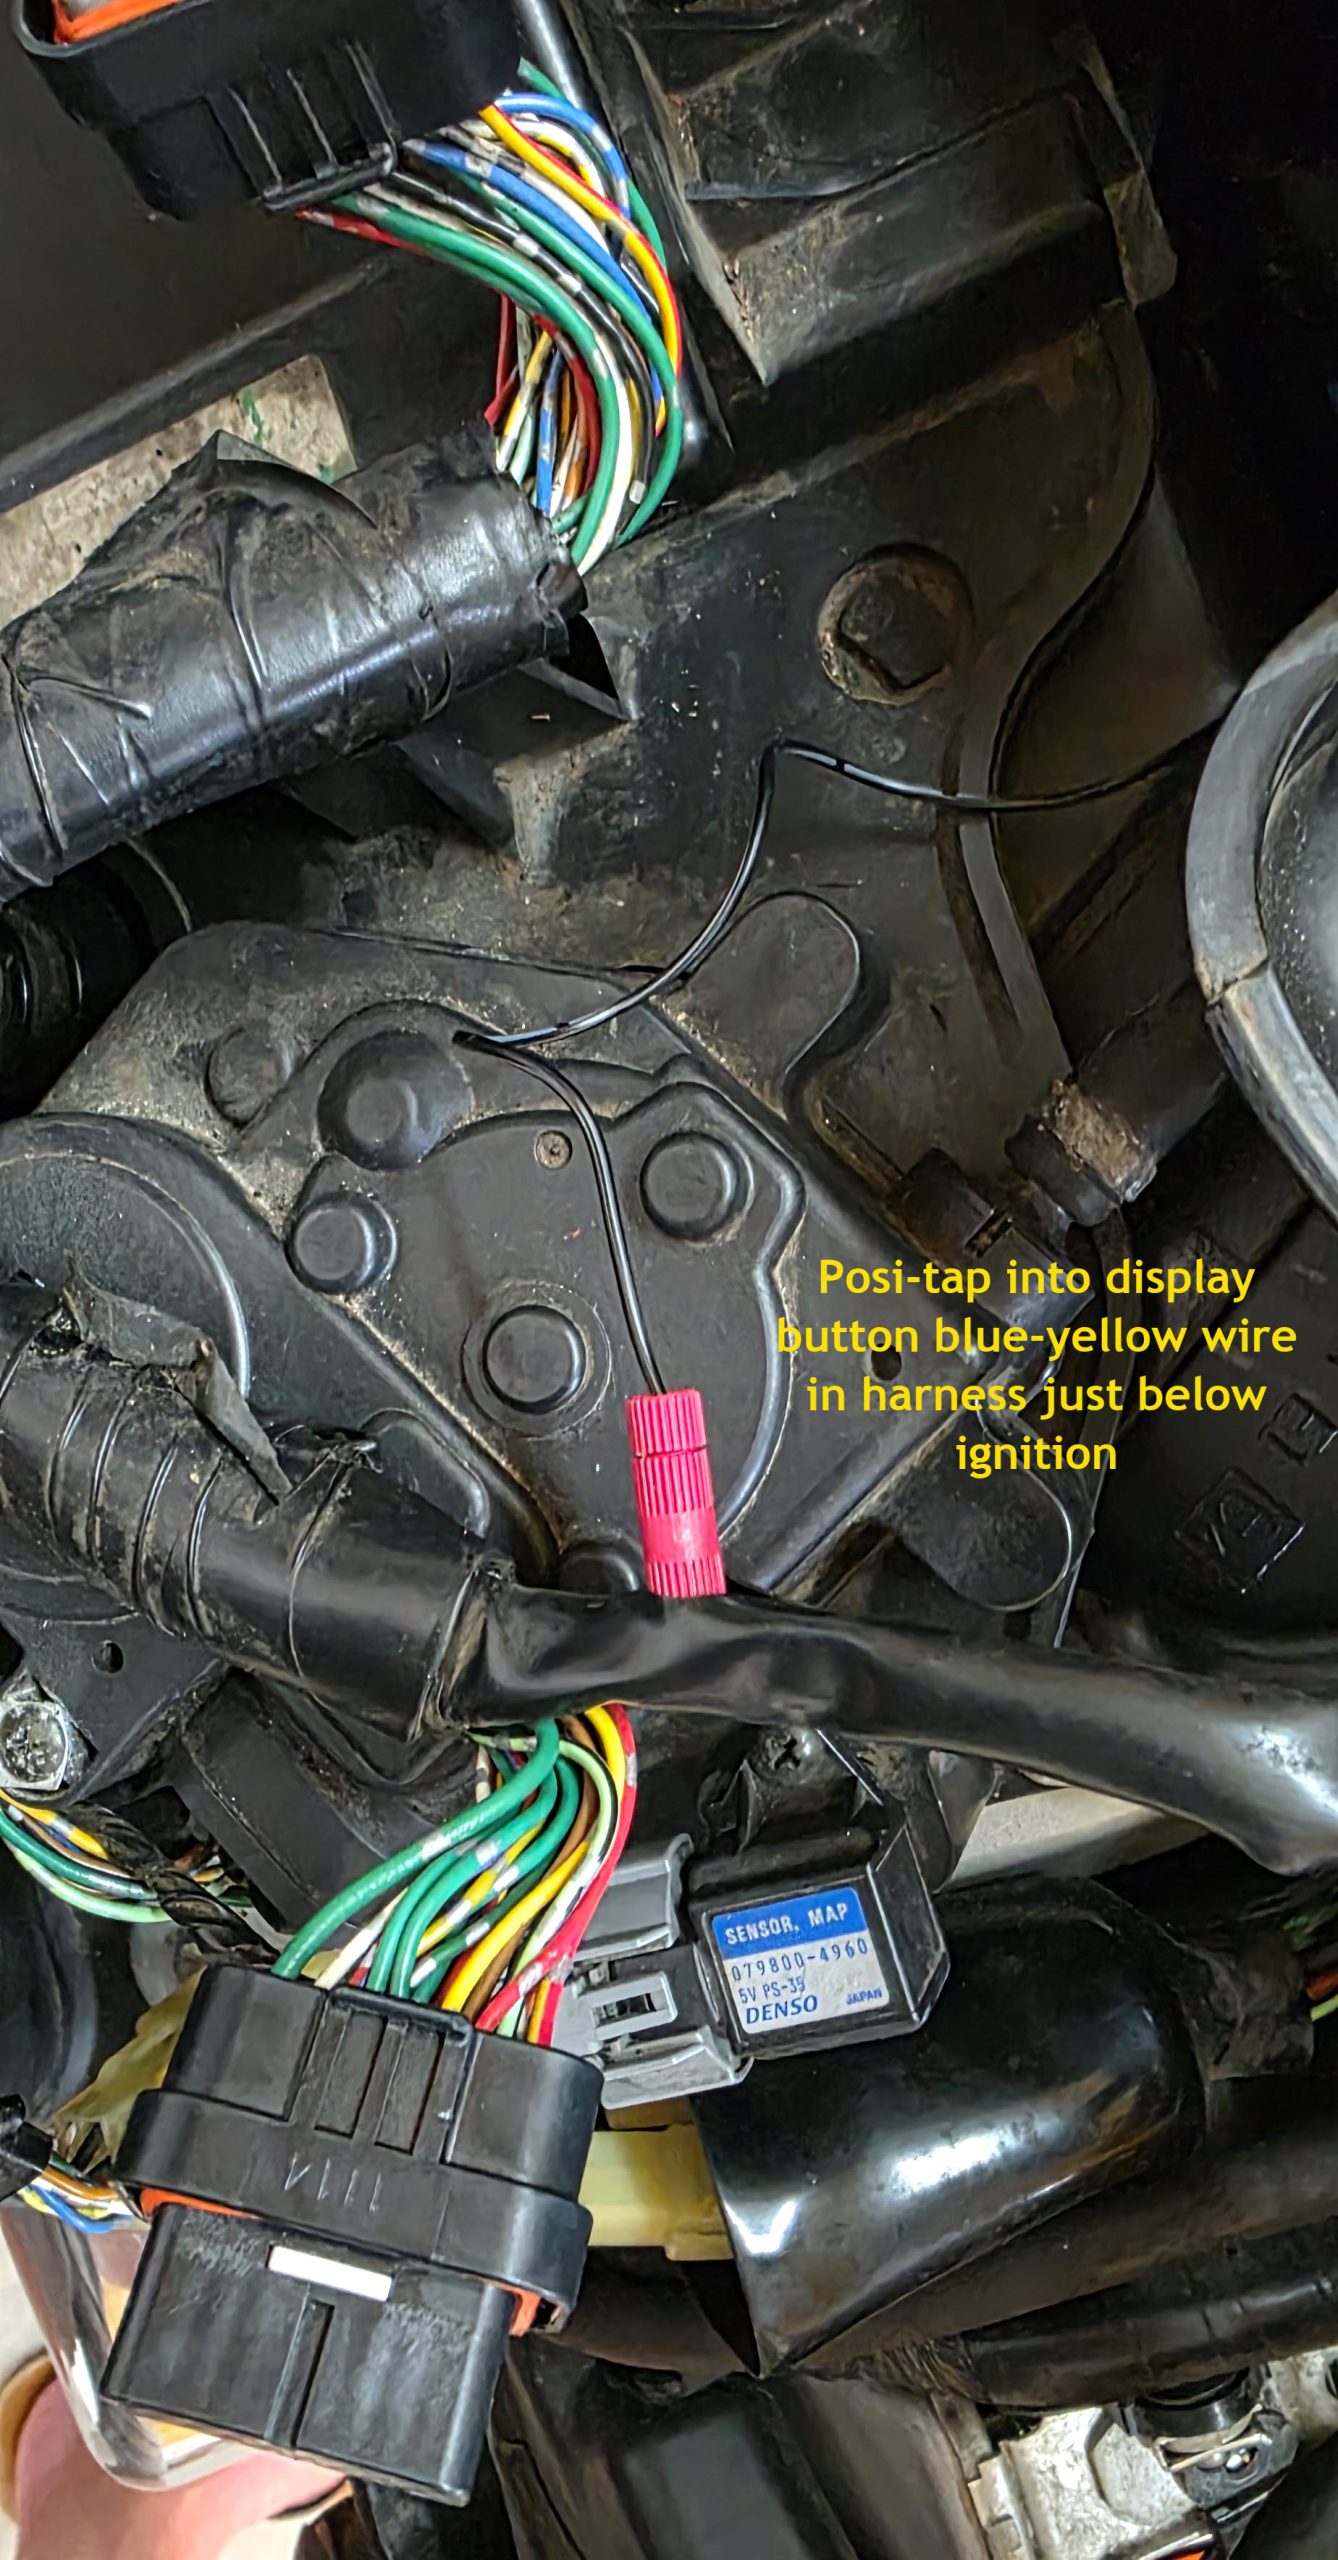
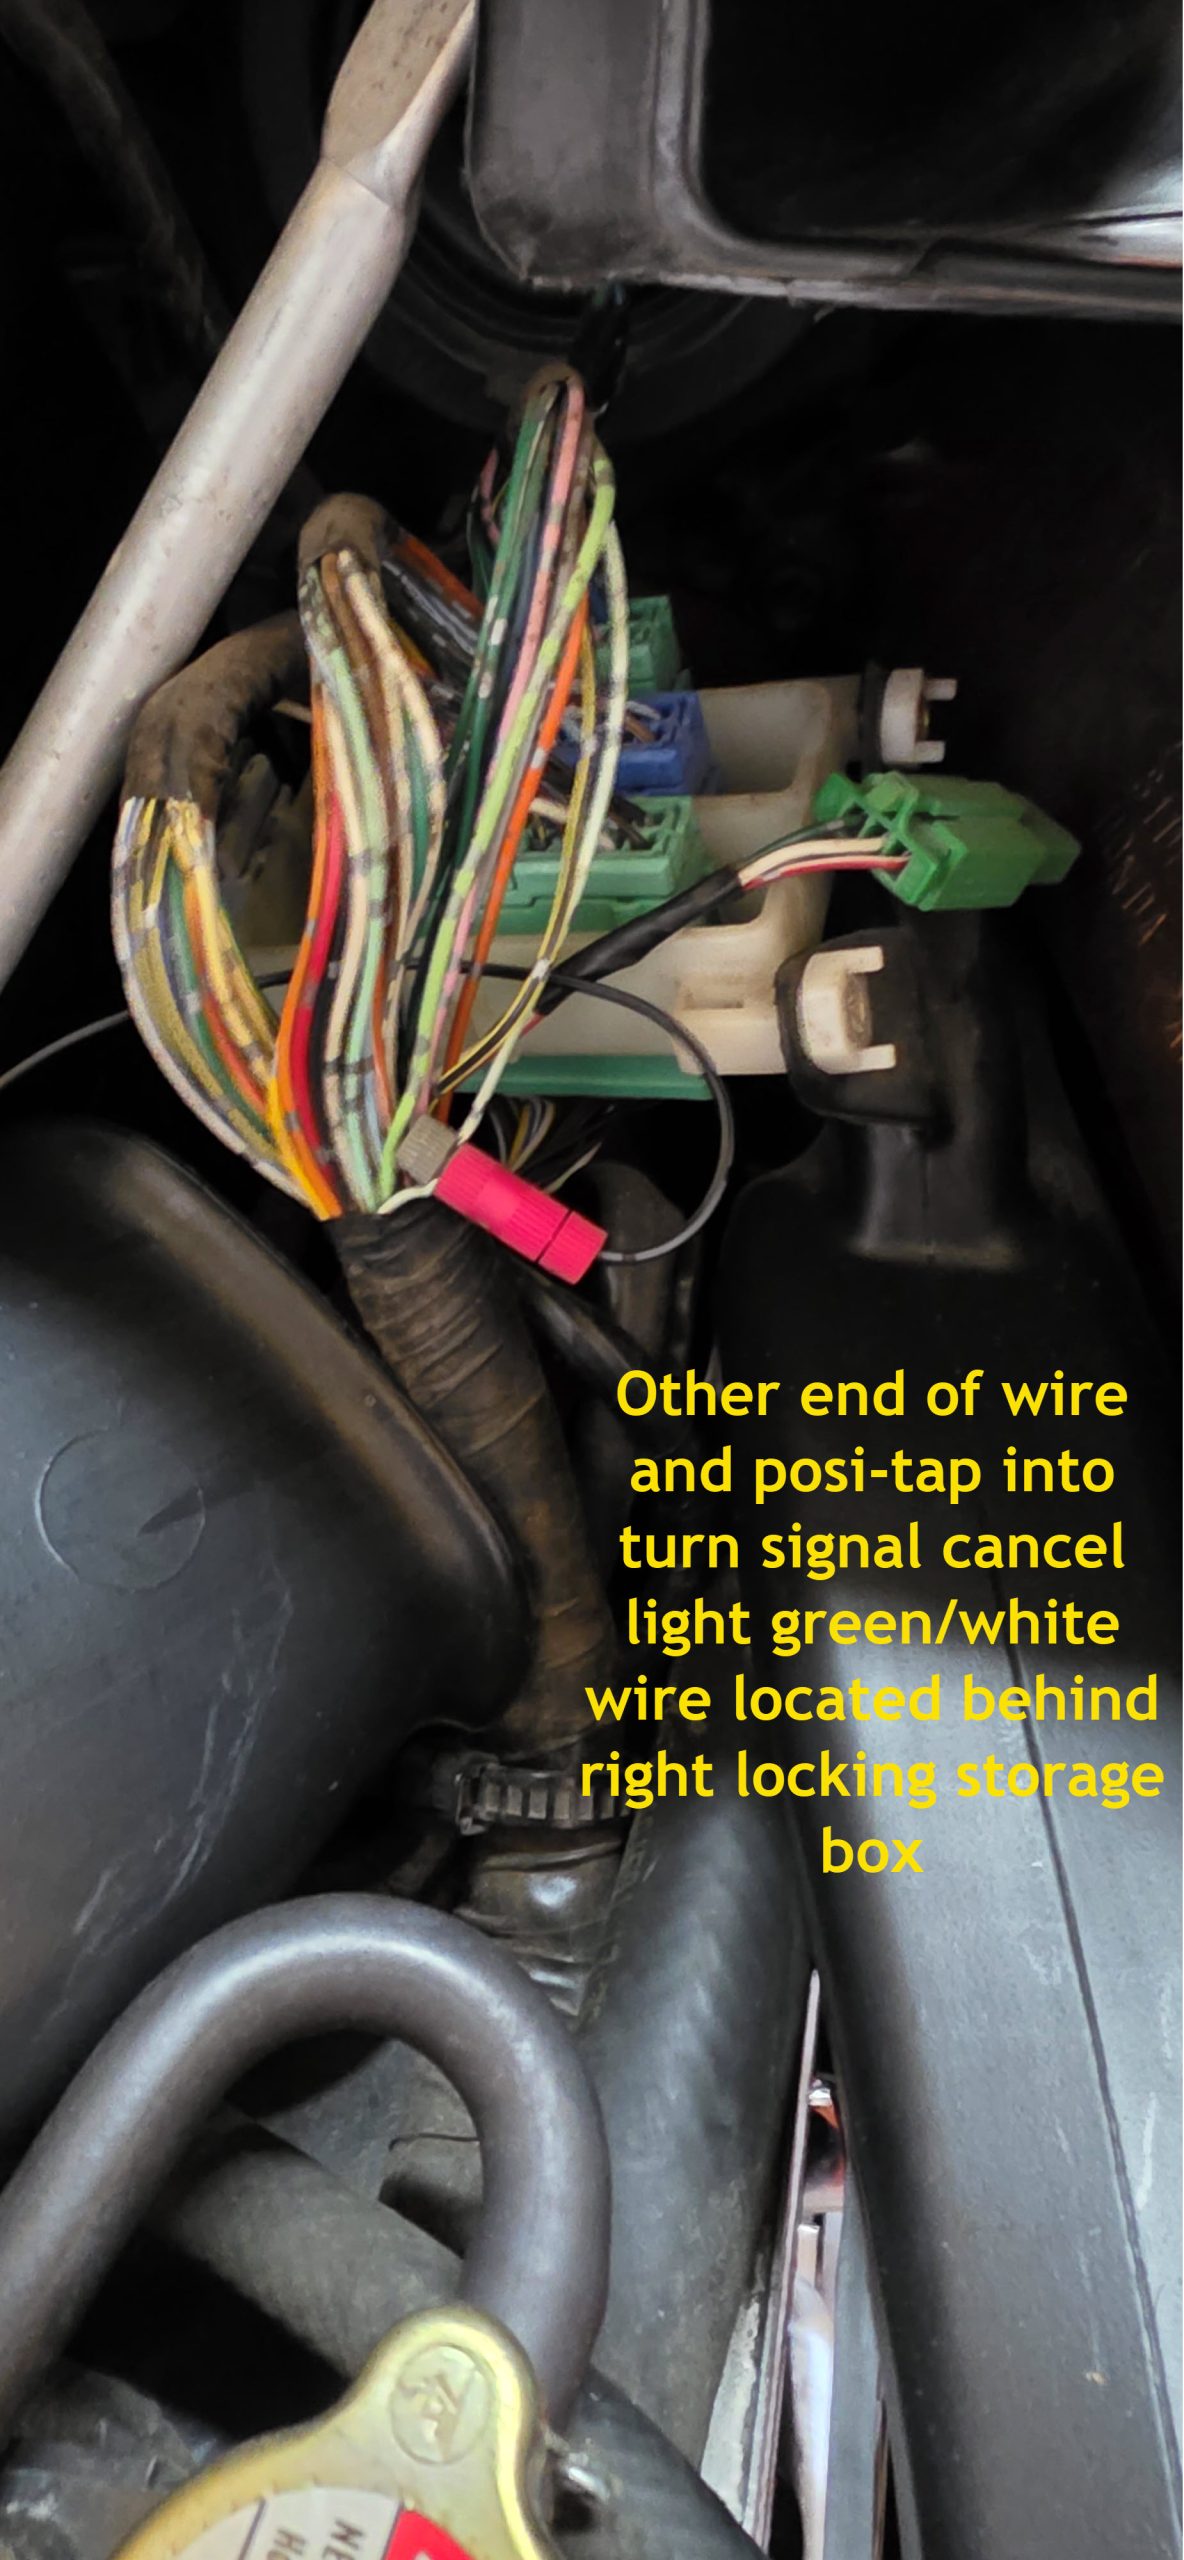
I like to use Posi-tap connectors for this type of thing as they are quick, secure, relatively water resistant, and easy to remove without damaging the wiring.
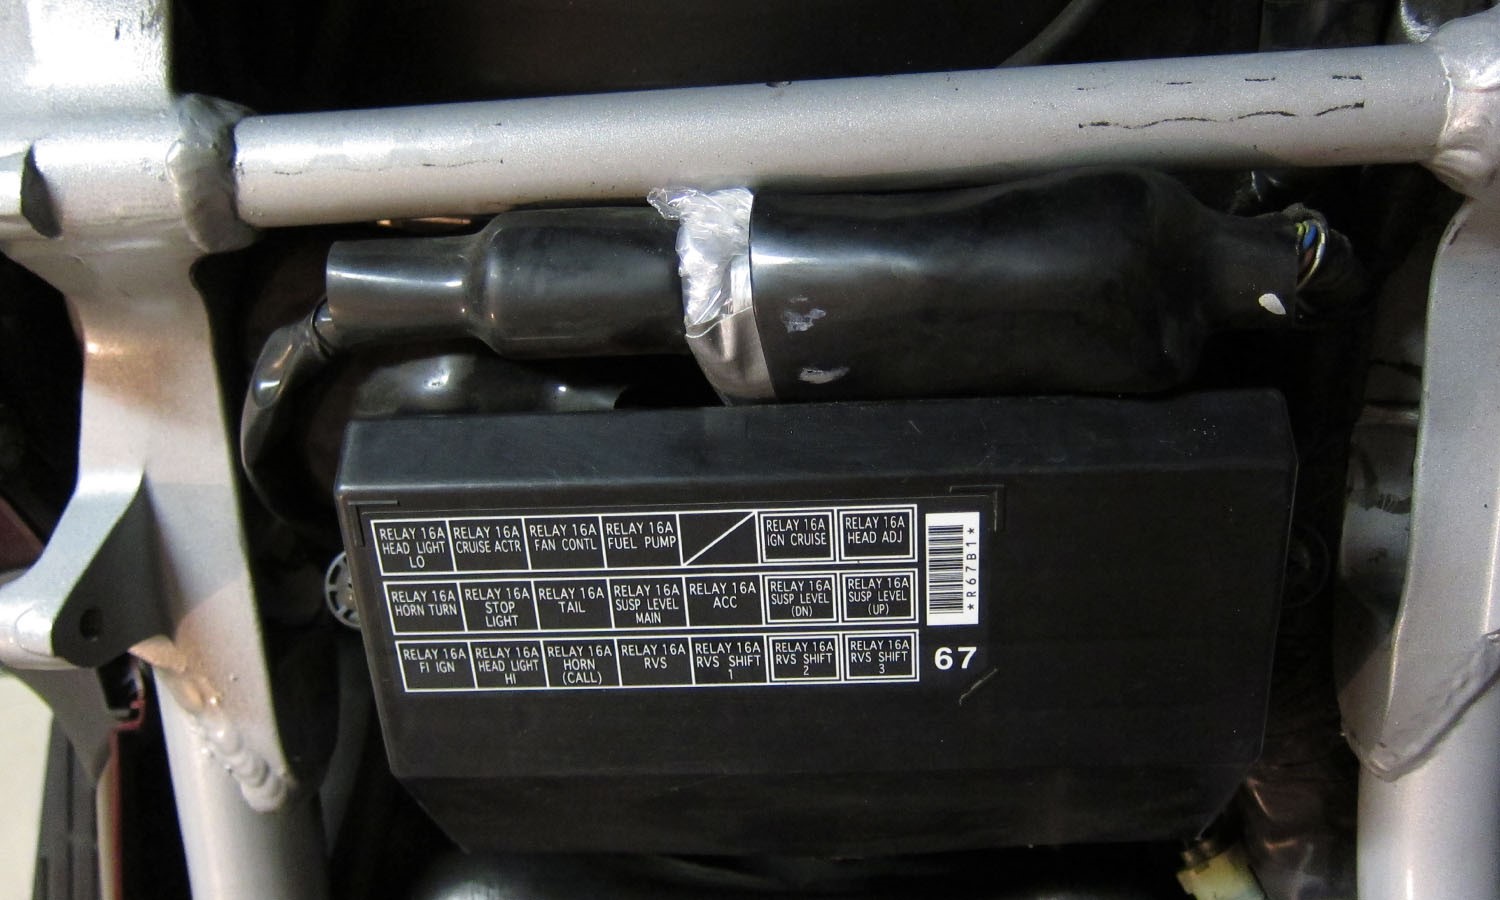
Finally, since I don’t use the radio/CB/CD, I have all of these buttons on the left handlebar that are not doing anything. I wired the CB Push to Talk (PTT) circuit into a garage door opener. The passenger PTT connector is located under the seat in a rubber boot with a bunch of other connectors. It’s a two wire connector with yellow and green wires. If you take apart the garage remote and test with a short piece of wire you can identify which leads on the back of the remote switch get connected when you press the button. Solder wires to these leads and the other end of the wires to the push to PPT connector wires. Test first as you may have to switch the polarity to get it to work correctly. Wrap the remote in a ziplock bag and stuff it into the rubber boot with the other connectors. Took about half an hour to complete.
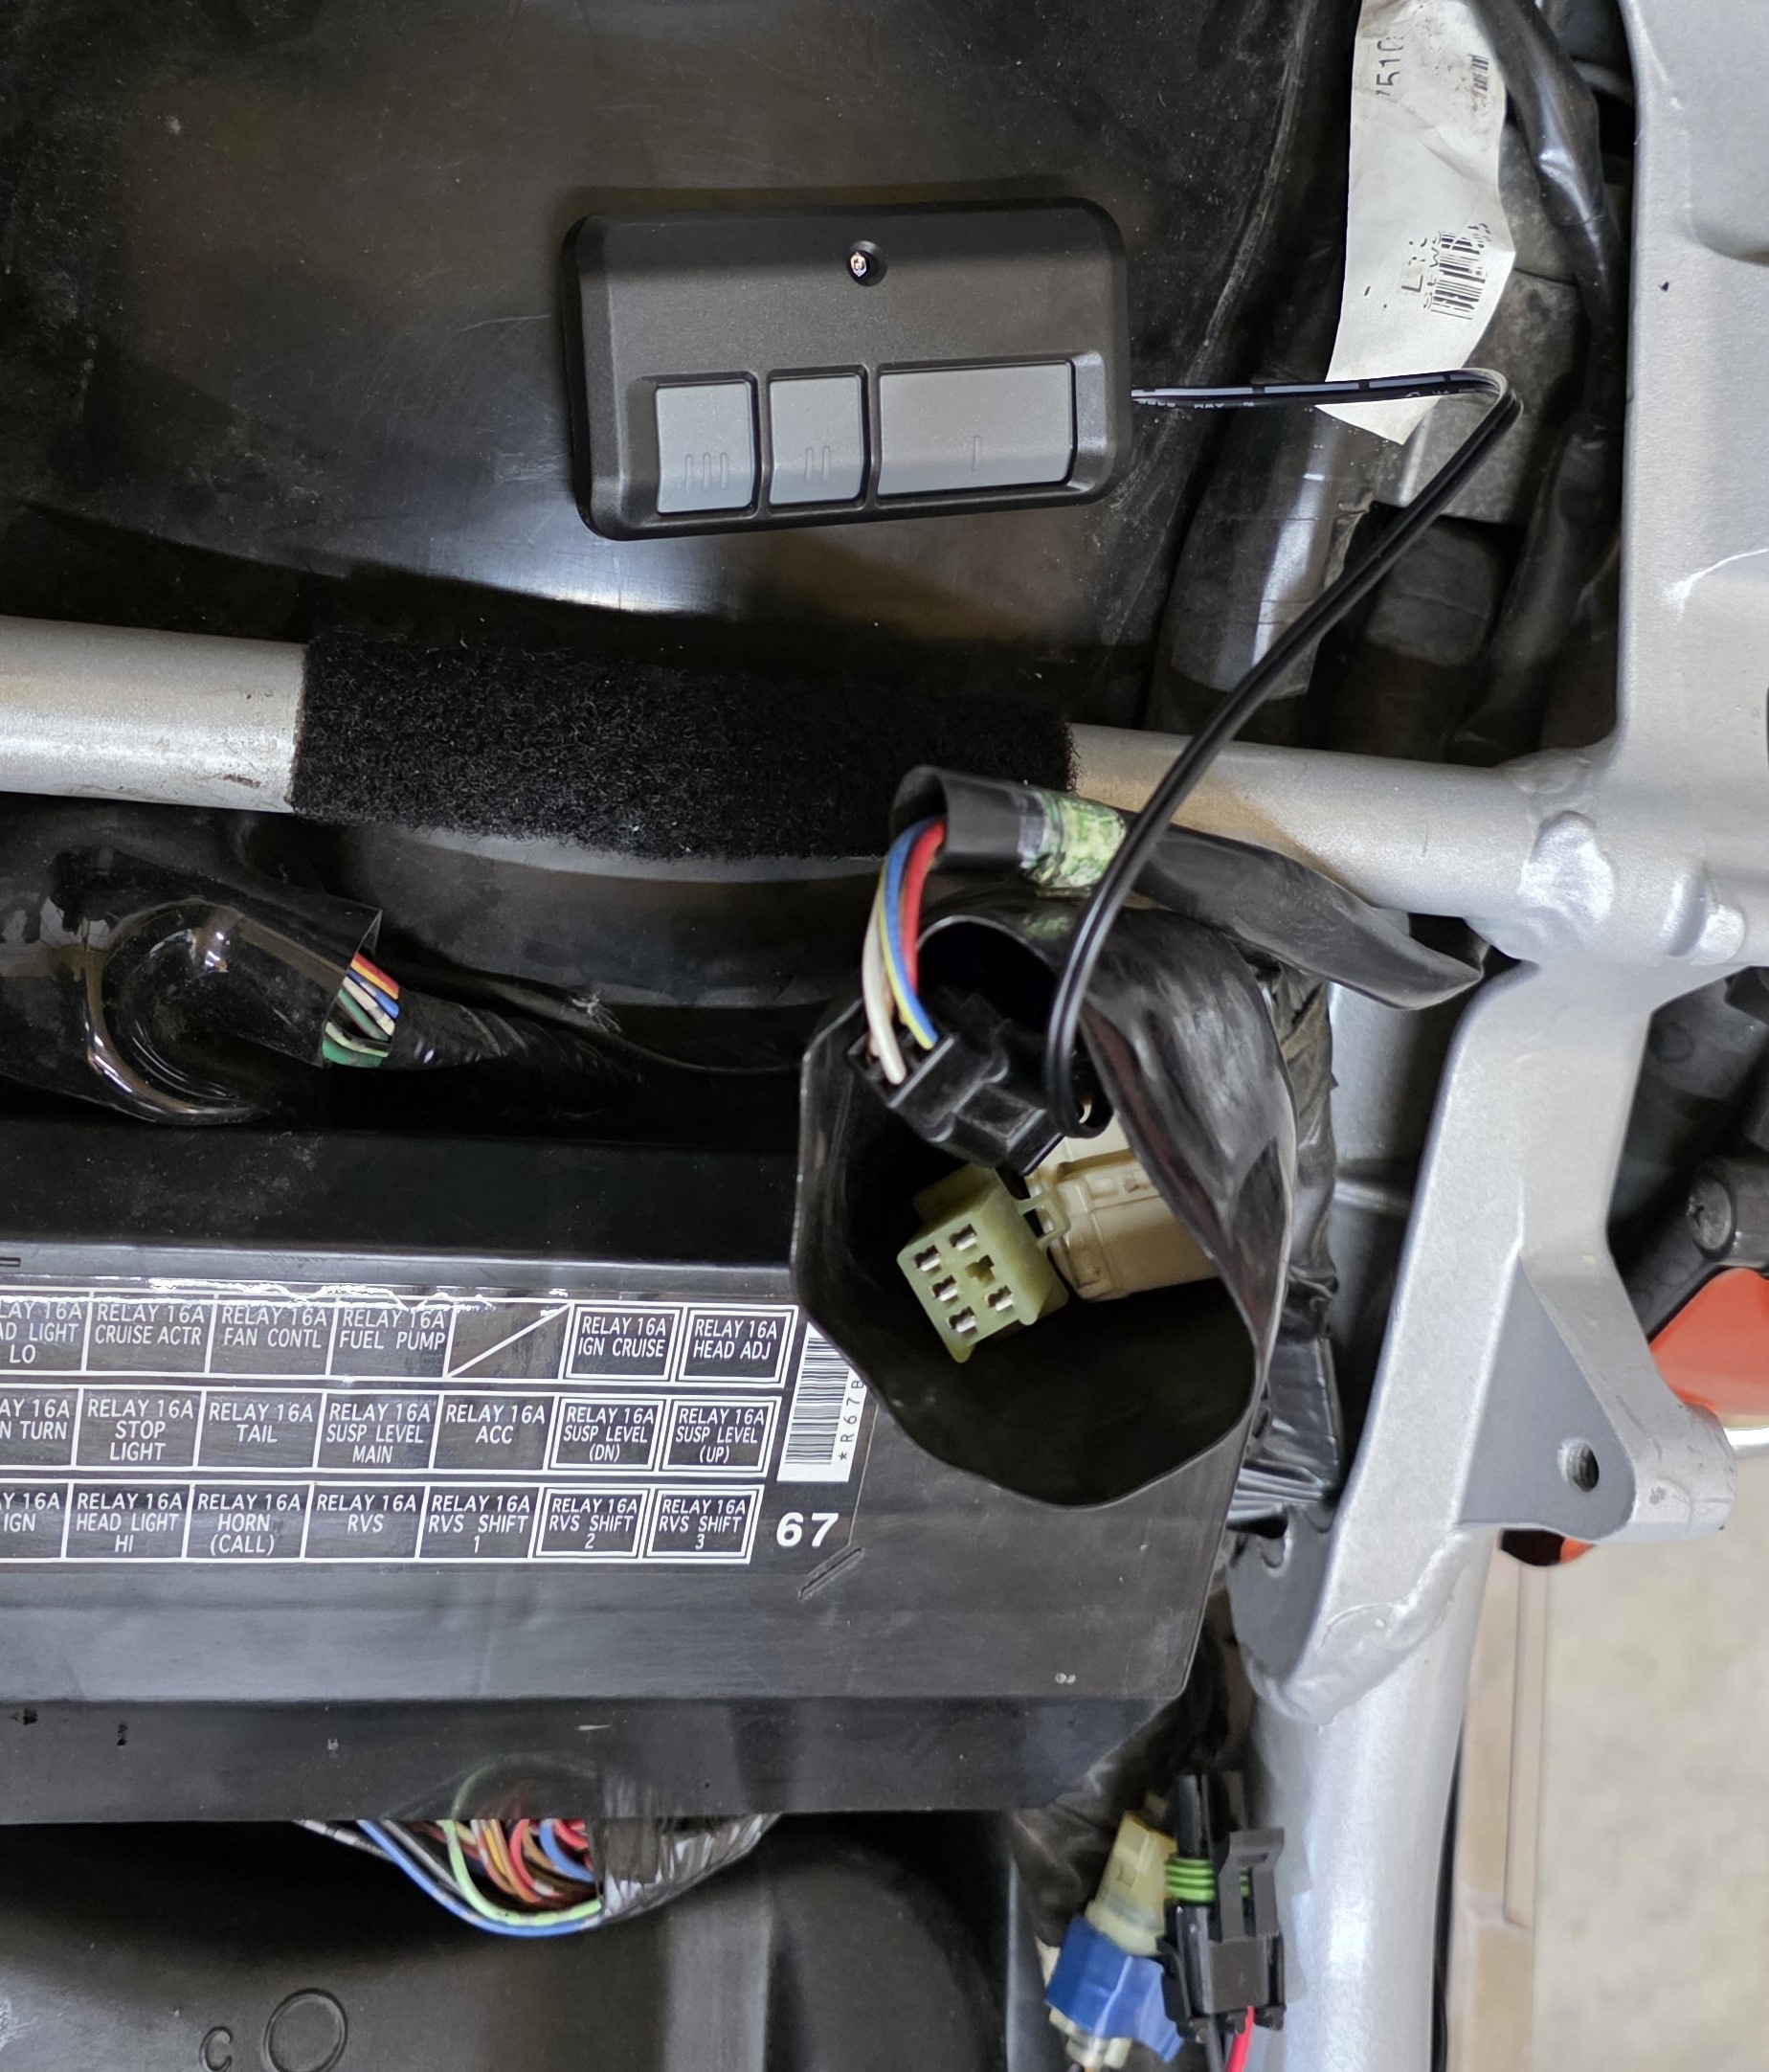
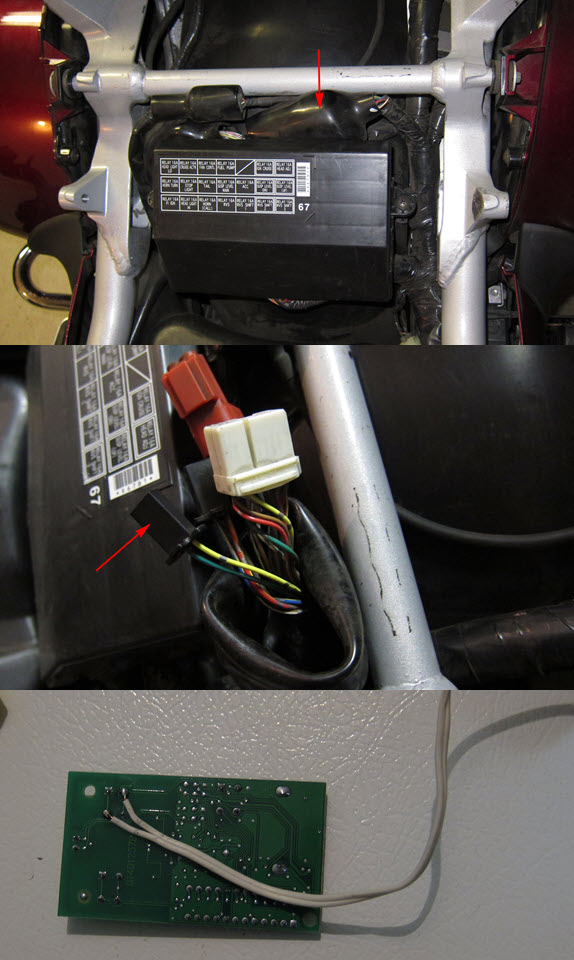
Now, when you use your index finger to push down on the left handlebar PPT switch, you are effectively pushing the button on the garage remote. No more fumbling for a remote in pocket, storage box, or velcroed under the dash.
Final Farkles and Tools
Almost to the end. What’s left are the small additions or modifications that make the bike personal.
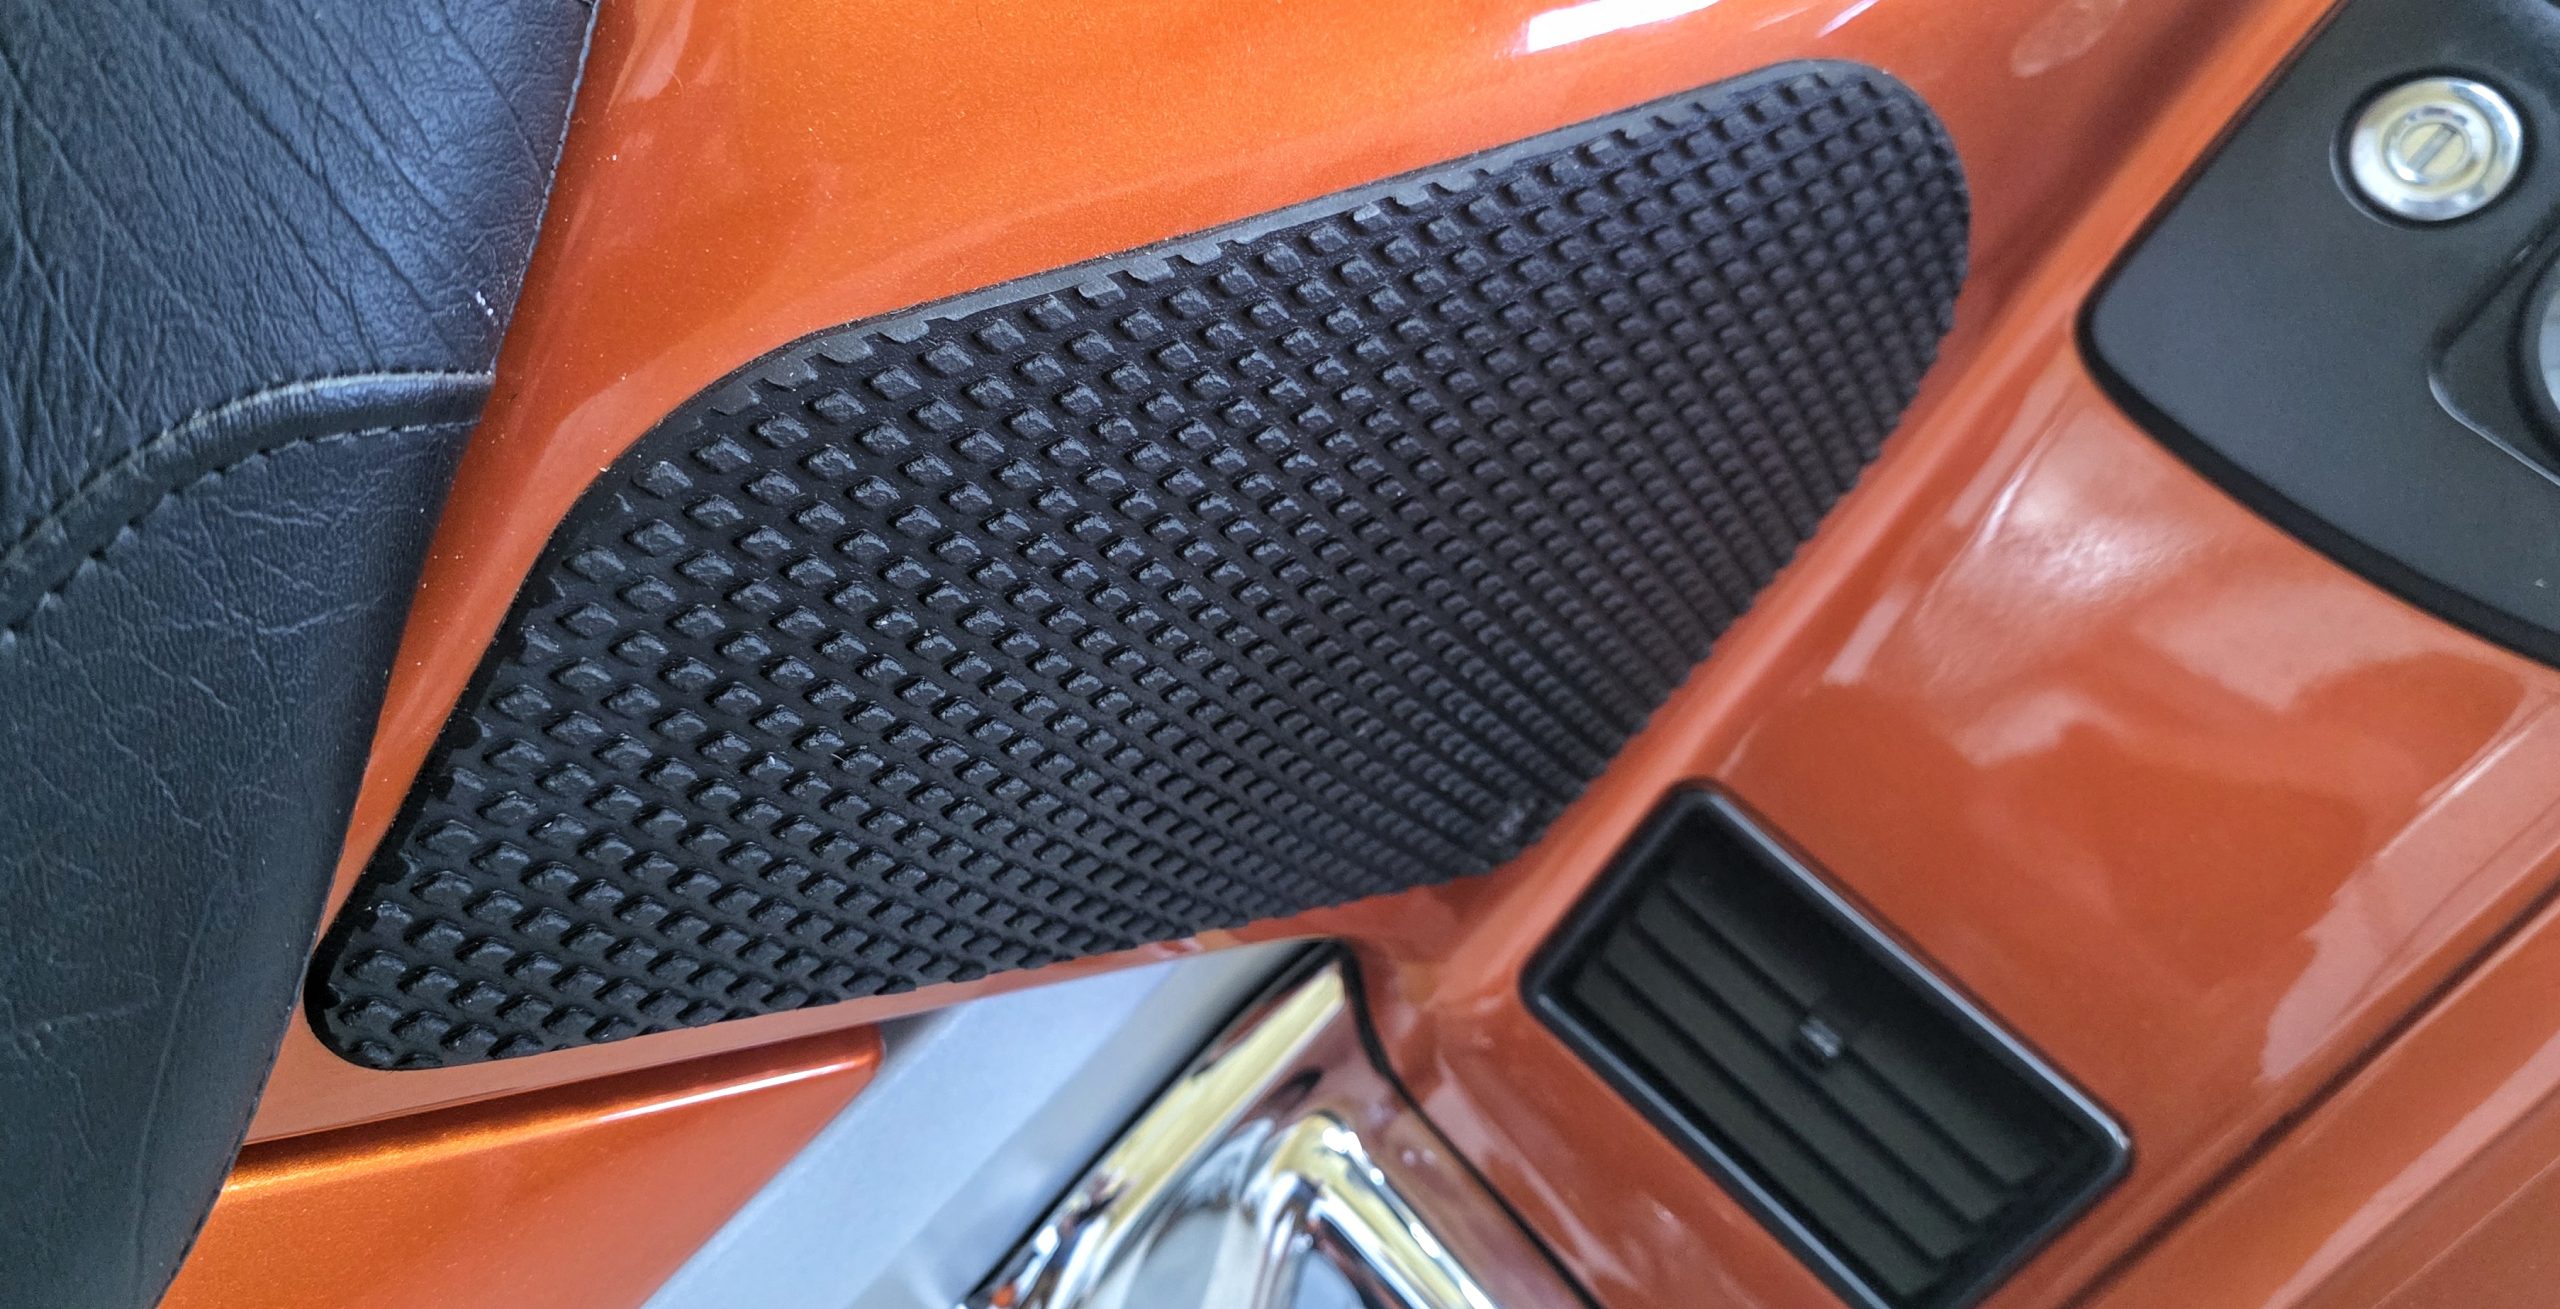
I tend to use my knees against the tank when I ride, either to grip the tank while braking or press against it while turning. That’s easier and more comfortable with a set of Tech Spec tank pads. It also looks nice. I’ve put these on almost all of my bikes
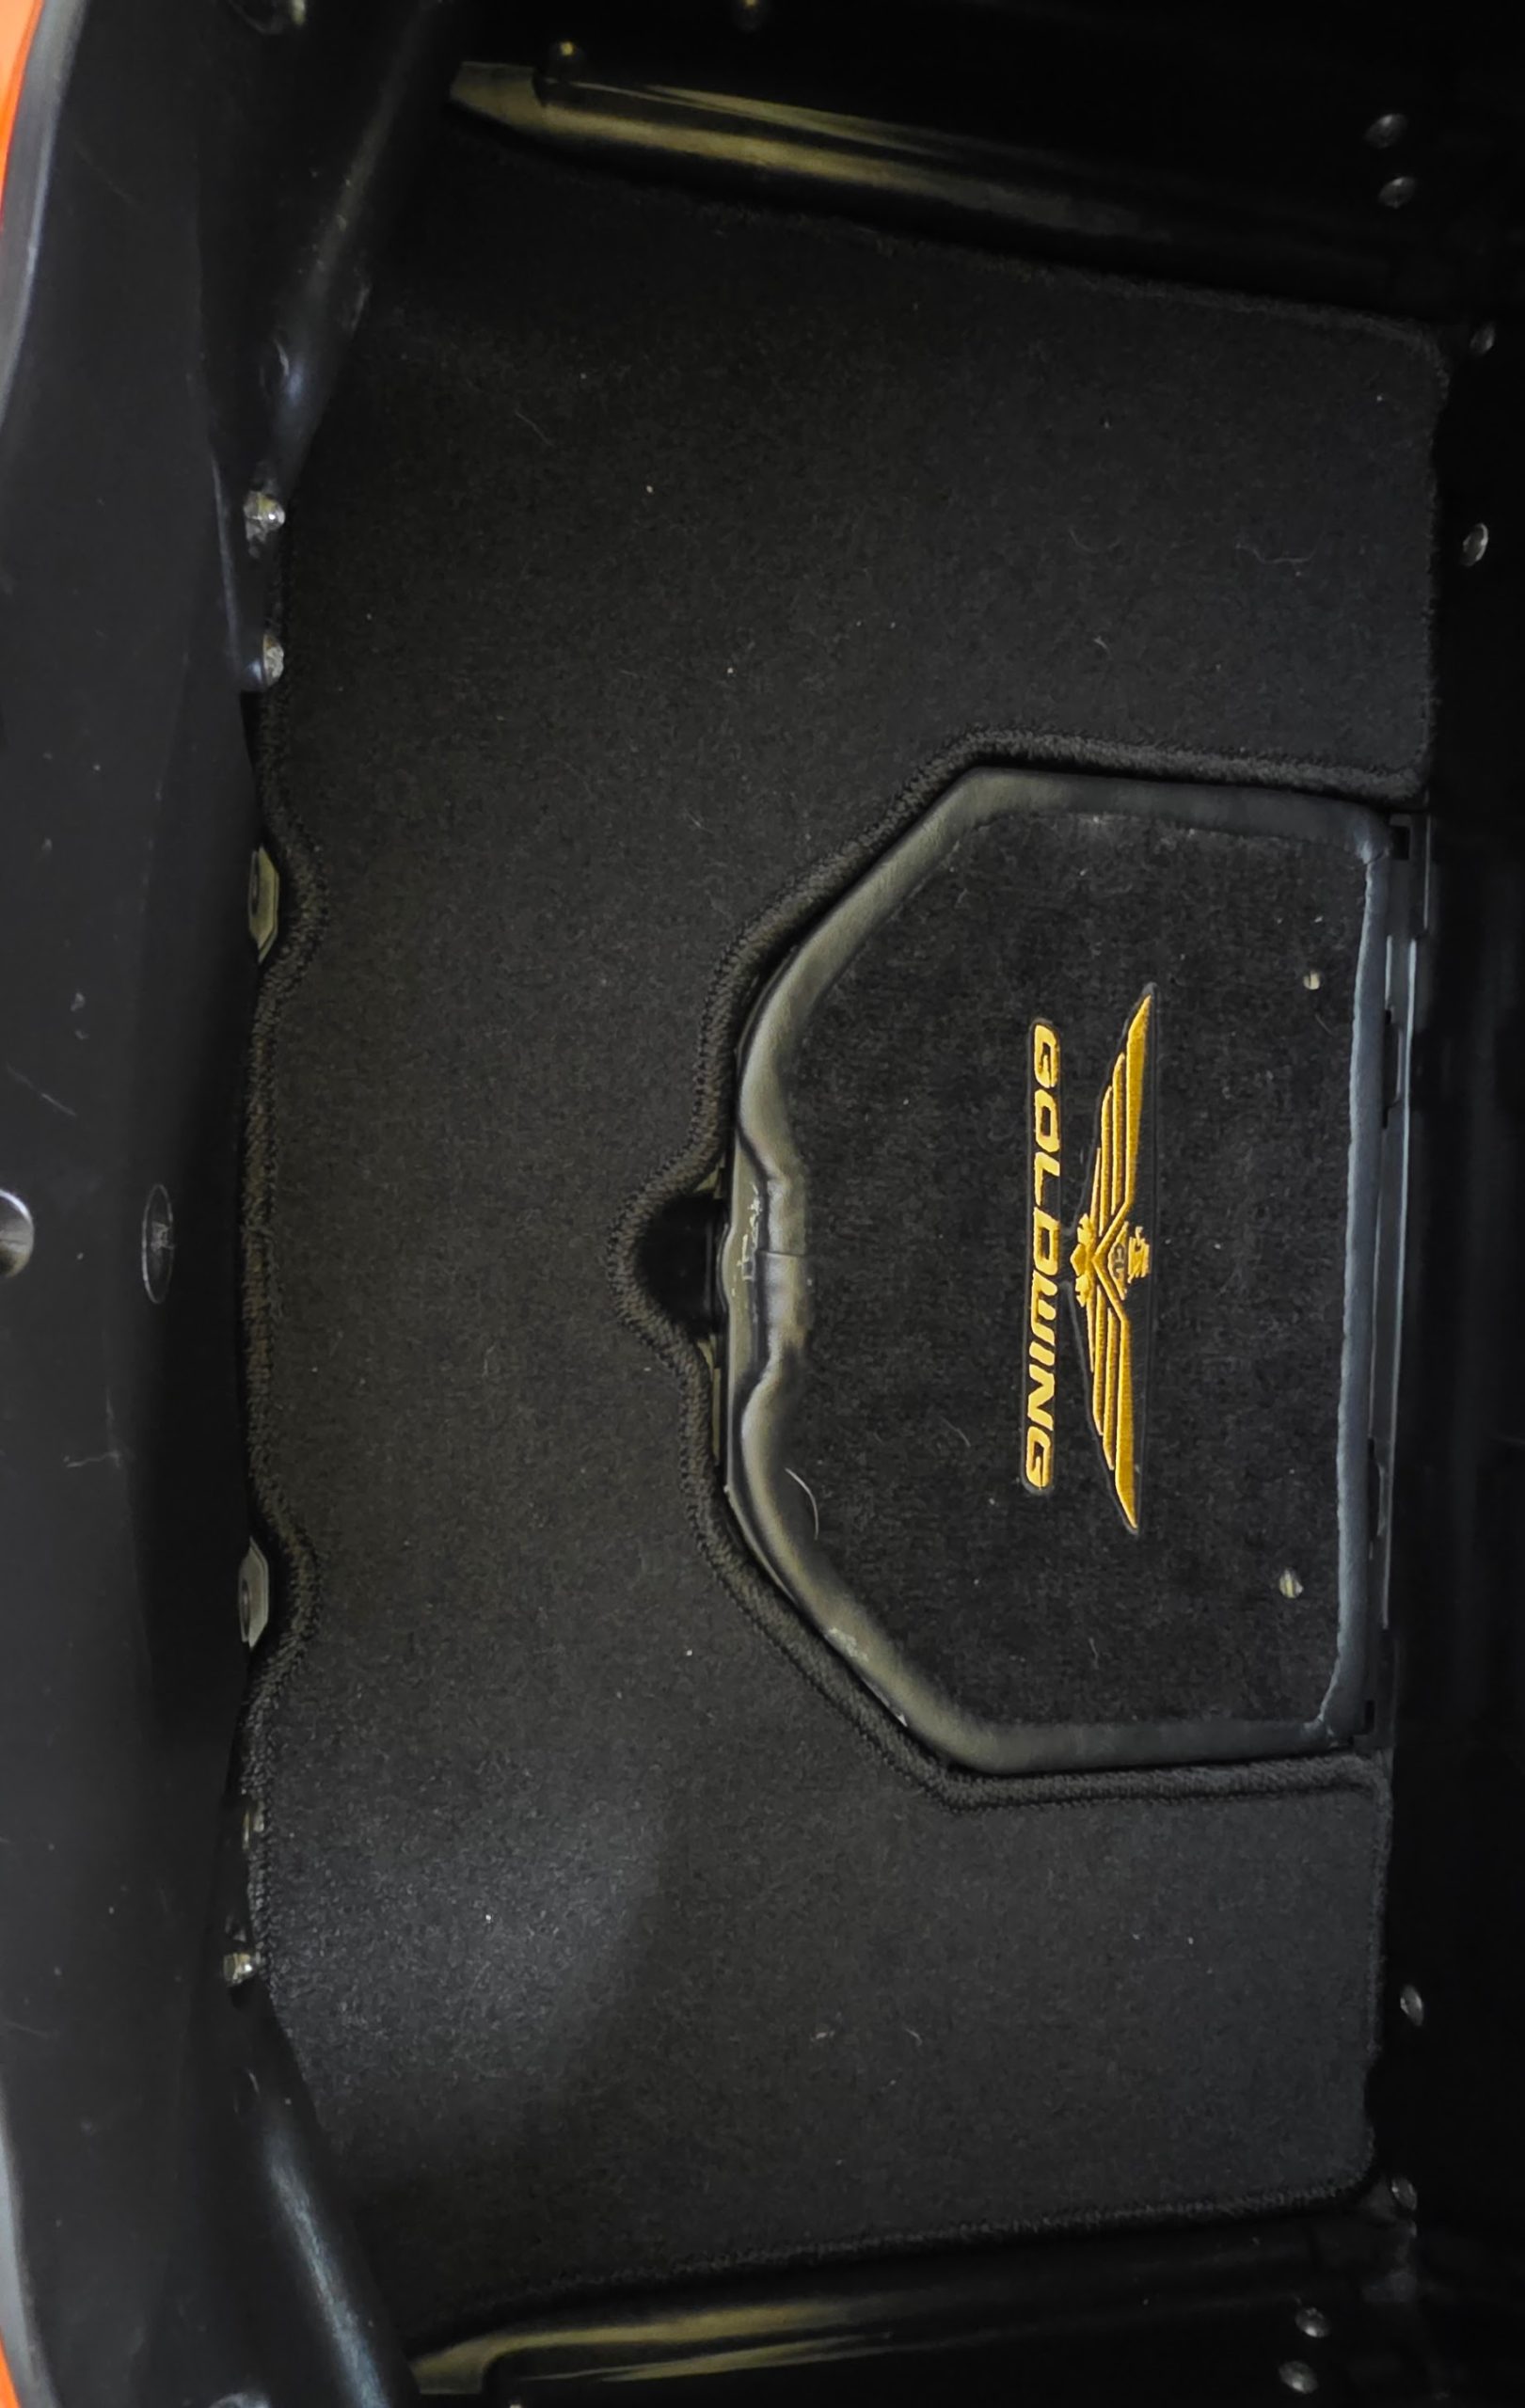
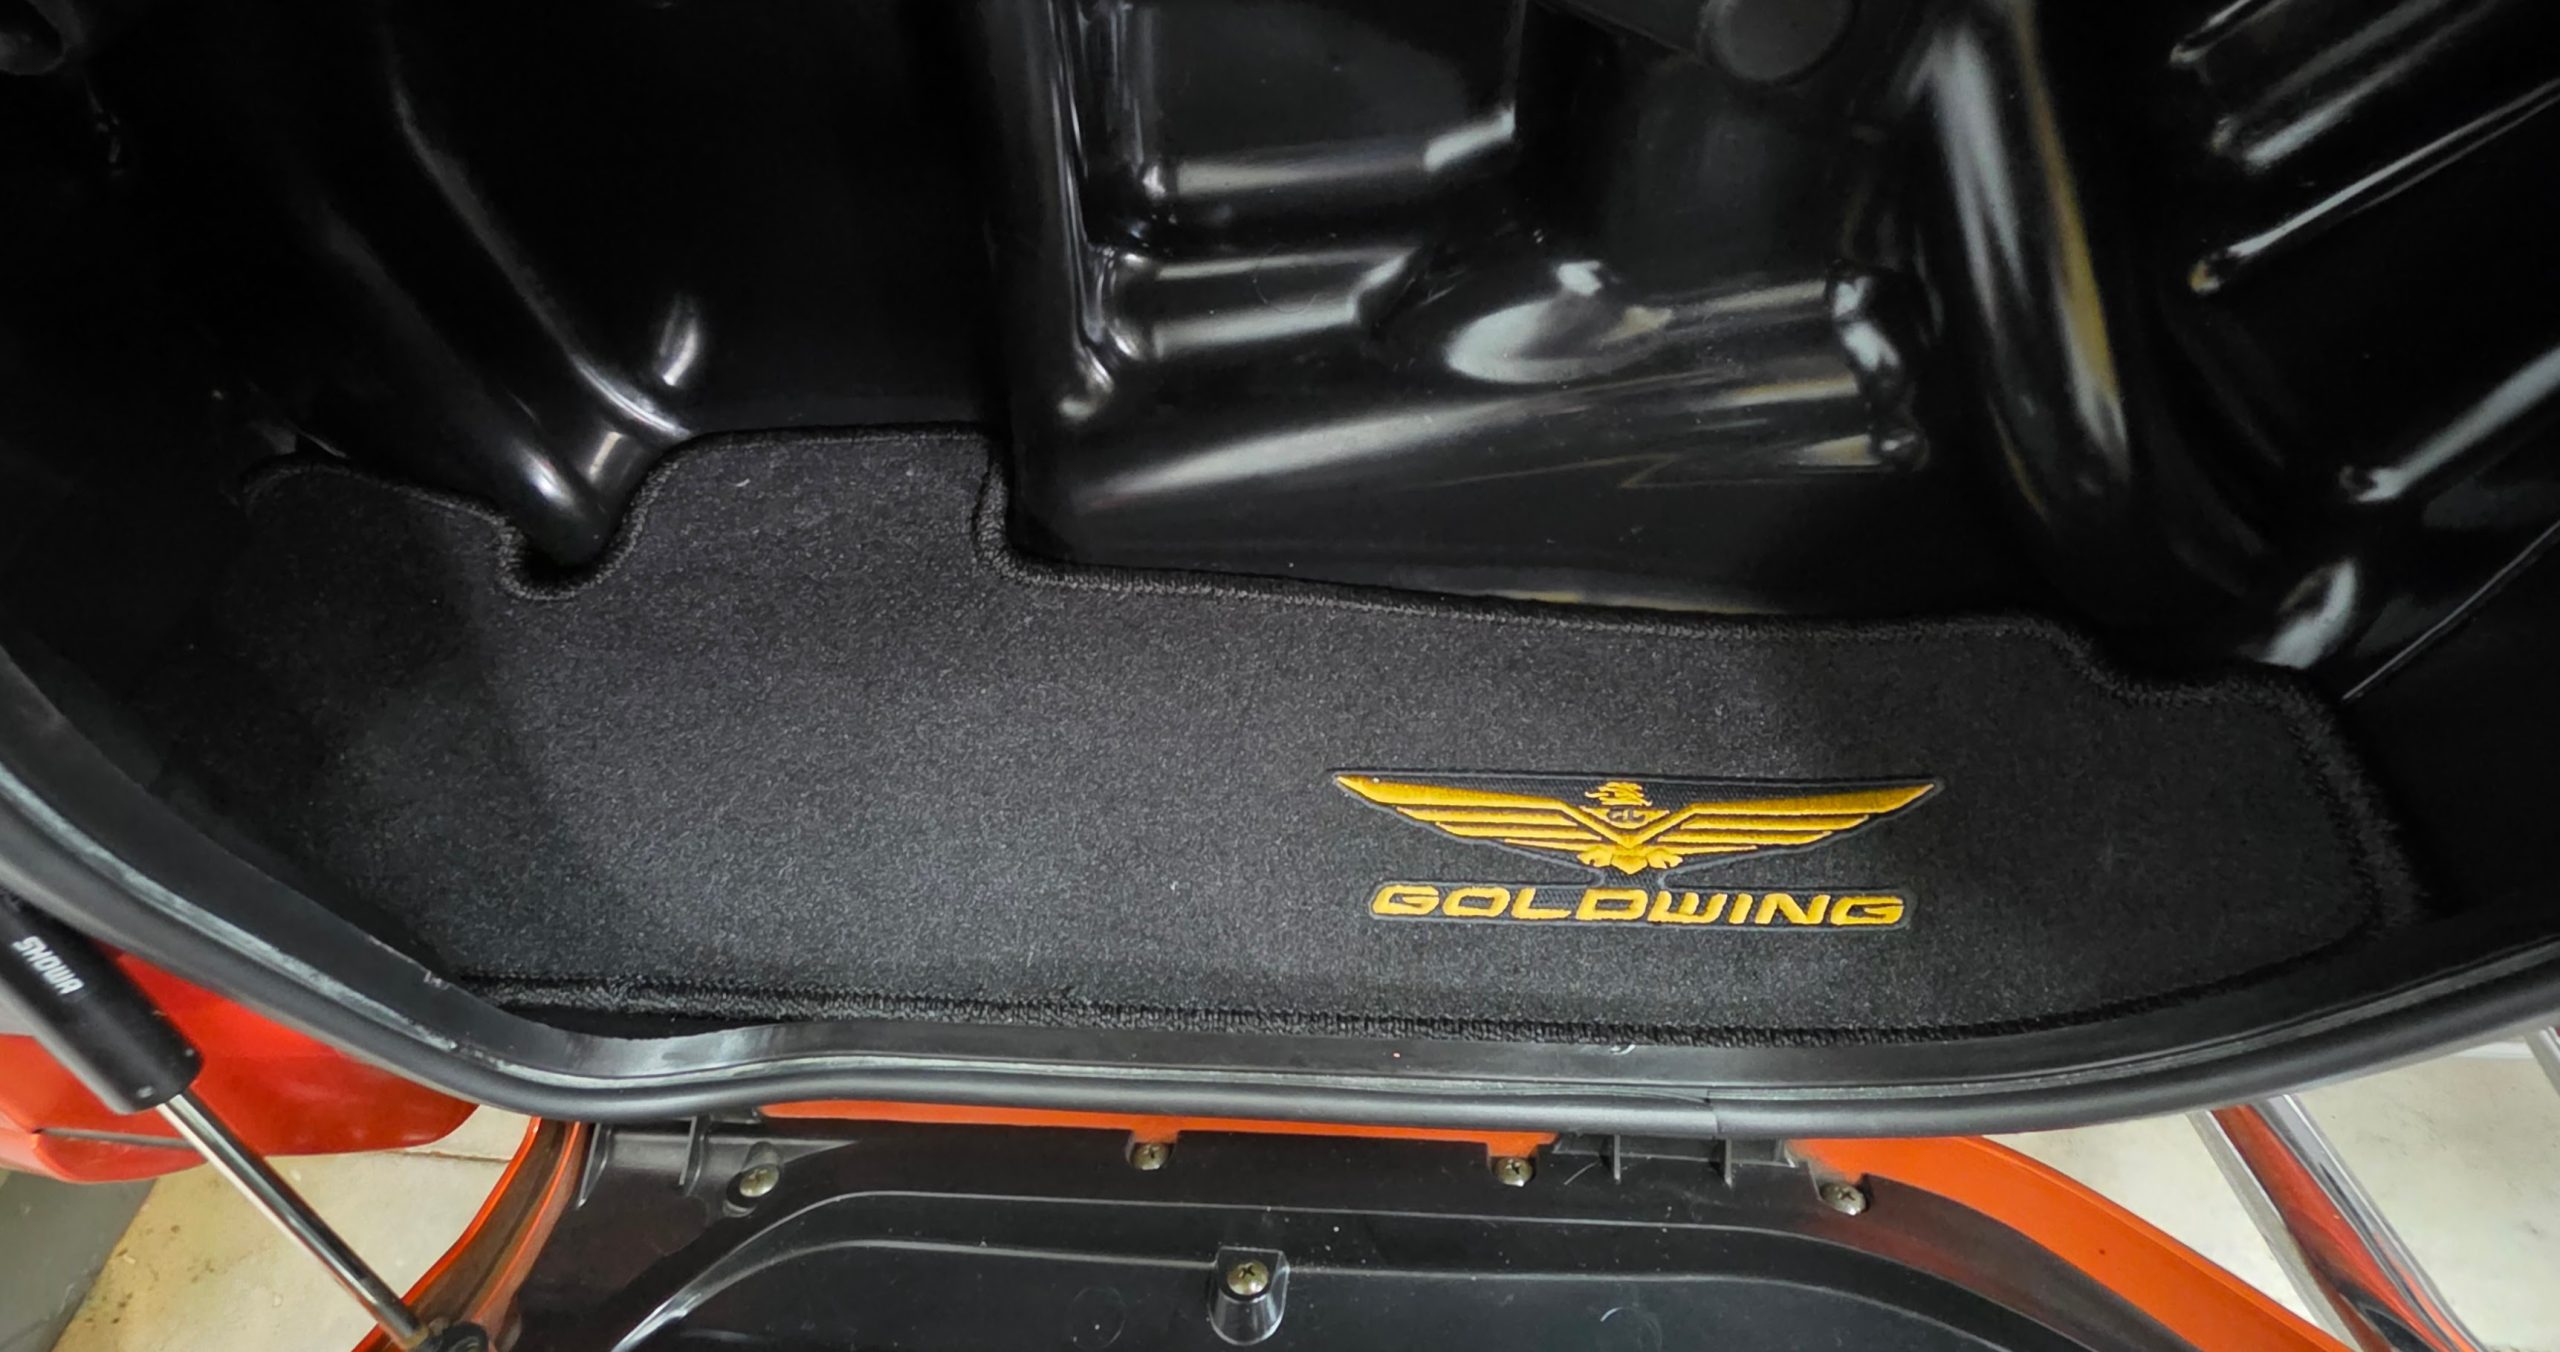
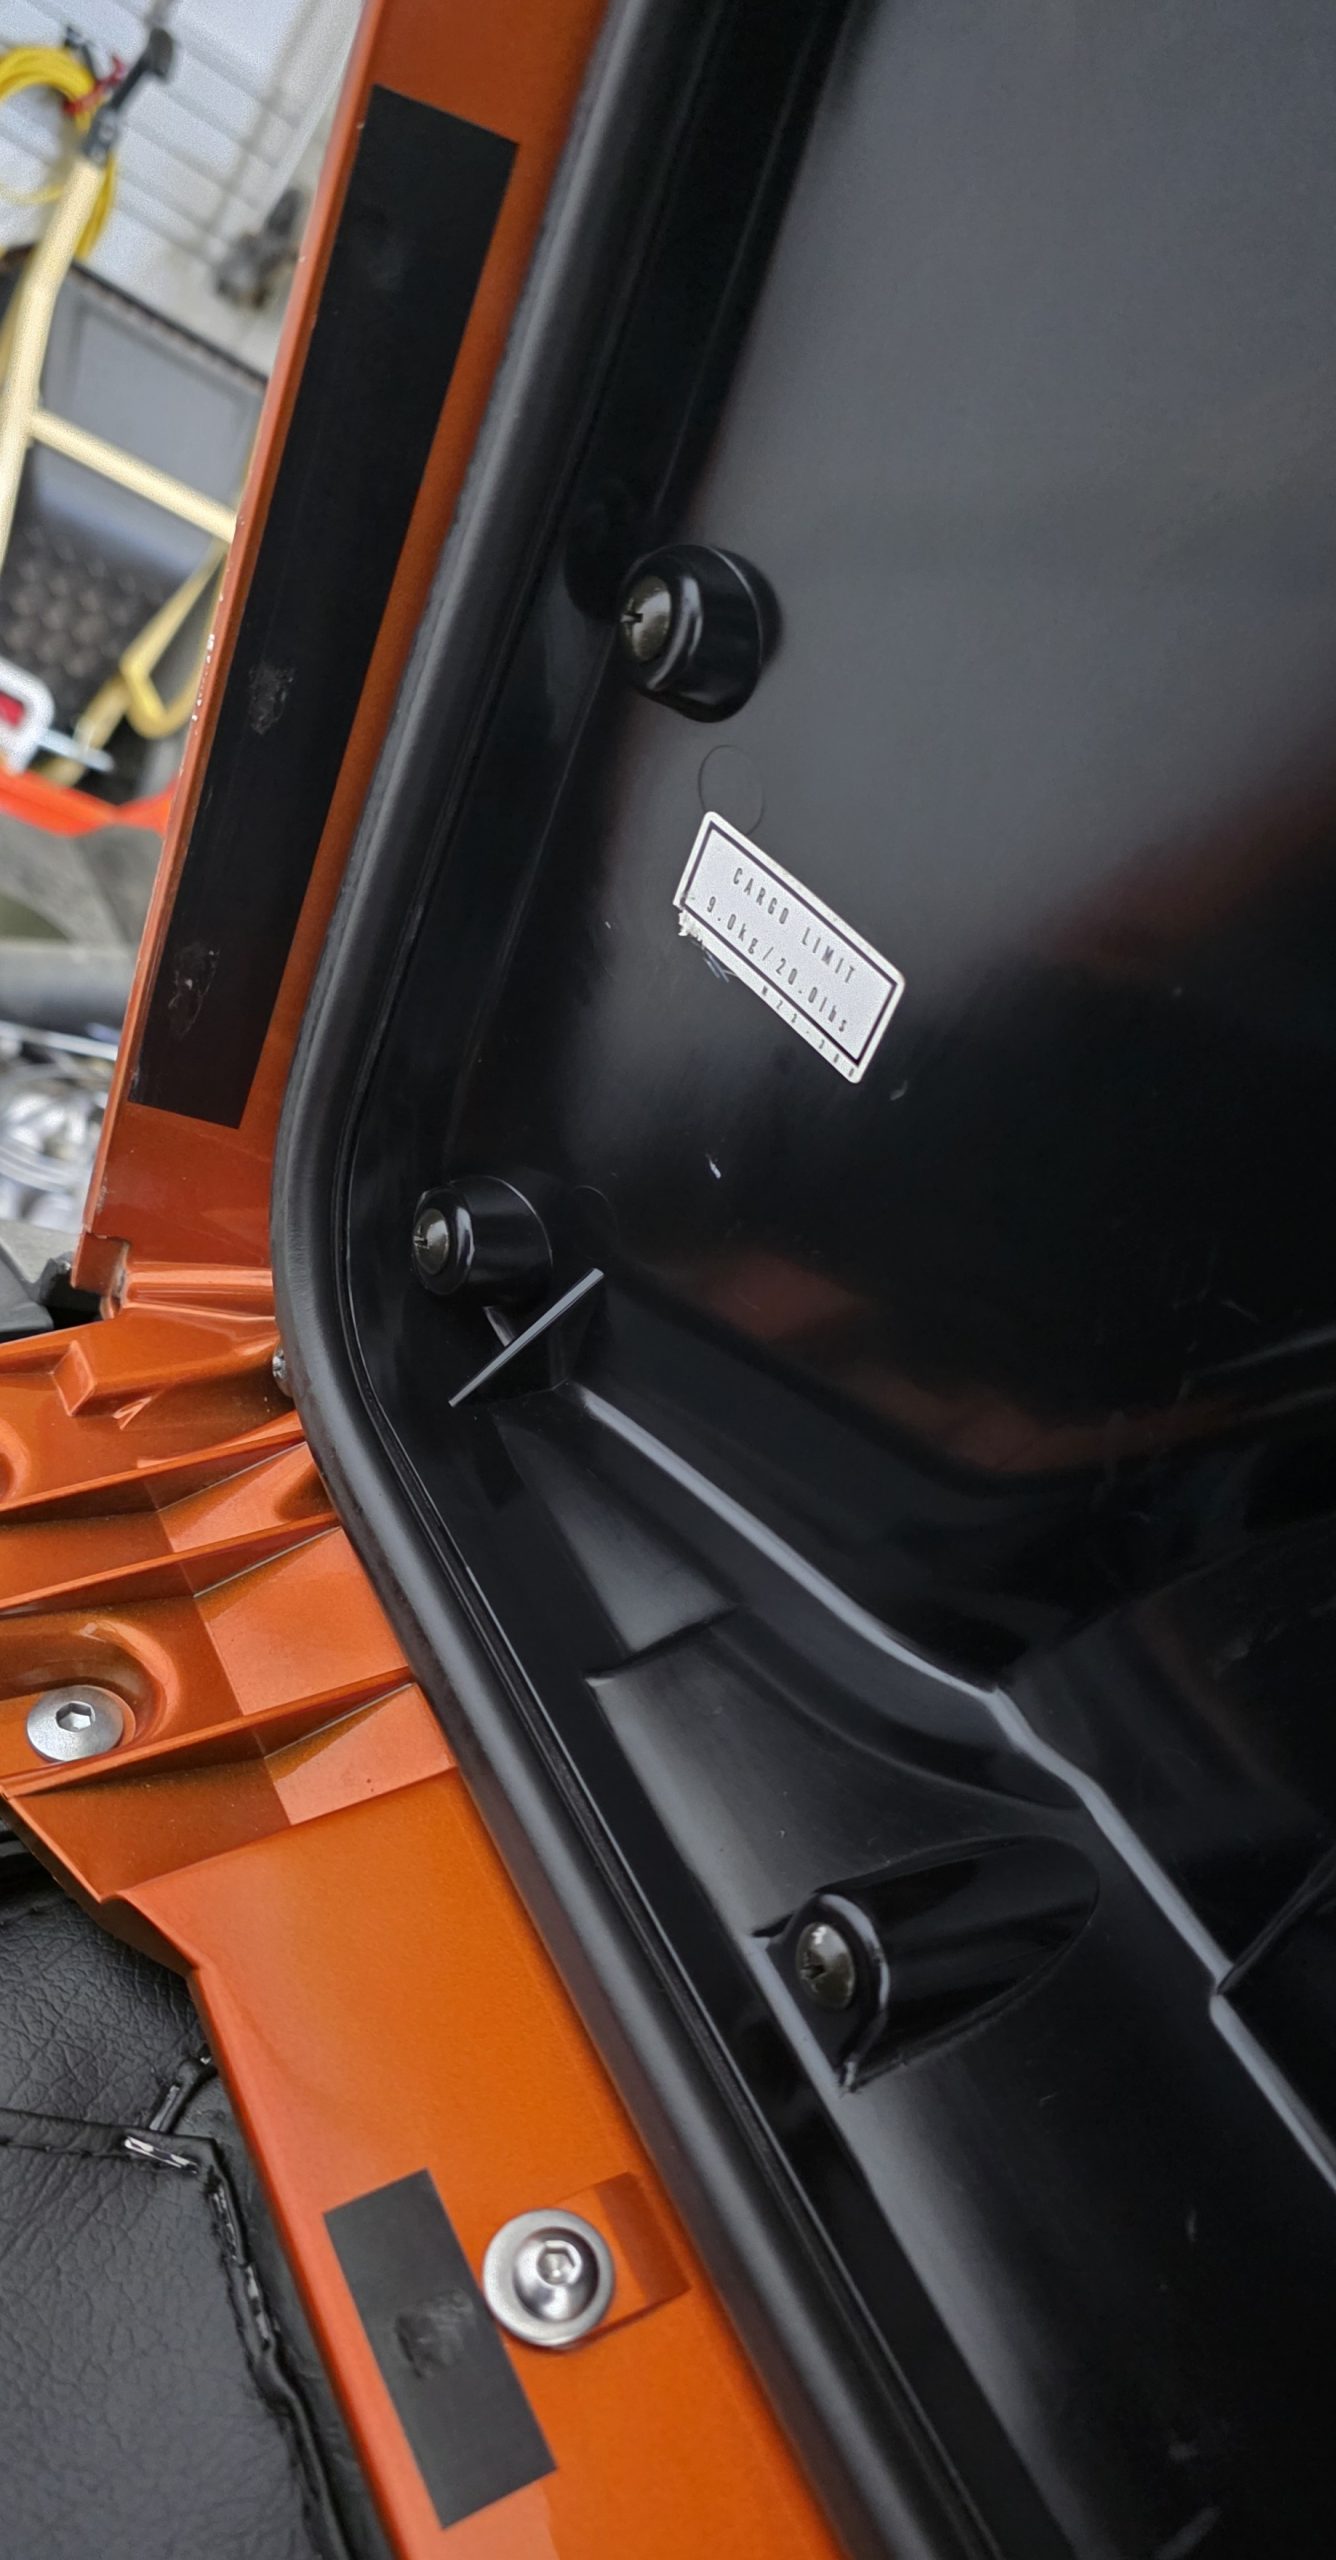
A carpet set finishes off the trunk and saddlebags. These are hard to come by for such an old bike. I finally found a set at Wingstuff. The only catch: this is the set designed for the optional CD player. When that’s installed, the lid that covers the sub-trunk is larger. We cut down the center mat insert and had a local upholstery shop bind the edges.
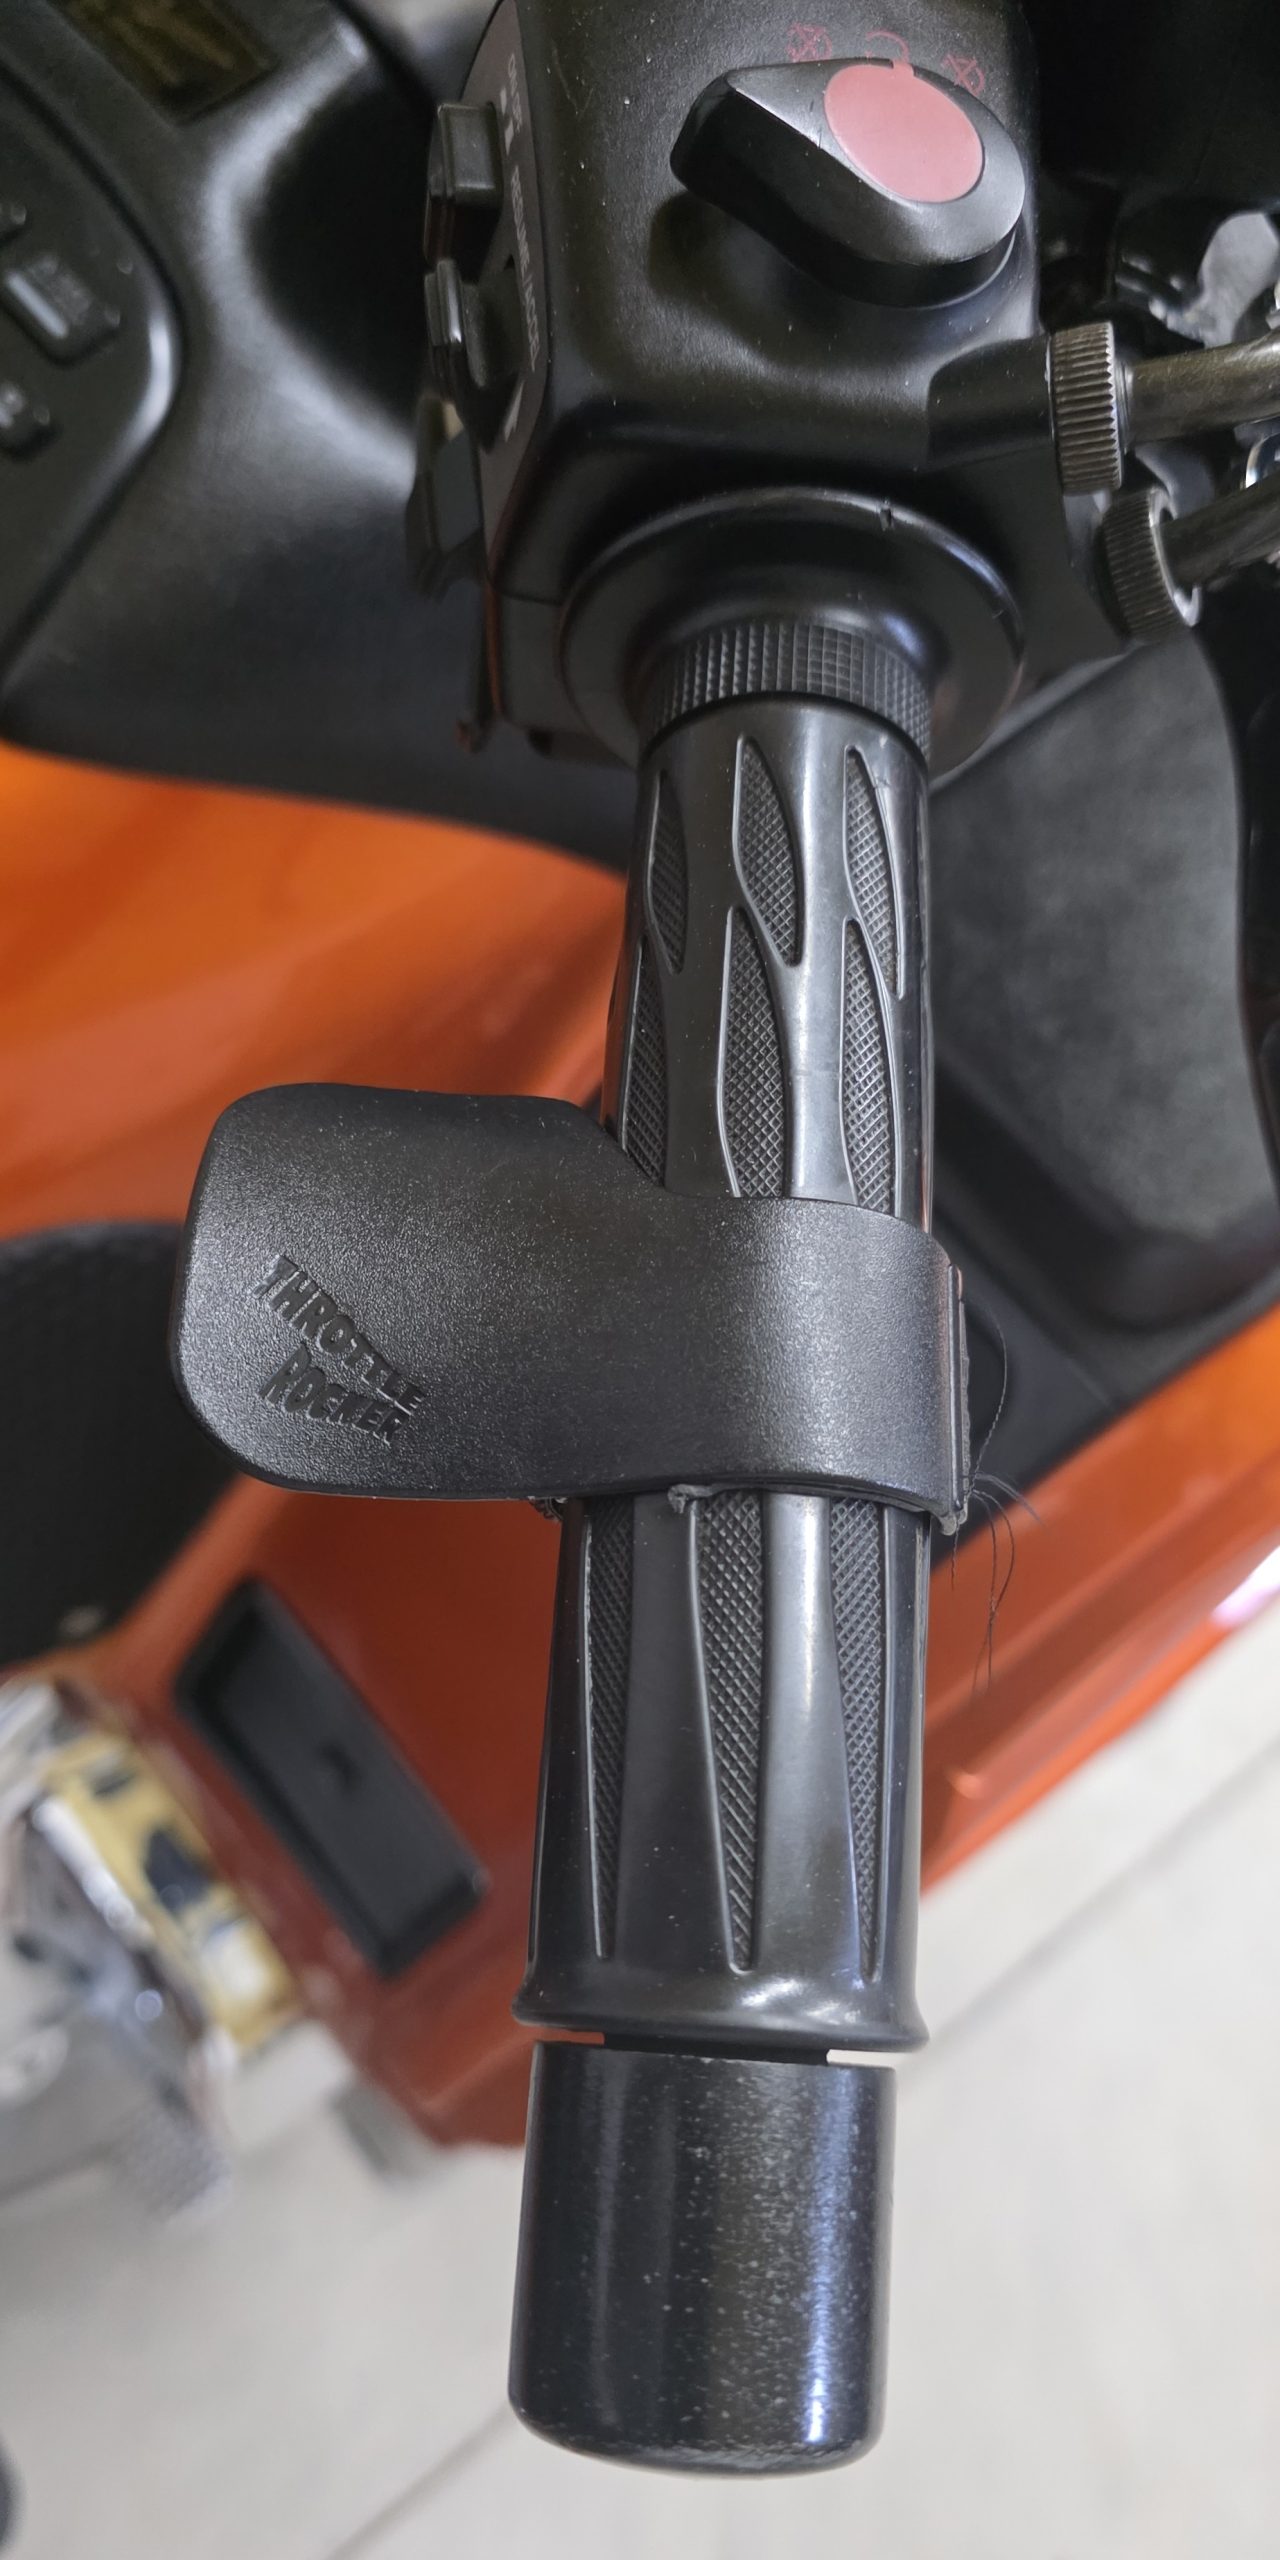
I like using a Throttle Rocker, even with a bike with electronic cruise control or a throttle clamp. Makes it easier to relax my hand, especially with two fingers on the brake, and I feel like I have better control. YMMV. One complaint people have is that it slips. I use 3M VHB double sided tape under the Throttle Rocker (in addition to the Velcro band) and it lasts for a year or so.
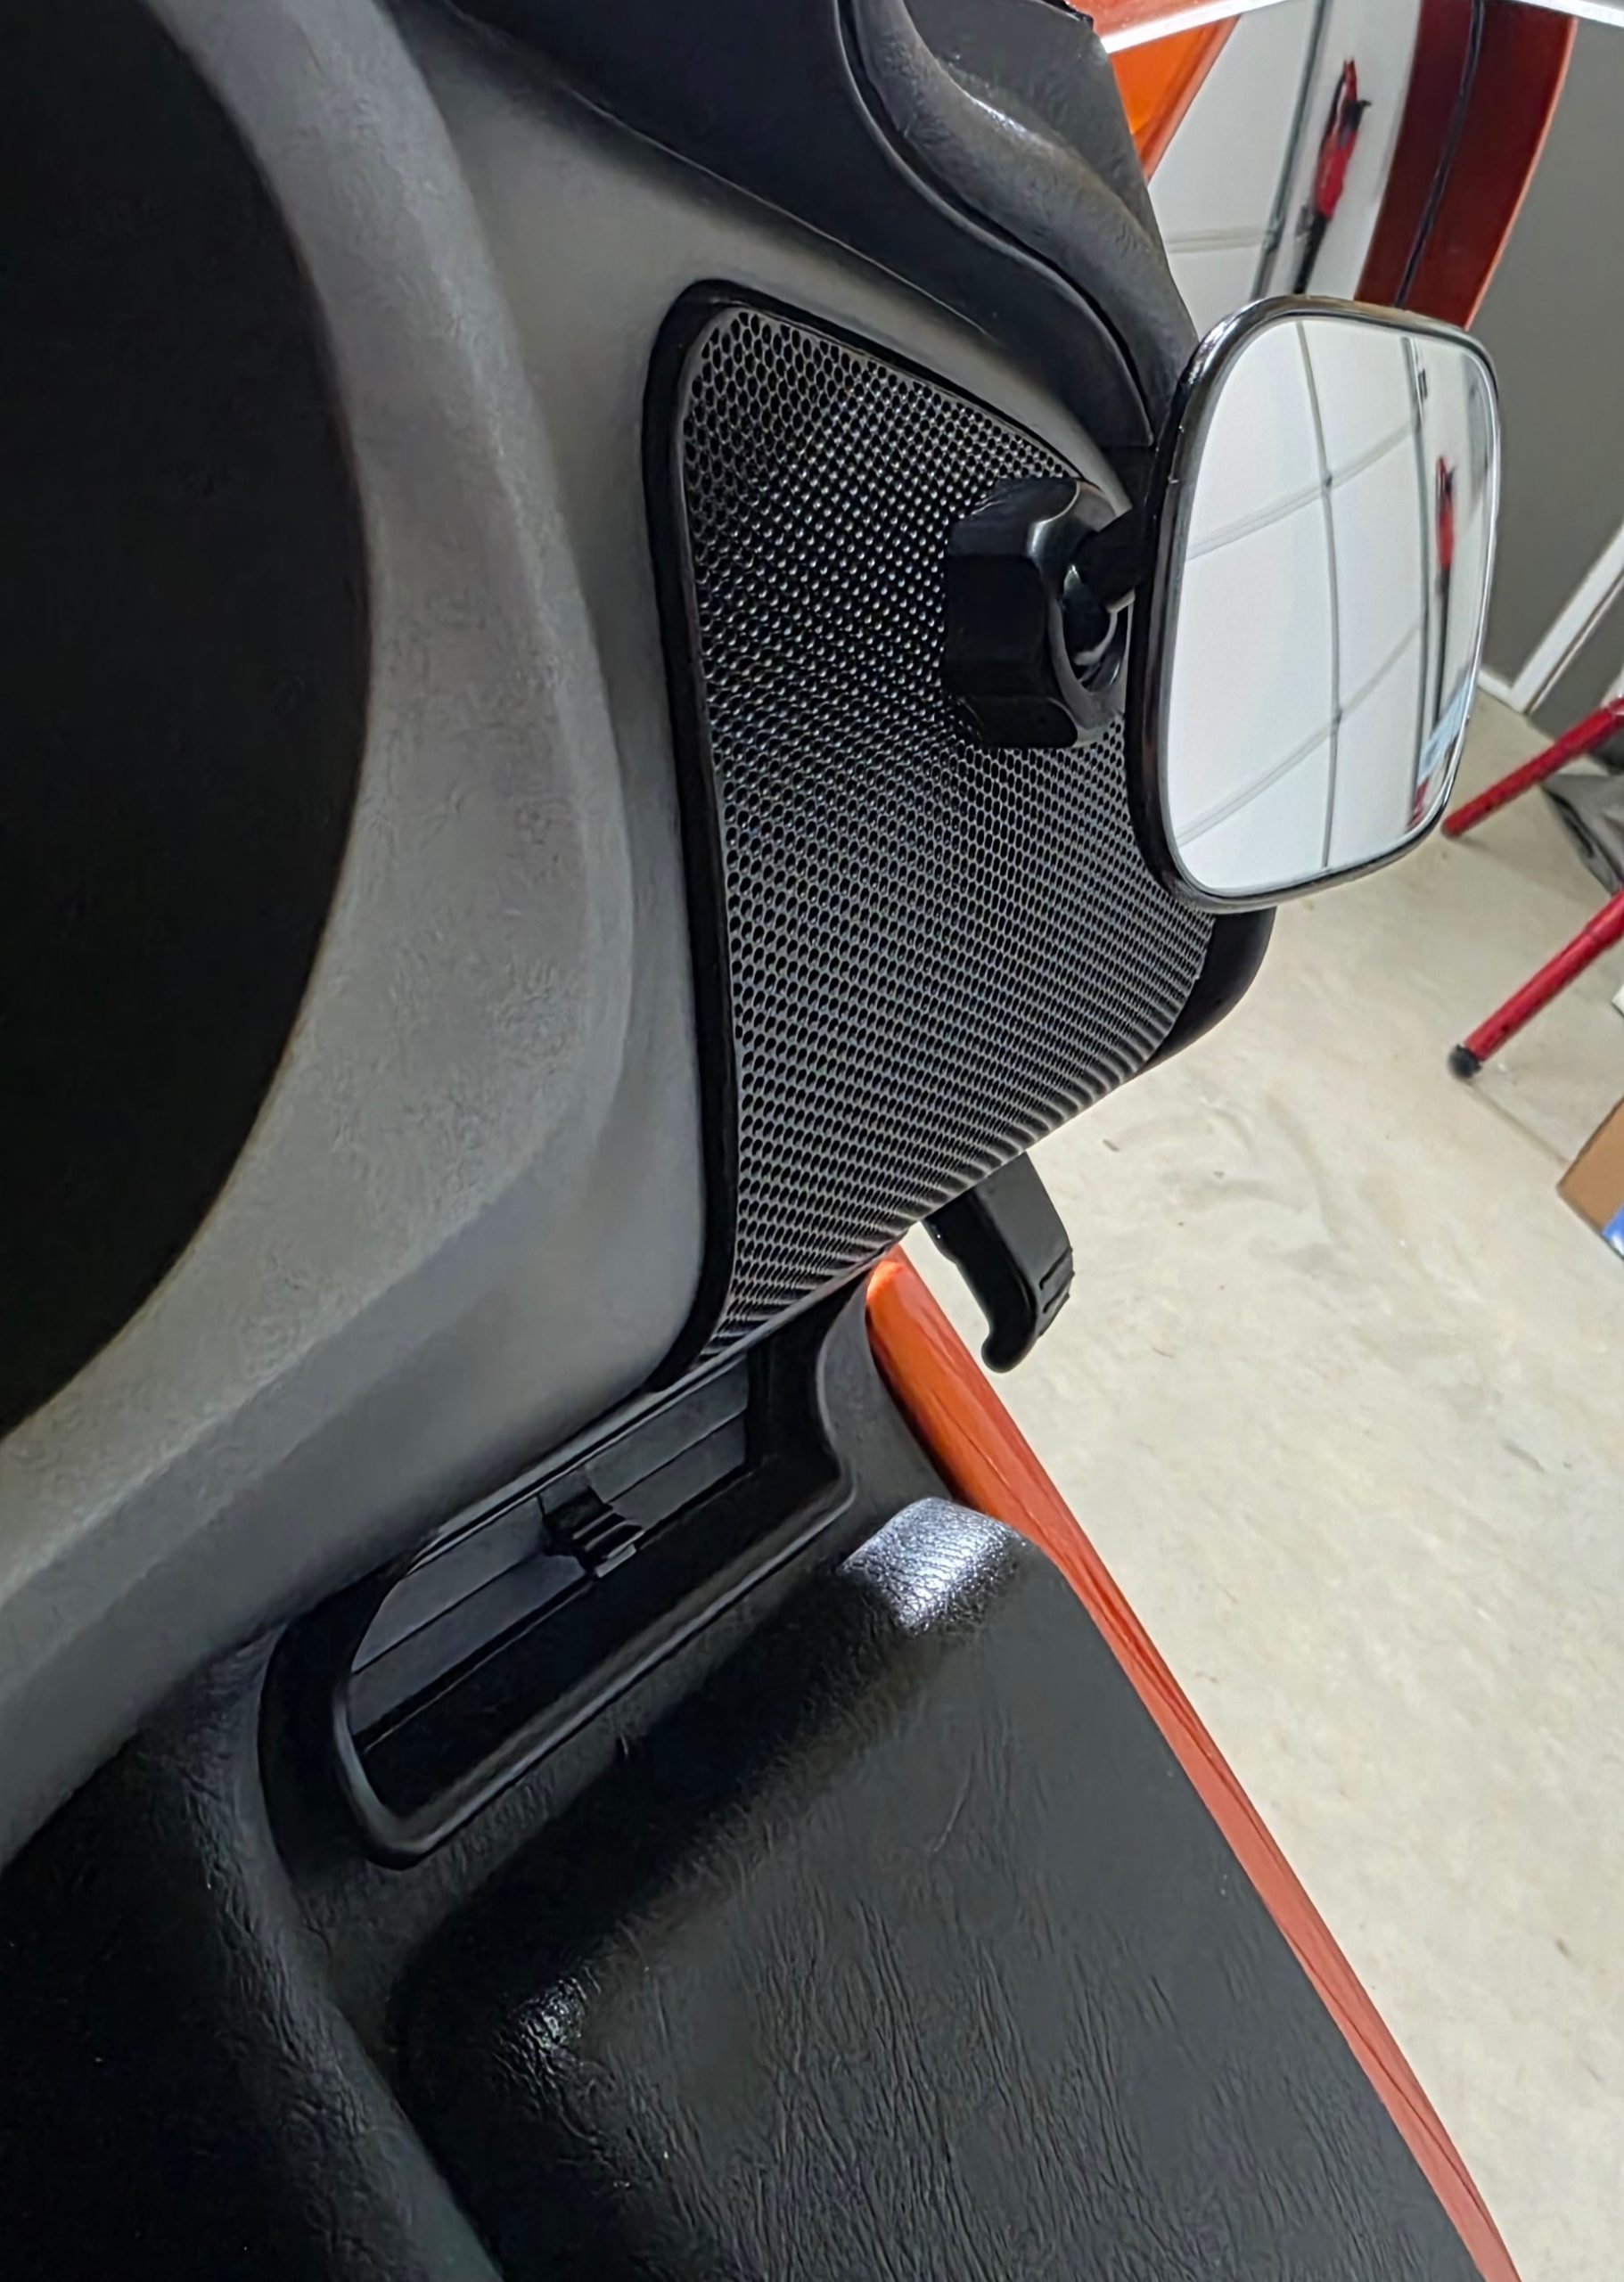
On our two-up bike, I like to have a little mirror so I can see my wife and make sure she hasn’t fallen off. This one from Amazon is designed to be a car baby mirror, but is just the right size and field of view. Since I’m not using the radio, I borrowed the speaker grill to mount the mirror.
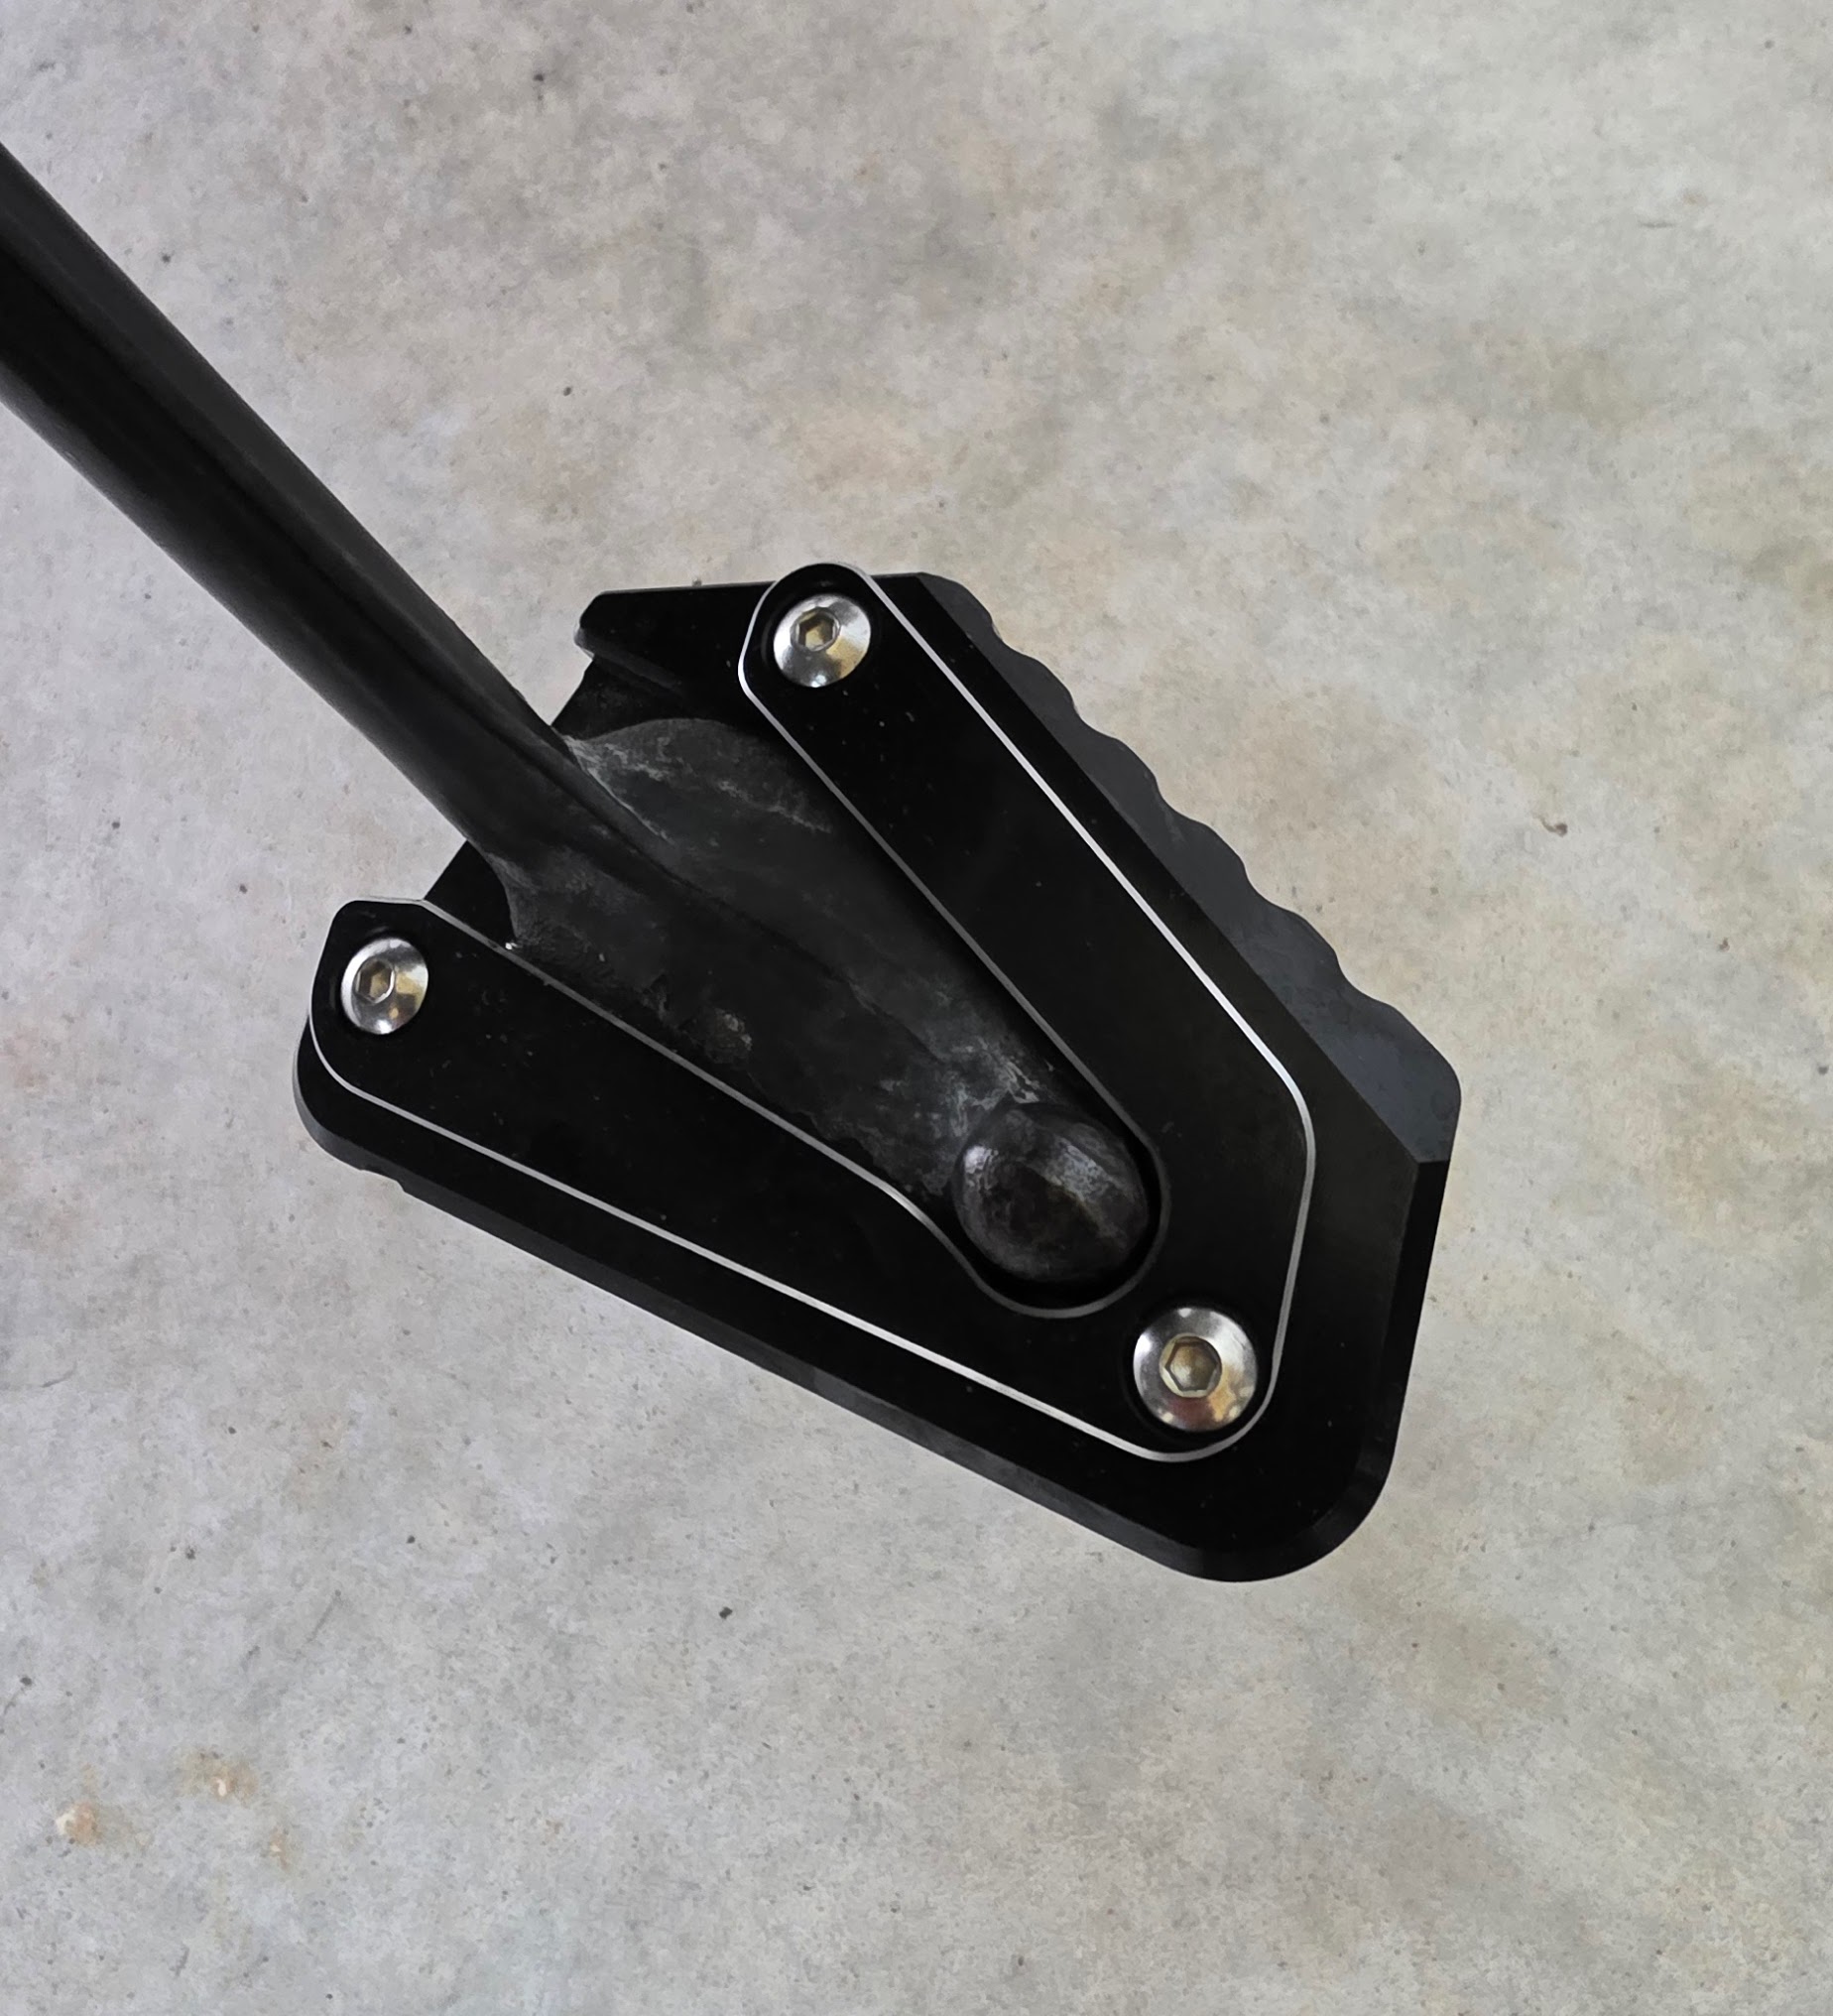
We added a larger foot pad for the side stand. This worked very well on our recent trip, adding much confidence when stopping on a dirt or gravel parking area.
The sides of the trunk have little nubs that wear into the lip of the lid over time. Even after only 8,000 miles, it was noticeable. I added a little UHMW tape to slow down the wear.
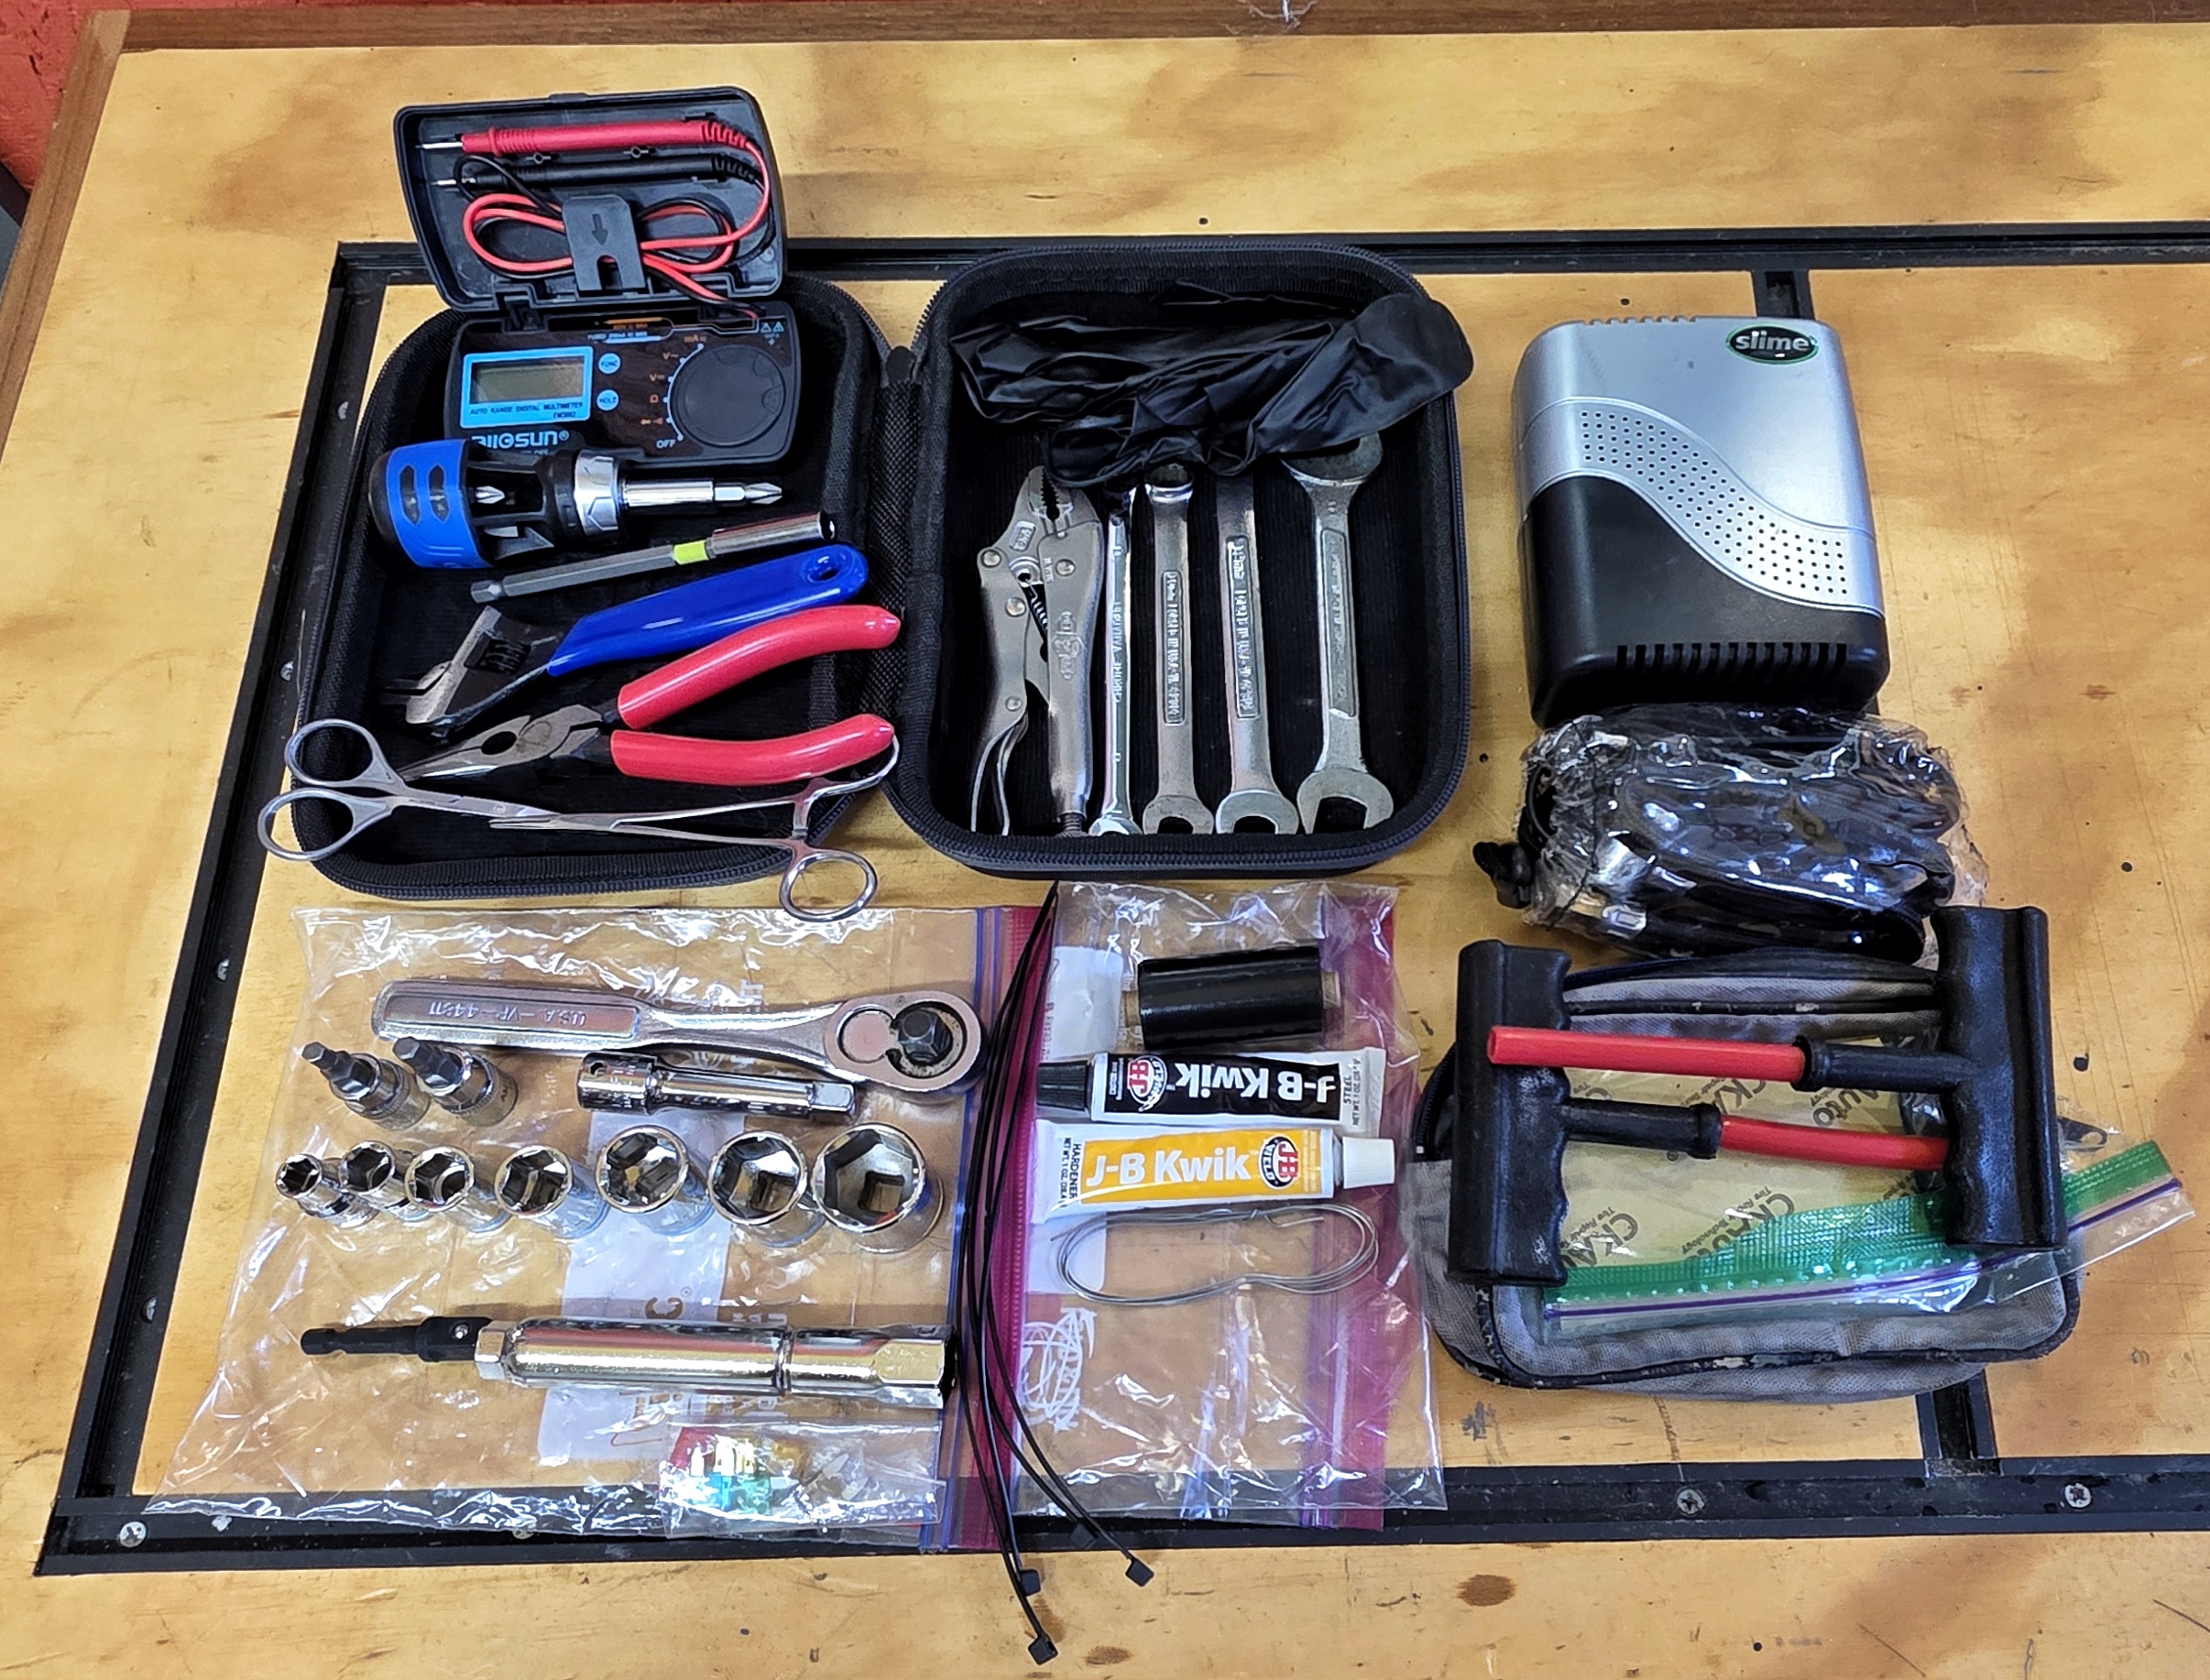
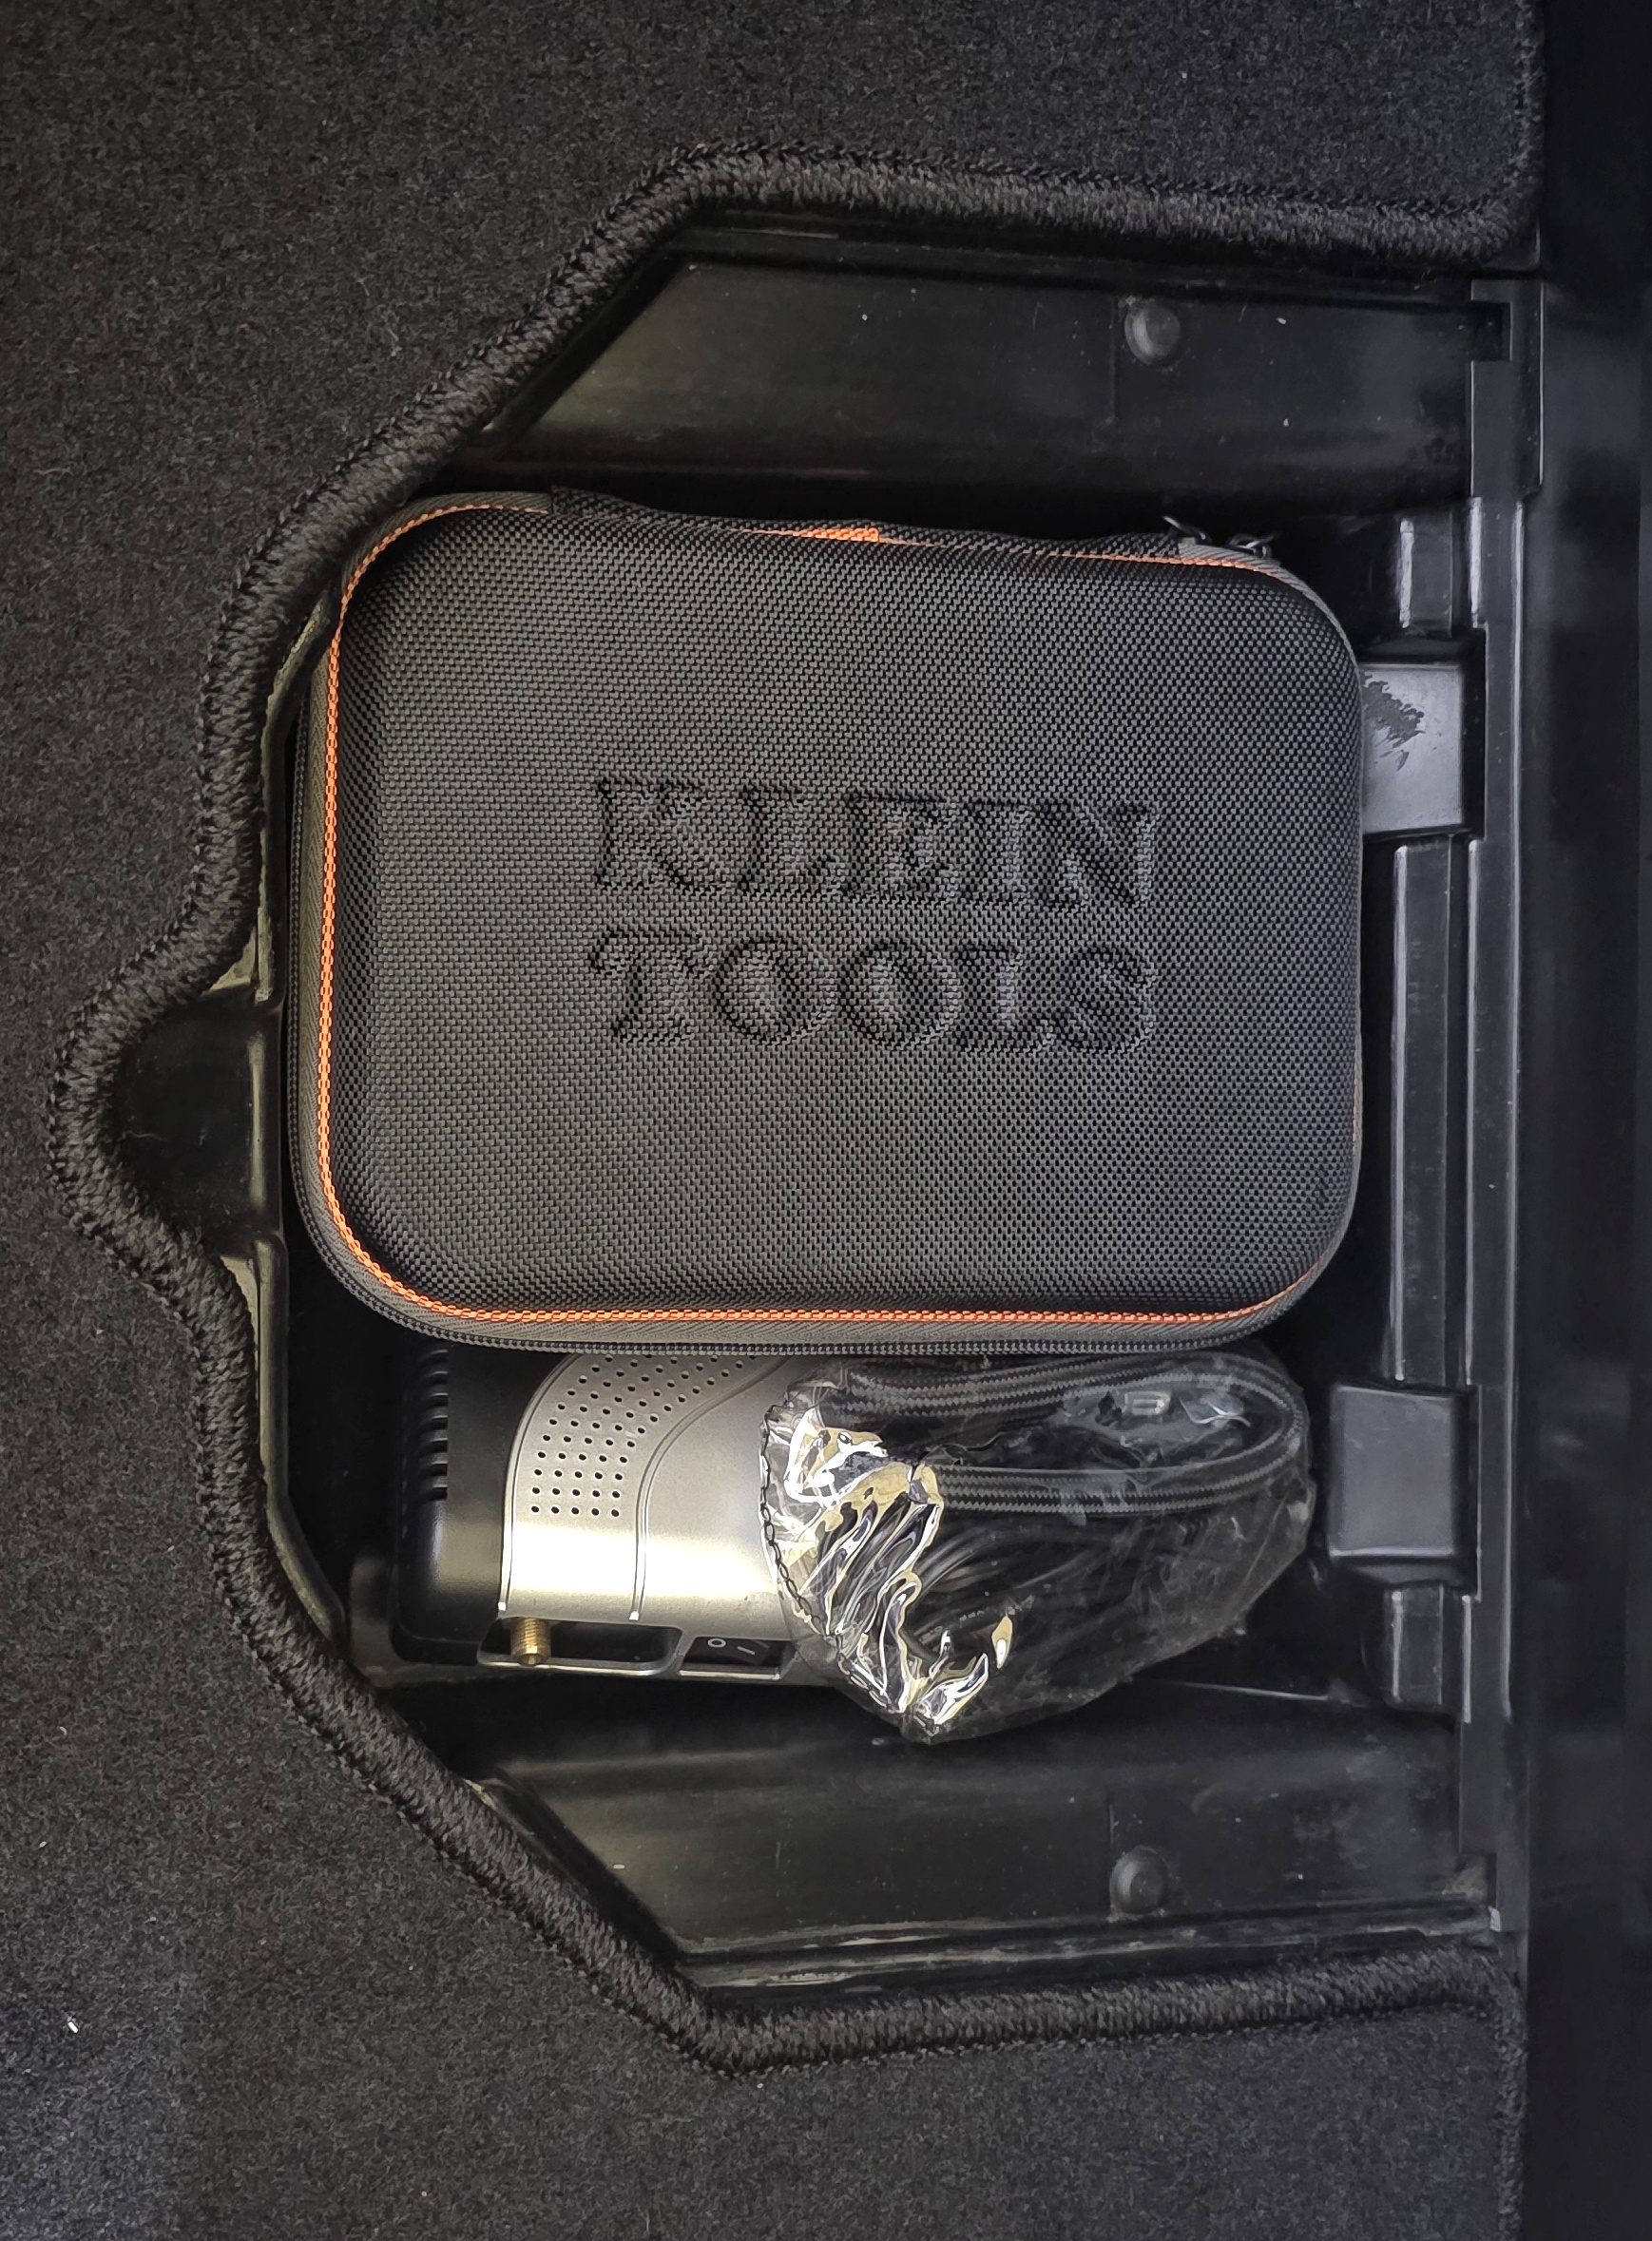
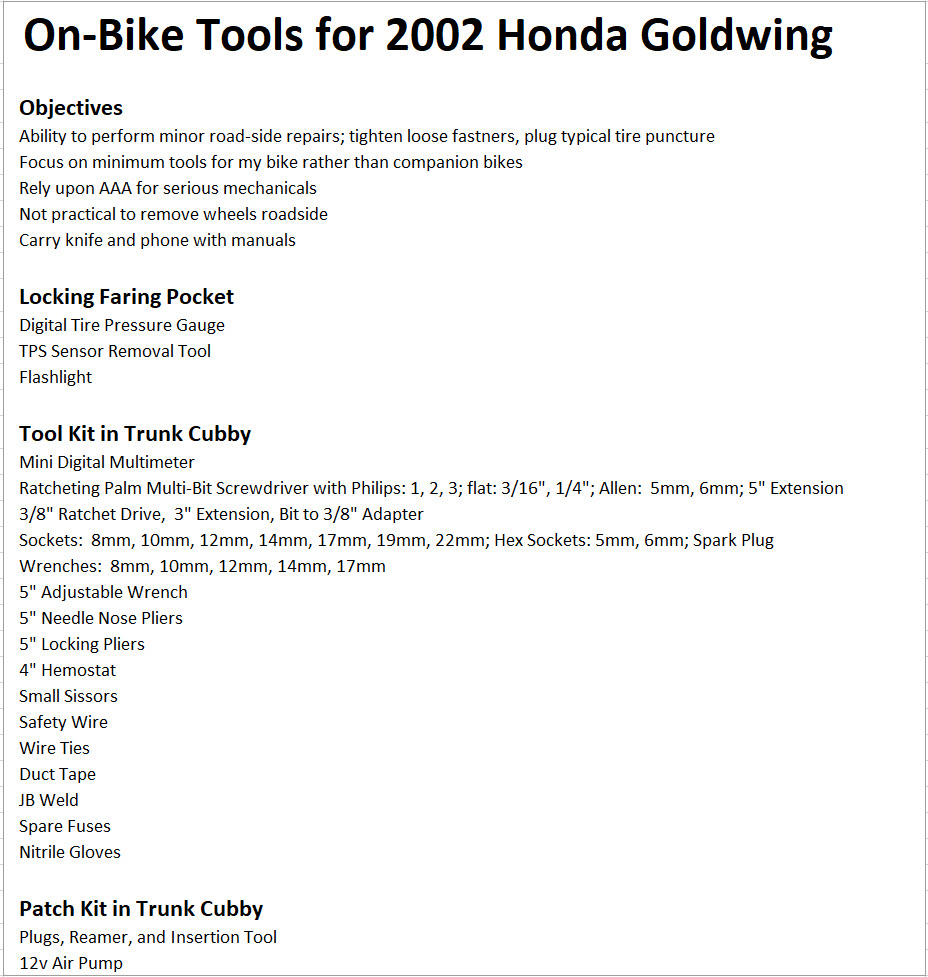
And finally, tools. I’m trying to focus on the minimum tools I need for my bike in order to perform a minor, road-side repair. Things like tighten loose fasteners, trouble shoot an electrical issue, or plug a tire puncture. I have AAA for more serious issues. The tools live in a Klein hard case which fits perfectly in the sub-trunk along with the patch kit and pump. I typically carry a pocket knife and have the manuals on my phone.
Still on my wish list:
- Traxxion Full Monty and Triple Tree
- Henry Final Drive/Speedo Healer
- Flashing brake lights. In the past, I’ve used Hyper-Lites, but the design is >20 years old. Still looking, if anyone has a recommendation.
- A USB charge port in one of the rear pockets so my wife can charge her phone while riding
And that’s it, for now. Thanks for staying with it if you made it this far.
One Response to “New” 2002 GL1800A Modifications